- Materials
-
- Flow Cell Wash Kit (EXP-WSH004) or Flow Cell Wash Kit XL (EXP-WSH004-XL)
- Equipment
-
- P1000 pipette and tips
- P20 pipette and tips
- Ice bucket with ice
-
Preparation to run the washing procedure
- This protocol assumes that the flow cell has already had a DNA/RNA library run on it
- The aim is to remove most of this initial library from the flow cell
- The Wash Kit contains all solutions required for removal of the initial library
- Data acquisition in MinKNOW should be stopped (if loading a new library or storing the flow cell), or paused (if loading more of the same library after the wash)
- After the flow cell has been washed, a new library can be loaded or the flow cell can be stored at 4°C
-
Place the tube of Wash Mix (WMX) on ice. Do not vortex the tube.
-
Thaw one tube of Wash Diluent (DIL) at room temperature.
-
Mix the contents of Wash Diluent (DIL) thoroughly by vortexing, then spin down briefly and place on ice.
-
In a fresh 1.5 ml Eppendorf DNA LoBind tube, prepare the following Flow Cell Wash Mix:
Reagent Volume per flow cell Wash Mix (WMX) 2 μl Wash Diluent (DIL) 398 μl Total 400 μl -
Mix well by pipetting, and place on ice. Do not vortex the tube.
-
Stop or pause the sequencing experiment in MinKNOW, and leave the flow cell in the device.
-
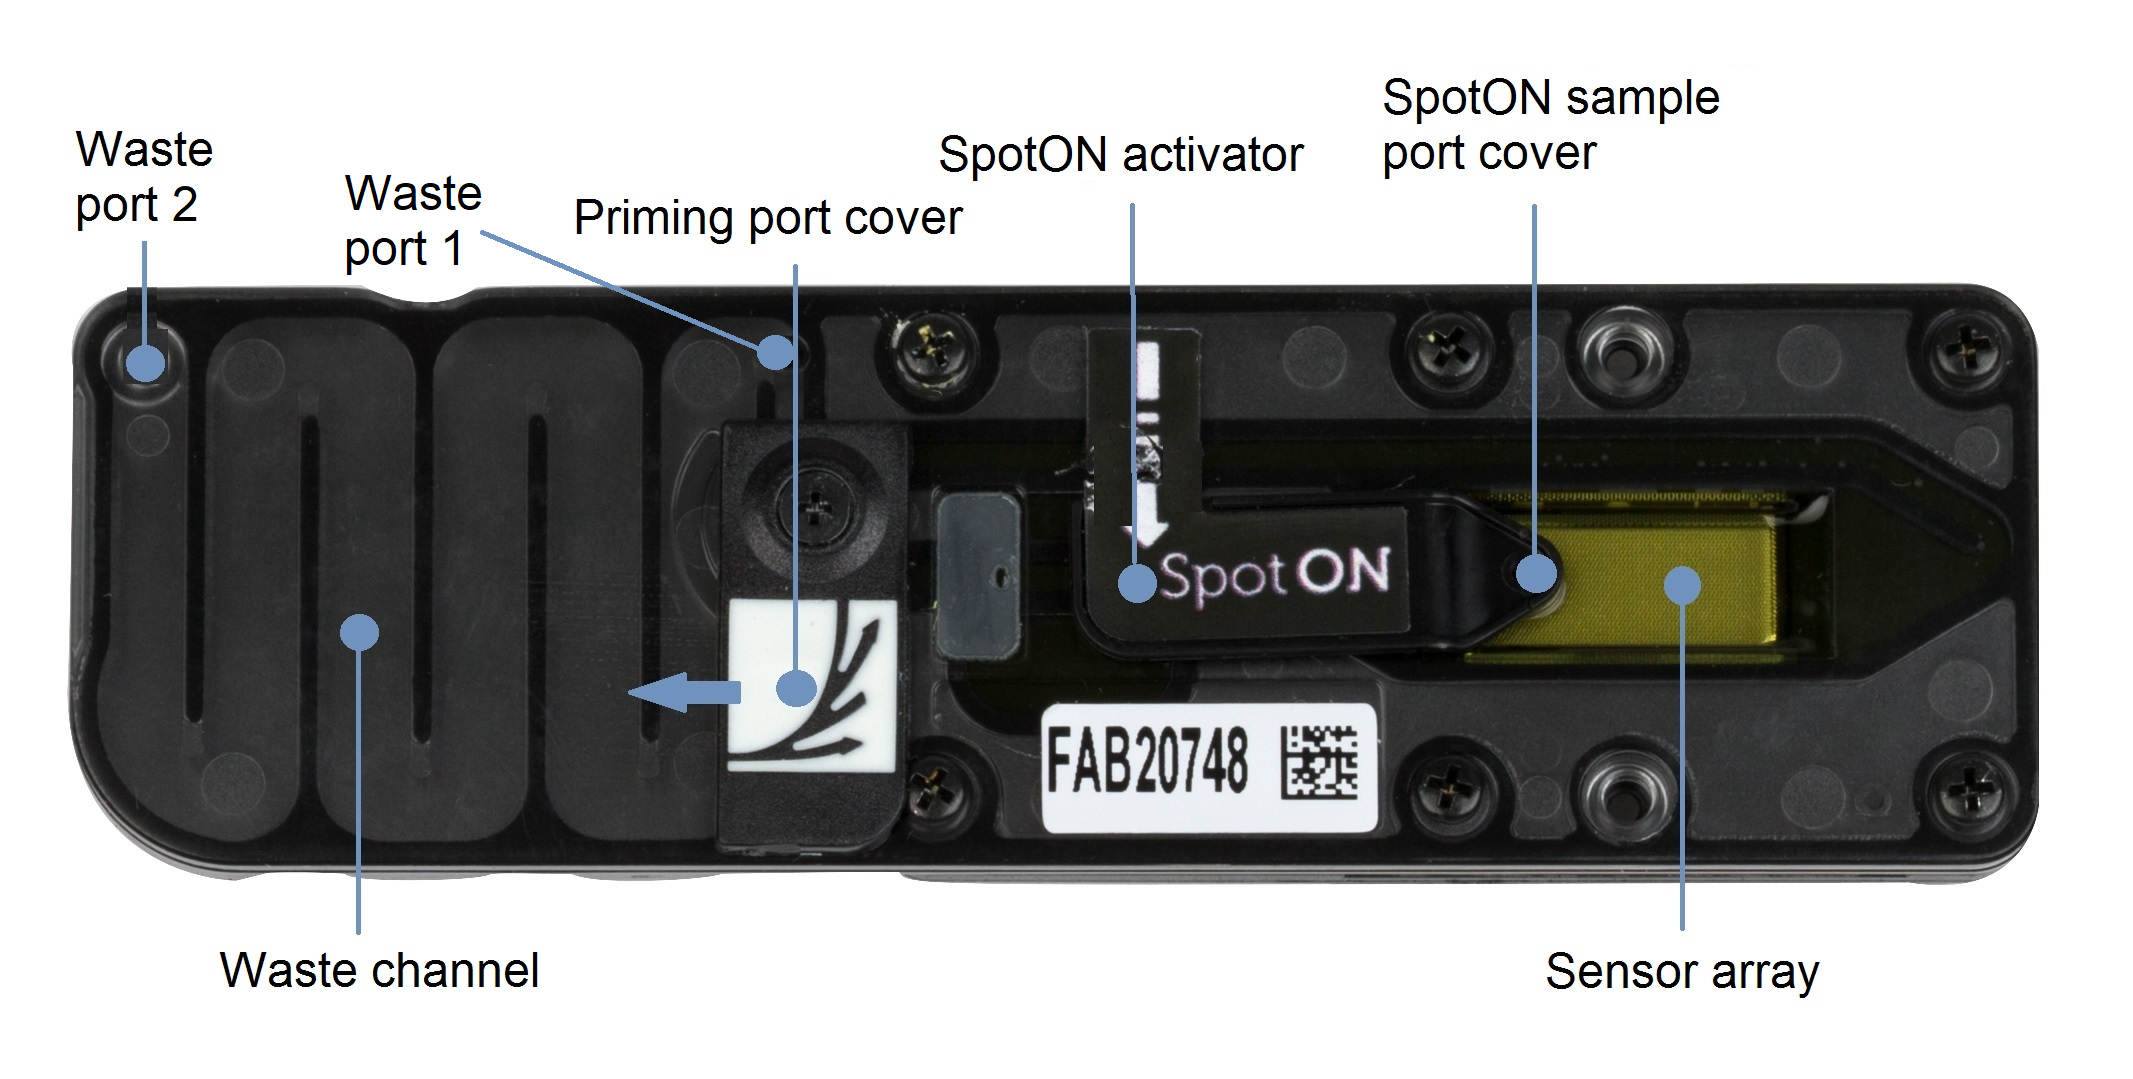
Remove the waste buffer, as follows:
- Close the priming port and SpotON sample port cover, as indicated in the figure below.
- Insert a P1000 pipette into waste port 1 and remove the waste buffer.
Note: As both the priming port and SpotON sample port are closed, no fluid should leave the sensor array area.
-
Slide the flow cell priming port cover clockwise to open.

-
After opening the priming port, check for a small air bubble under the cover. Draw back a small volume to remove any bubbles:
- Set a P1000 pipette to 200 µl.
- Insert the tip into the flow cell priming port.
- Turn the wheel until the dial shows 220-230 µl, or until you can see a small volume of buffer/liquid entering the pipette tip.
- Visually check that there is continuous buffer from the flow cell priming port across the sensor array.
-
Slowly load 200 µl of the prepared flow cell wash mix into the priming port, as follows:
- Using a P1000 pipette, take 200 µl of the flow cell wash mix
- Insert the pipette tip into the priming port, ensuring there are no bubbles in the tip
- Slowly twist the pipette wheel down to load the flow cell (if possible with your pipette) or push down the plunger very slowly, leaving a small volume of buffer in the pipette tip.
- Set a timer for a 5 minute incubation.
-
Once the 5 minute incubation is complete, carefully load the remaining 200 µl of the prepared flow cell wash mix into the priming port, as follows:
- Using a P1000 pipette, take the remaining 200 µl of the flow cell wash mix
- Insert the pipette tip into the priming port, ensuring there are no bubbles in the tip
- Slowly twist the pipette wheel down to load the flow cell (if possible with your pipette) or push down the plunger very slowly, leaving a small volume of buffer in the pipette tip.
-
Close the priming port and wait for 1 hour.

-
Remove the waste buffer, as follows:
- Ensure the priming port and SpotON sample port covers are closed, as indicated in the figure below.
- Insert a P1000 pipette into waste port 1 and remove the waste buffer.
Note: As both the priming port and SpotON sample port are closed, no fluid should leave the sensor array area.


