-
The PromethION 2 Solo
This is a small benchtop device designed to run up to two flow cells. Each flow cell is independently addressable, meaning that experiments can be run concurrently or individually. The PromethION 2 Solo plugs into a GridION Mk1 or user compute for real-time data streaming and analysis. The device is operated by the MinKNOW software that controls the device, experimental scripts, and performs basecalling.
Below is a quick start guide to set up a new device and to start sequencing your library samples. For further details using this device, please see the PromethION 2 Solo User Manual.
-
Install the P2 Solo with a GridION.
Place the P2 Solo and GridION on a laboratory bench.
Check the GridION serial number is greater than GXB002xxx on the back of the device.
Download and install the PromethION 2 Solo software from the Software Downloads page on the Community. For Linux, install the software via the Terminal. For more information, see the PromethION 2 Solo User Manual.
Note: The MinKNOW App is also available to download for iOS and Android devices to allow you to monitor experiment progress and to control your device remotely.Connect the P2 Solo AC power adapter into a mains supply and connect it to the P2 Solo.
Connect the USB Type-C cable to the GridION and the P2 Solo.
Turn on the power switch on the GridION and wait 60 seconds.
-
Install the P2 Solo with a workstation/laptop.
Place the P2 Solo on a laboratory bench.
Download and install the PromethION 2 Solo software from the Software Downloads page on the Community. For Linux, install the software via the Terminal. For more information, see the PromethION 2 Solo User Manual.
Note: The MinKNOW App is also available to download for iOS and Android devices to allow you to monitor experiment progress and to control your device remotely.Connect the P2 Solo AC power adapter into a mains supply and connect it to the P2 Solo.
Connect the USB Type-C cable to the workstation/laptop and the P2 Solo.
-
Log into MinKNOW.
Double-click on the MinKNOW icon on your desktop.
Click on Log in with your Nanopore account.
Enter your email address and Nanopore password.
The Connection Manager will open, and your device will be the card in the top left corner.
Click on My device card to access and control it.

-
Tutorials
These are available to help you get started and run your experiments as easily as possible.
On opening the MinKNOW software for the first time, the tutorials will navigate you through the graphical user interface (GUI). Click Continue tutorial to follow or click the ⁞ to skip.

-
Configure your GridION.
For your P2 Solo connected to a GridION, the network will need to be configured. To connect your GridION to a single network, use the user interface. A device can be connected to multiple networks which will require a script to be used.
Validate your IP address to ensure it has been correctly set using a static or DHCP address using the command
ifconfig. -
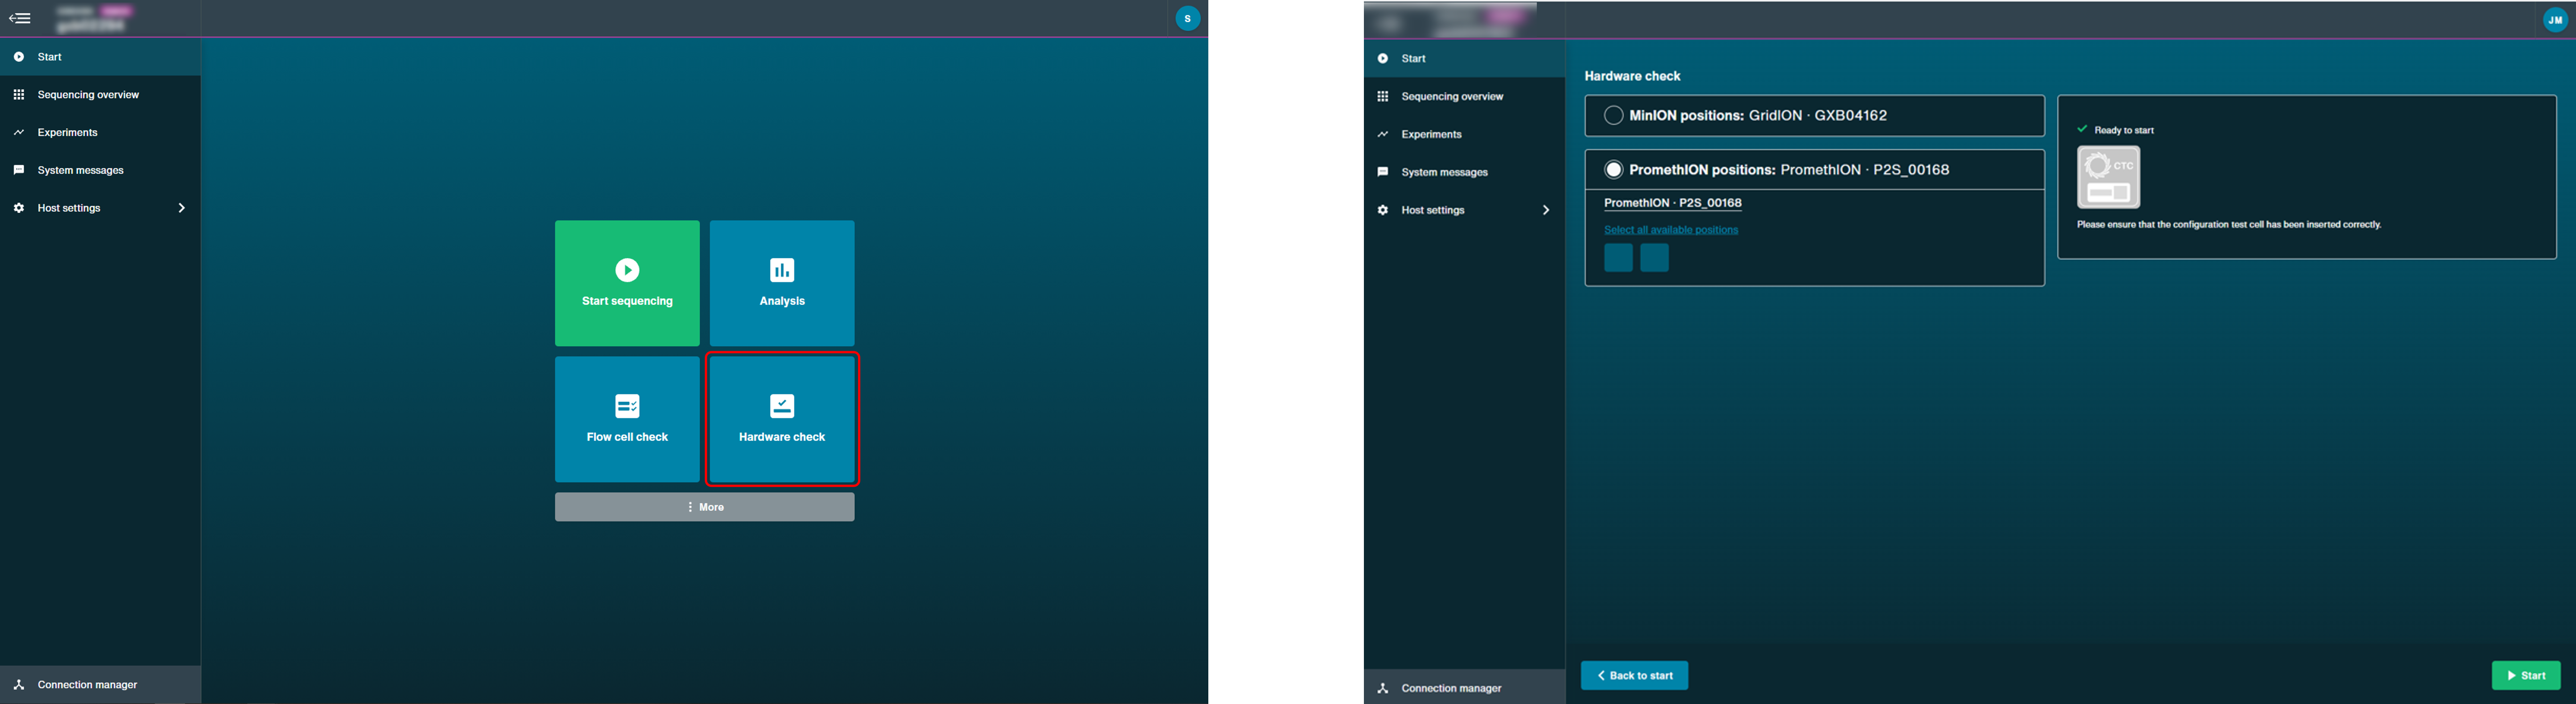
Perform a hardware check.
A hardware check must be performed on new devices and after software updates.
Open the P2 Solo and slide the CTC into each position.
Note: Ensure you are using the CTCs provided with the P2 Solo device only.Close the device lid.
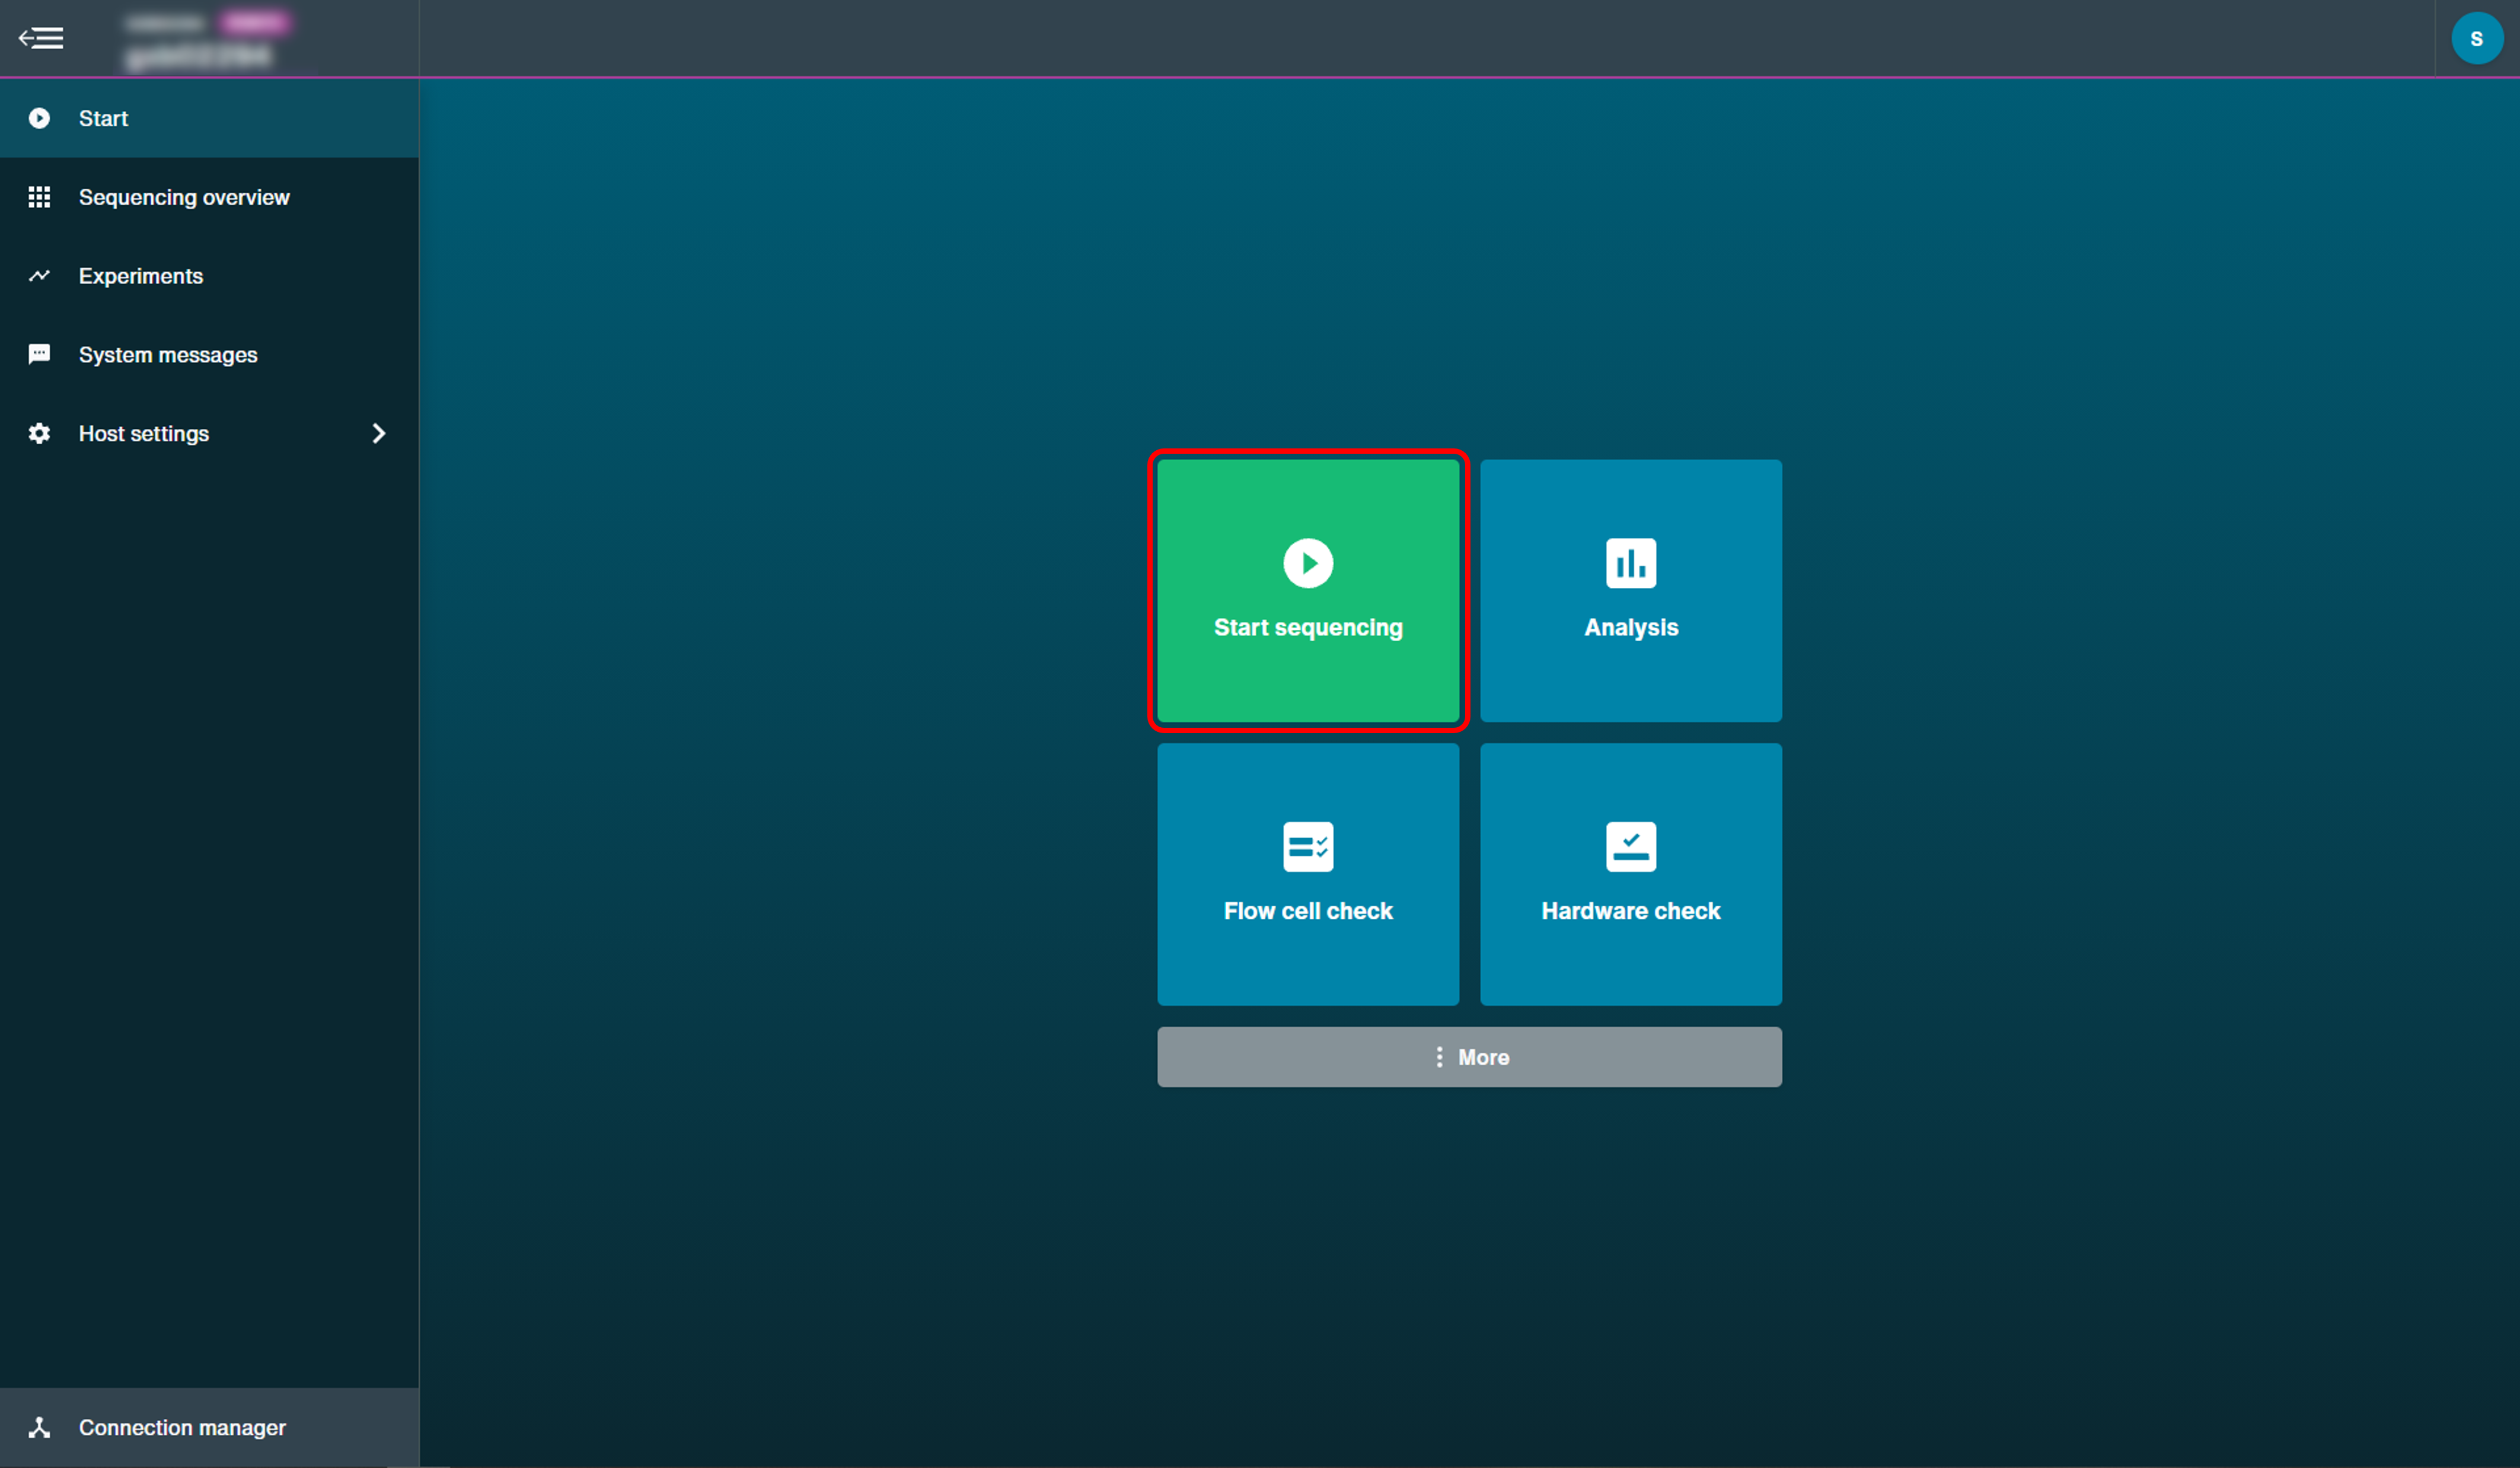
Navigate to the Start page and click Hardware check.
Click Select all available positions.
Click Start and the hardware check will complete after approximately 1 minute.
After the hardware check has completed, remove the CTCs and store in dry conditions.
-
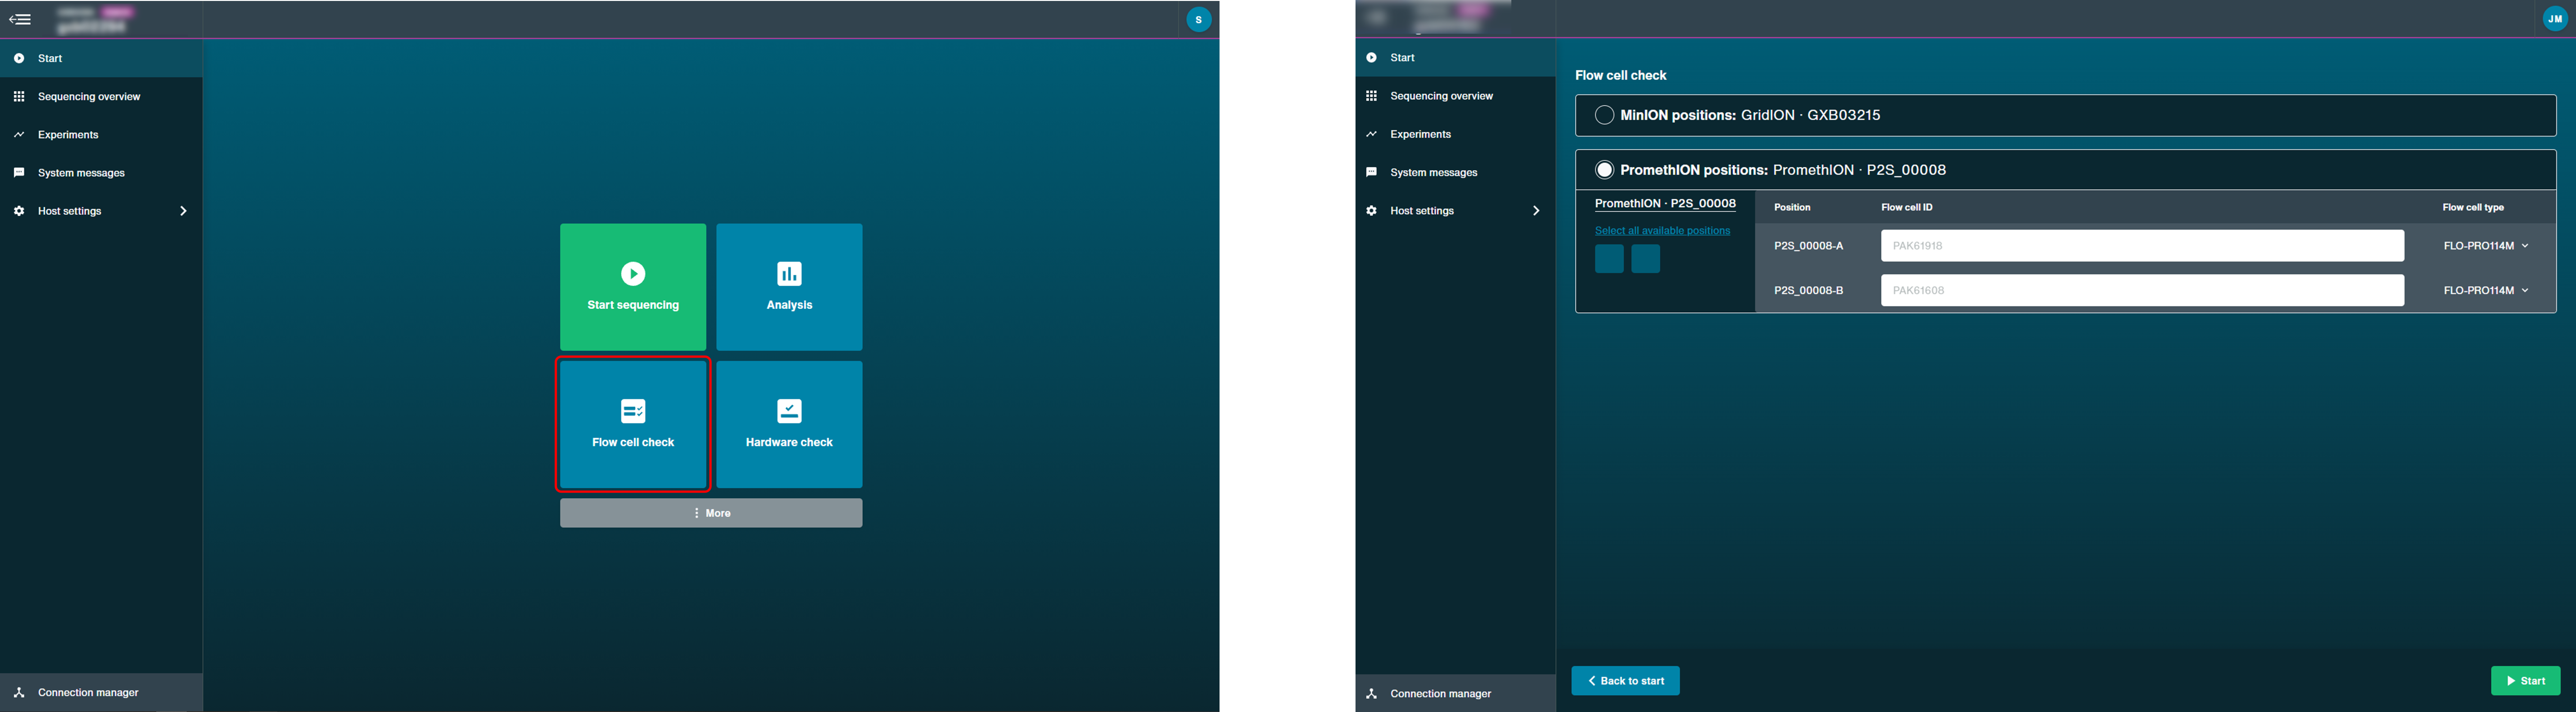
Perform a flow cell check.
A flow cell check must be carried out before loading a DNA or RNA library to assess the number of pores available.
Open the device and insert your flow cell.
Navigate to the Start page and click Flow Cell Check.
MinKNOW will recognise the PromethION Flow Cell type and ID.
Click Start and the flow cell check will begin.
-
Set up a sequencing run.
Prime and load your flow cell with DNA or RNA library by following a library prep protocol and set-up a sequencing run, as follows:
Navigate to the Start page and click Start Sequencing.
In the Positions tab, fill in the experiment name, sample ID, and select the flow cell type and position(s). Click Continue to kit selection.
Select the kit and any expansion(s) used to prepare the library. Click Continue to run options.
Specify the sequencing run length and minimum read length or keep the default settings. Click Continue to analysis.
Choose your basecaller model and select any available barcoding and alignment options or keep the default settings. Click Continue to output.
Specify your output data location, format and filtering options or keep the default settings. Click Continue to final review.
Click Start.
For further details, please see the Starting a sequencing run section for your device in the MinKNOW protocol.