- Materials
-
- Flow Cell Flush (FCF)
- Flush Tether UL (FTU)
- Loading Solution UL (LSU)
- Sequencing Buffer UL (SBU)
- Consumables
-
- PromethION Flow Cell
- 1.5 ml Eppendorf DNA LoBind tubes
- Equipment
-
- PromethION 24/48 device
- PromethION 2 Solo device
- PromethION Flow Cell Light Shield
- P1000 pipette and tips
- P200 pipette and tips
- P20 pipette and tips
- Wide-bore pipette tips
-
Thaw the Sequencing Buffer UL (SBU), Loading Solution UL (LSU), Flush Tether UL (FTU) and one tube of Flow Cell Flush (FCF) at room temperature and mix by vortexing. Then spin down and place on ice.
-
In a fresh 1.5 ml Eppendorf DNA LoBind tube, prepare the DNA library for loading as follows using a wide-bore pipette tip for the addition of the DNA library:
Reagent Volume per flow cell Sequencing Buffer UL (SBU) 100 µl Loading Solution UL (LSU) 10 µl DNA library 90 µl Total 200 µl Note: ensure the Sequencing Buffer UL (SBU) and Loading Solution UL (LSU) are thoroughly mixed by pipetting before the addition of the DNA library.
-
Gently mix the prepared DNA library by slowly pipetting ten times using a wide-bore pipette tip.
-
Incubate at room temperature for 30 minutes then gently mix by slowly pipetting with a wide-bore tip. Visually inspect to ensure the sample is homogenous.
-
Prepare the flow cell priming mix in a 1.5 ml Eppendorf DNA LoBind tube and mix by vortexing at room temperature.
Reagent Volume Flush Tether UL (FTU) 30 µl Flow Cell Flush (FCF) 1170 µl Total 1200 µl -
For PromethION 2 Solo, load the flow cell(s) as follows:
Place the flow cell flat on the metal plate.
Slide the flow cell into the docking port until the gold pins or green board cannot be seen.
-
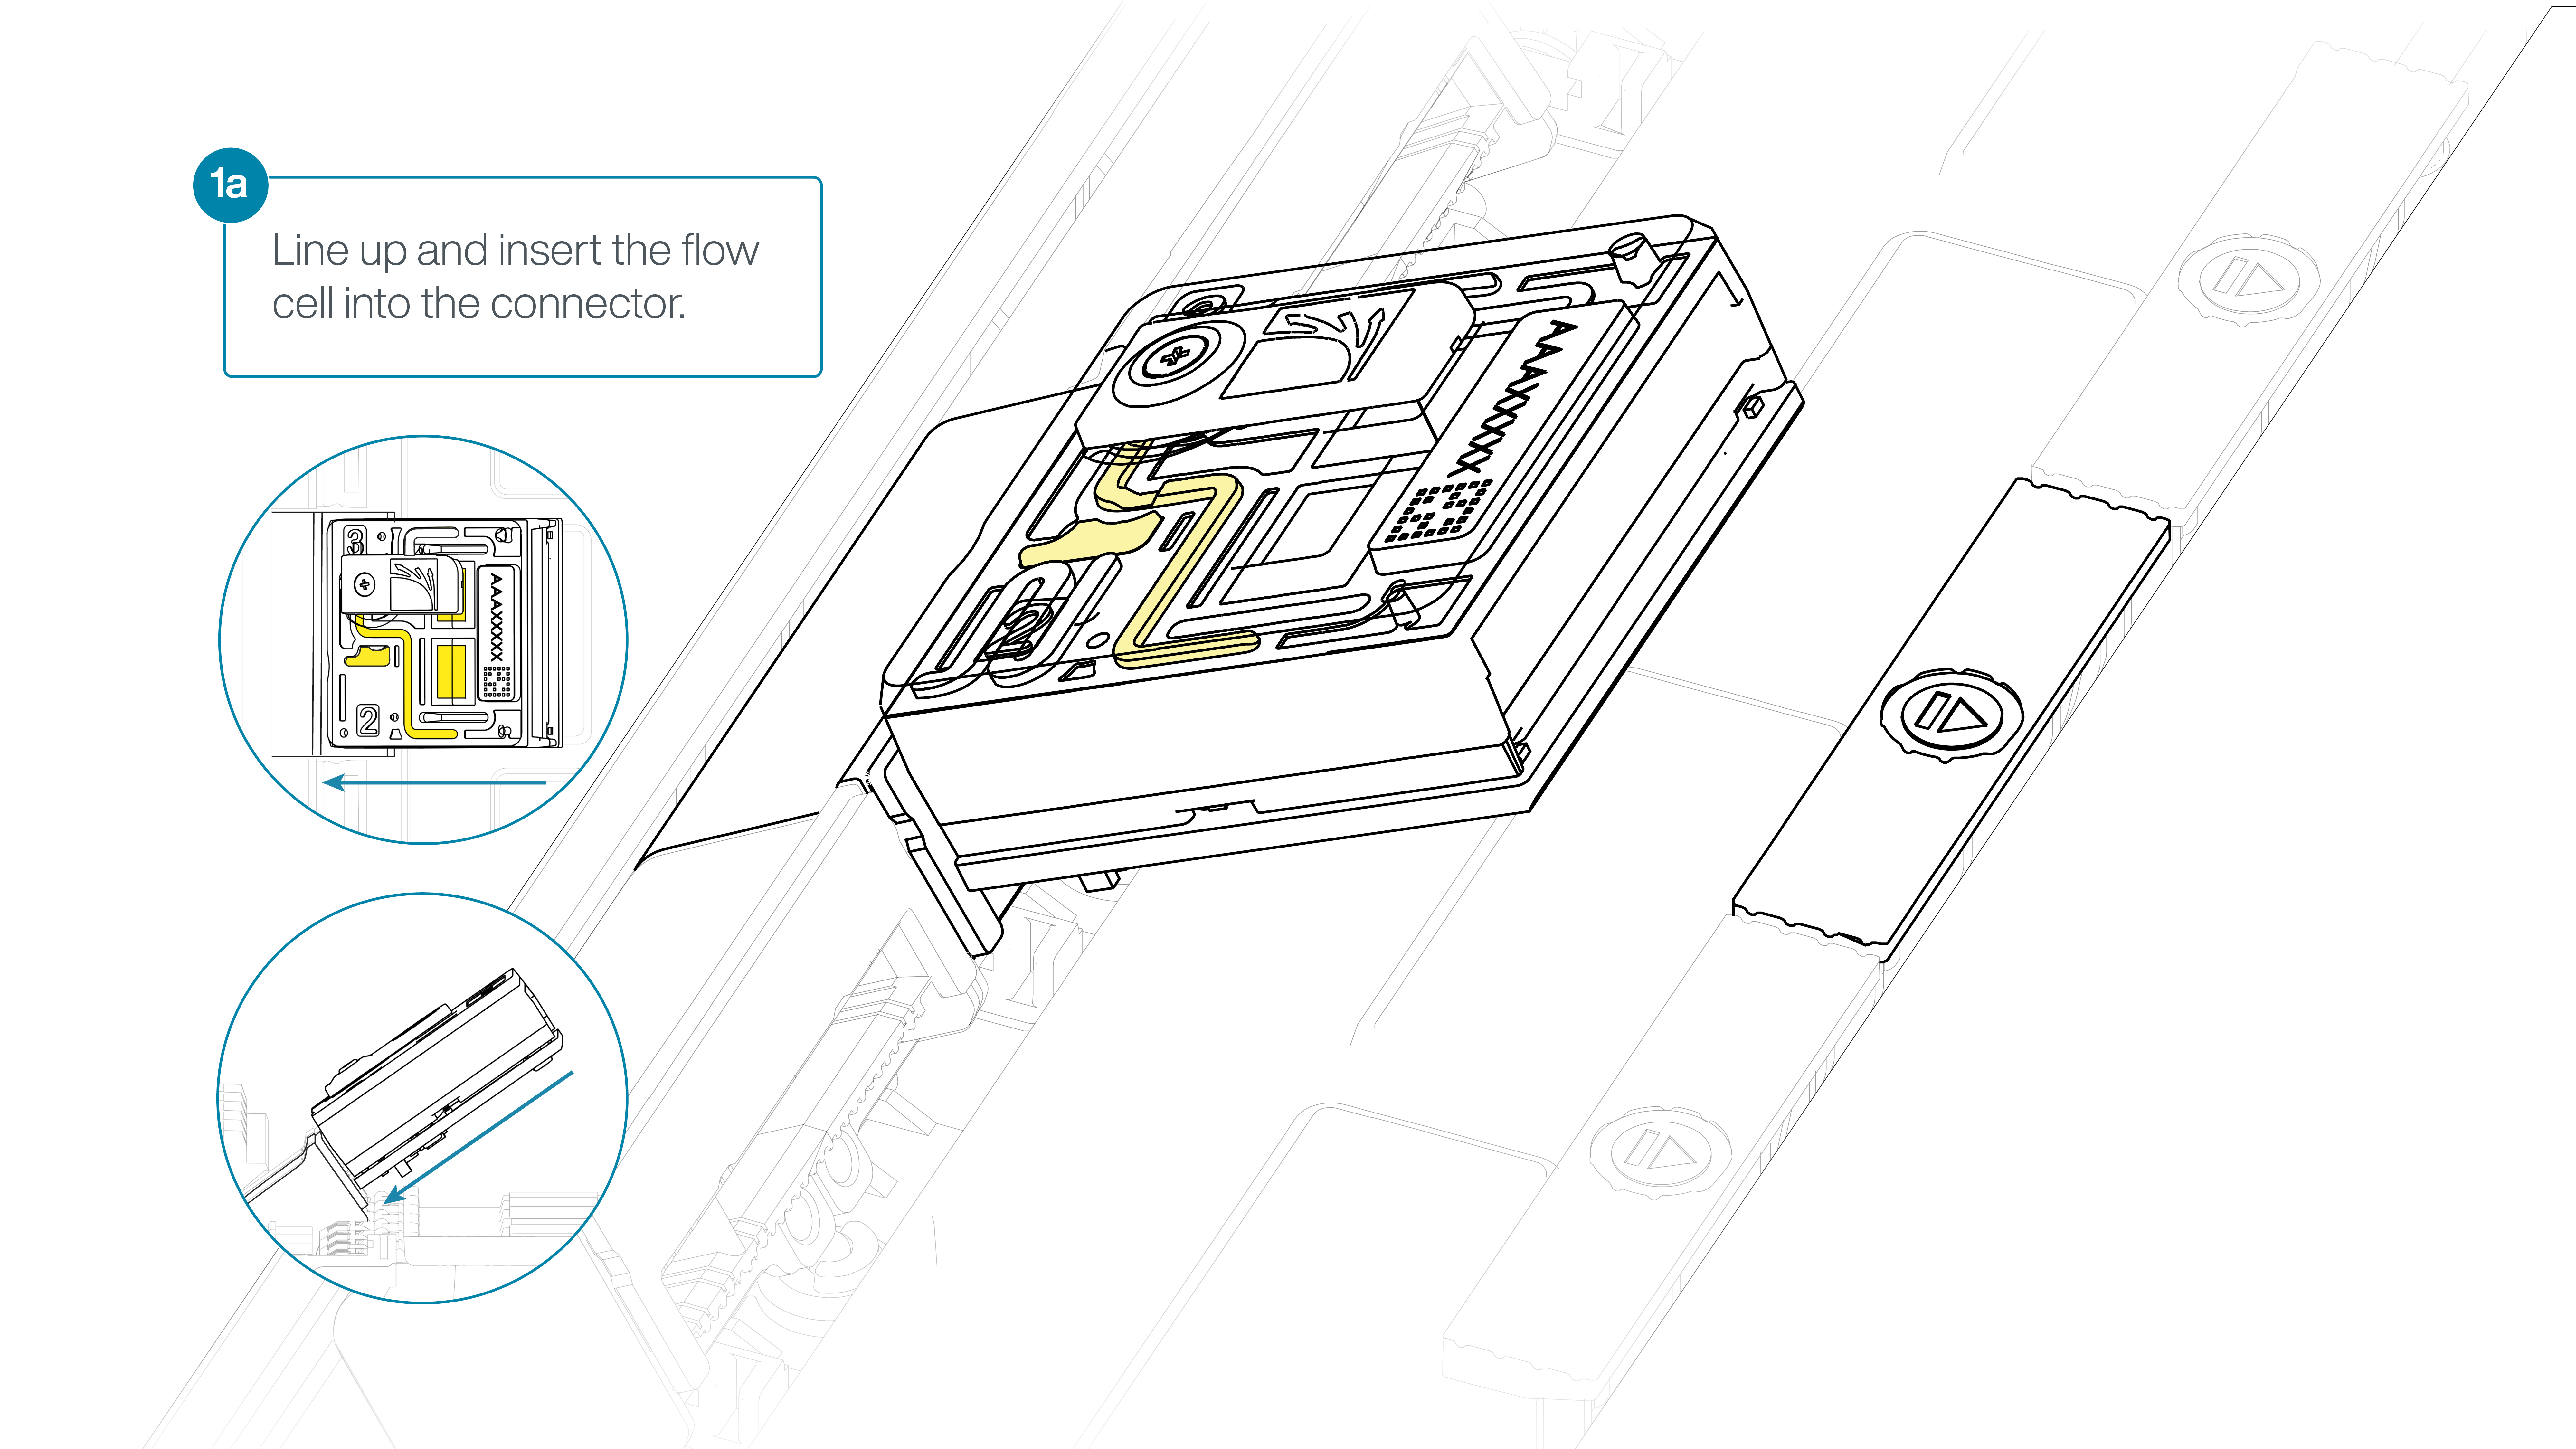
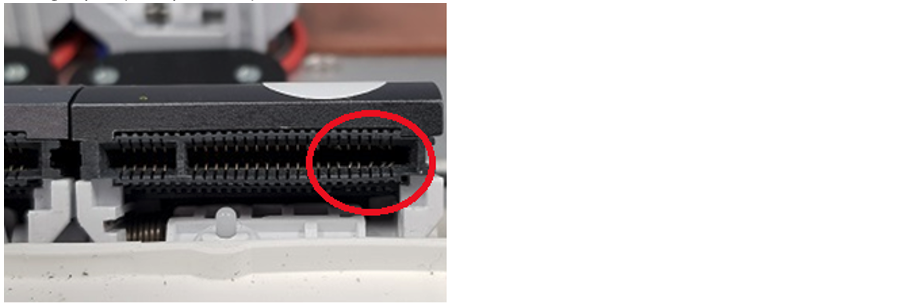
For the PromethION 24/48, load the flow cell(s) into the docking ports:
- Line up the flow cell with the connector horizontally and vertically before smoothly inserting into position.
- Press down firmly onto the flow cell and ensure the latch engages and clicks into place.
-
-
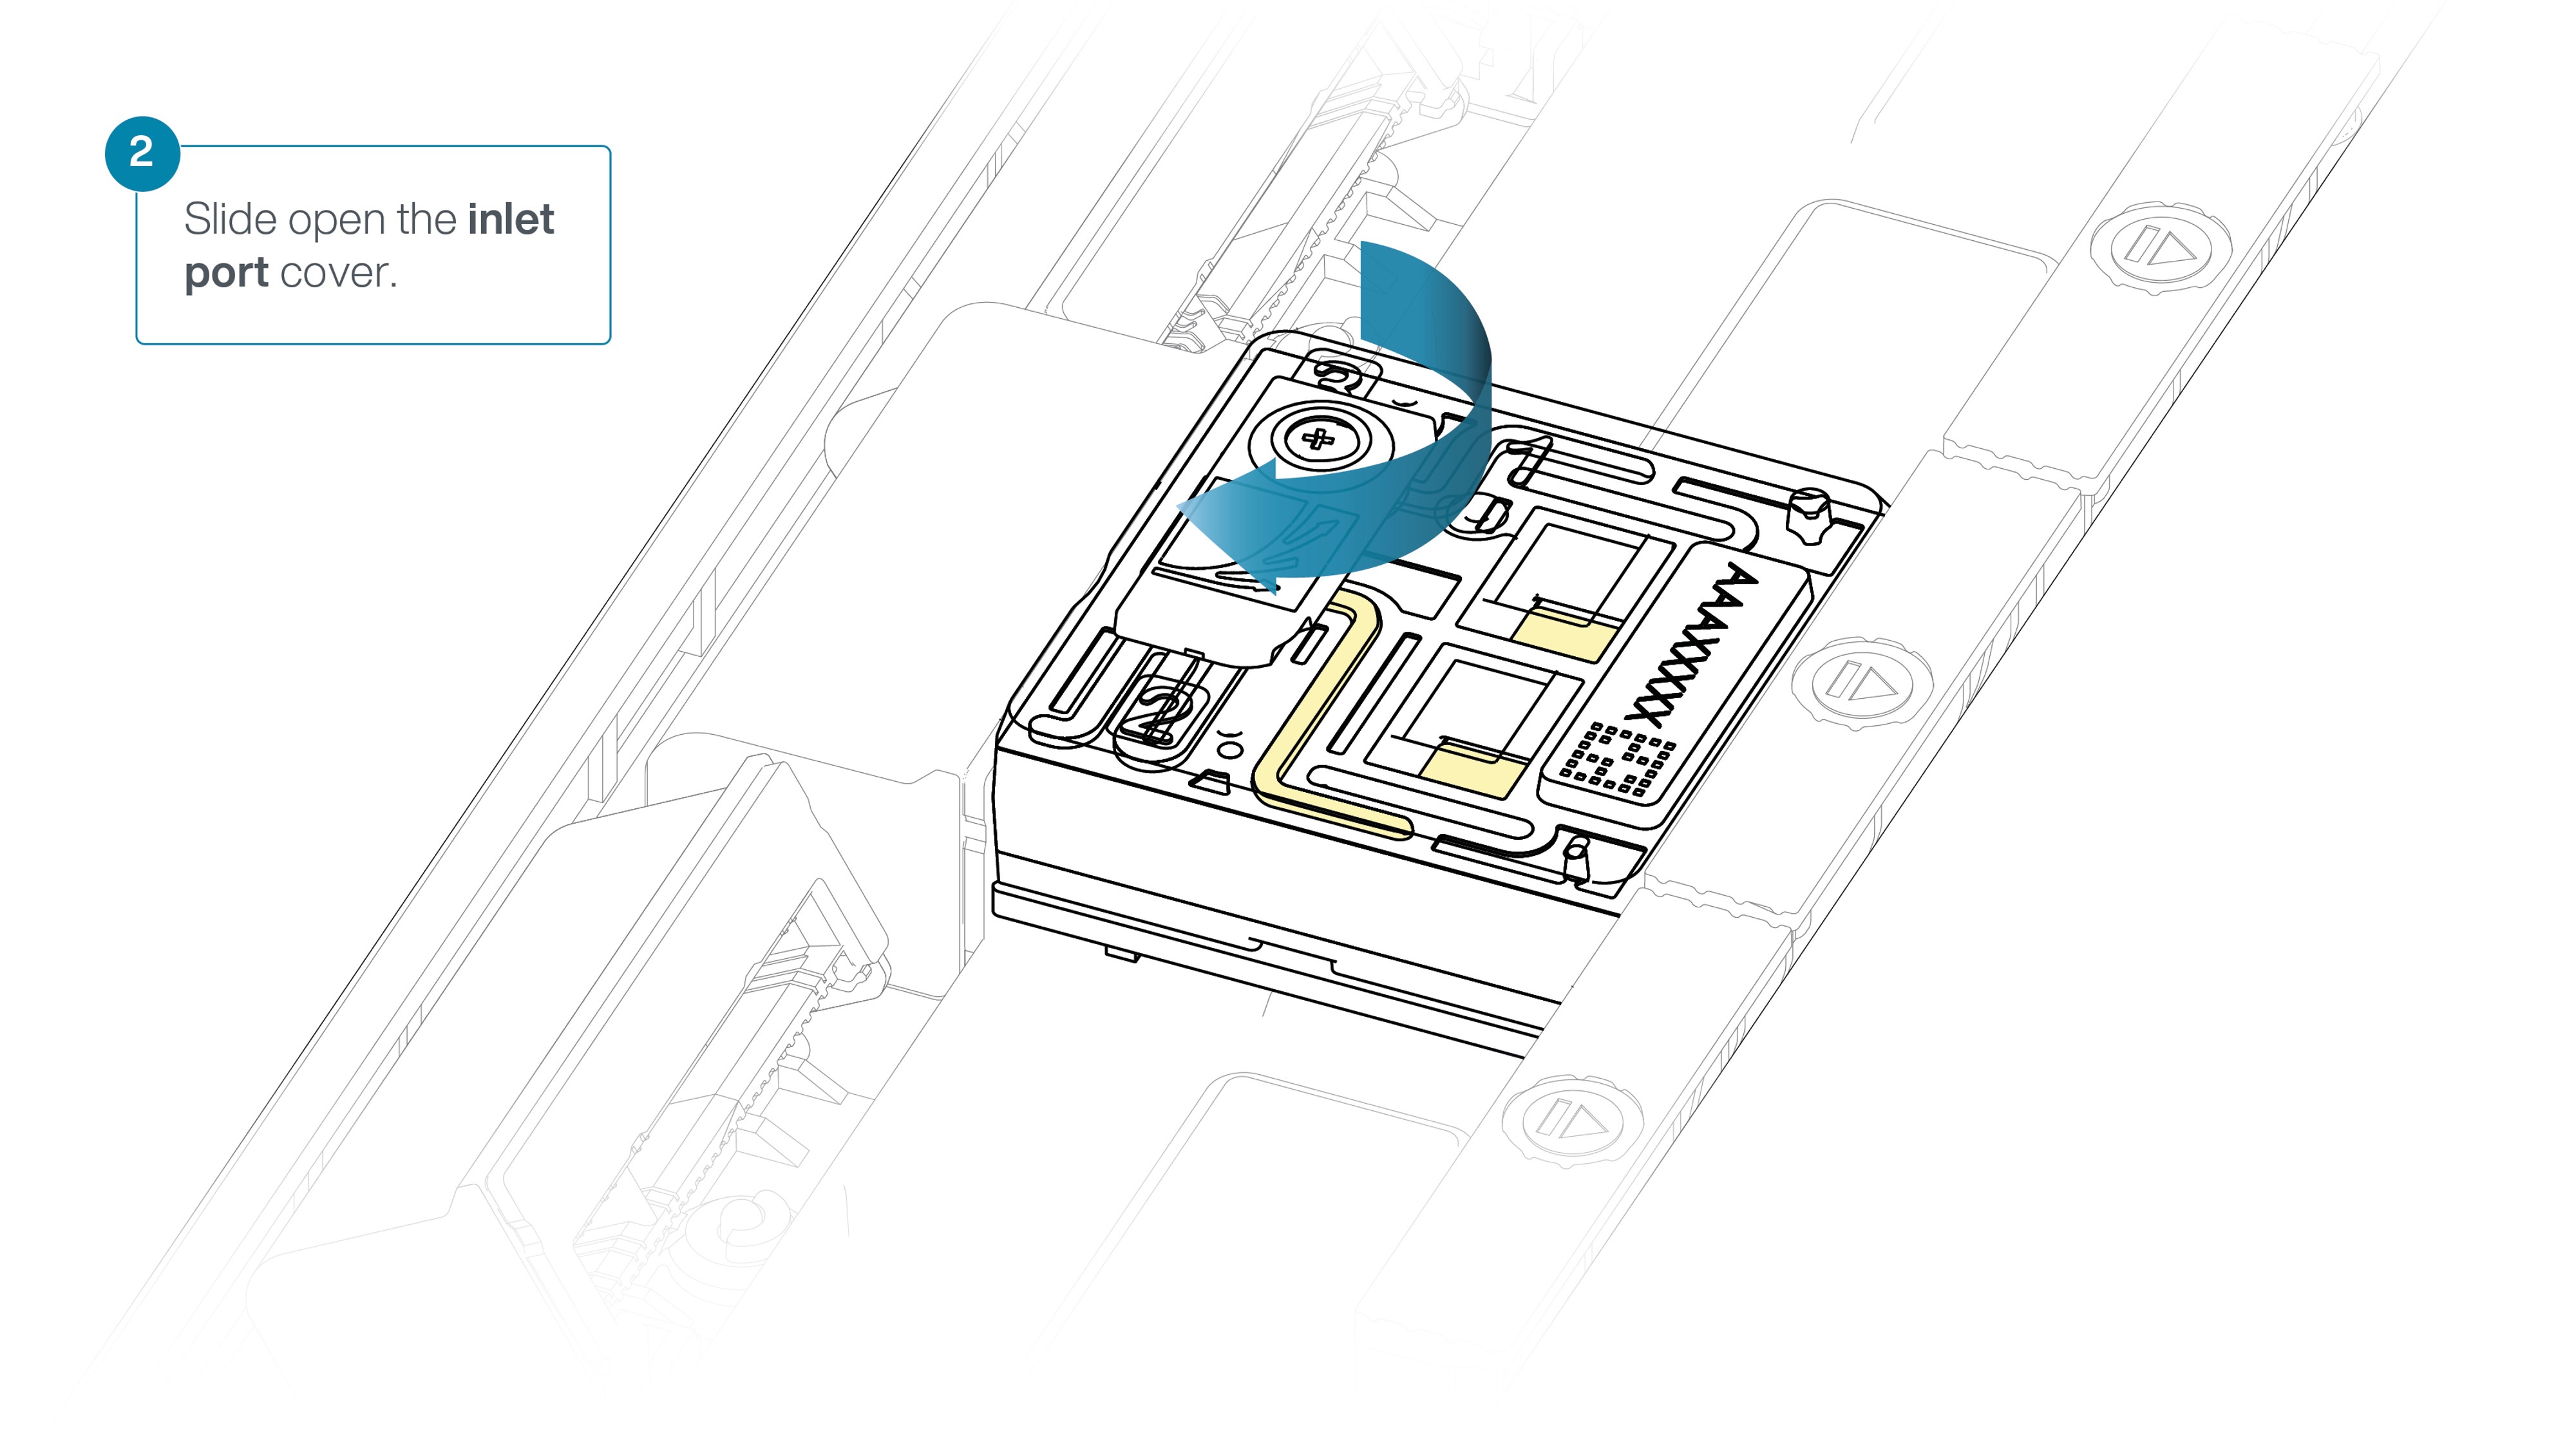
Slide the inlet port cover clockwise to open.
-
After opening the inlet port, draw back a small volume to remove any air bubbles:
- Set a P1000 pipette tip to 200 µl.
- Insert the tip into the inlet port.
- Turn the wheel until the dial shows 220-230 µl, or until you see a small volume of buffer entering the pipette tip.
-
Load 500 µl of the priming mix into the flow cell via the inlet port, avoiding the introduction of air bubbles. Wait five minutes.
-
Complete the flow cell priming by slowly loading 500 µl of the priming mix into the inlet port.
-
Ensure the inlet port cover of the flow cell is still open in preparation for loading.
Check that no air bubbles have been introduced to the inlet port during flow cell priming.
If air is present, draw back a small volume to remove any air bubbles by using a P1000 pipette set to 200 µl and turning the pipette wheel (as per the instructions above).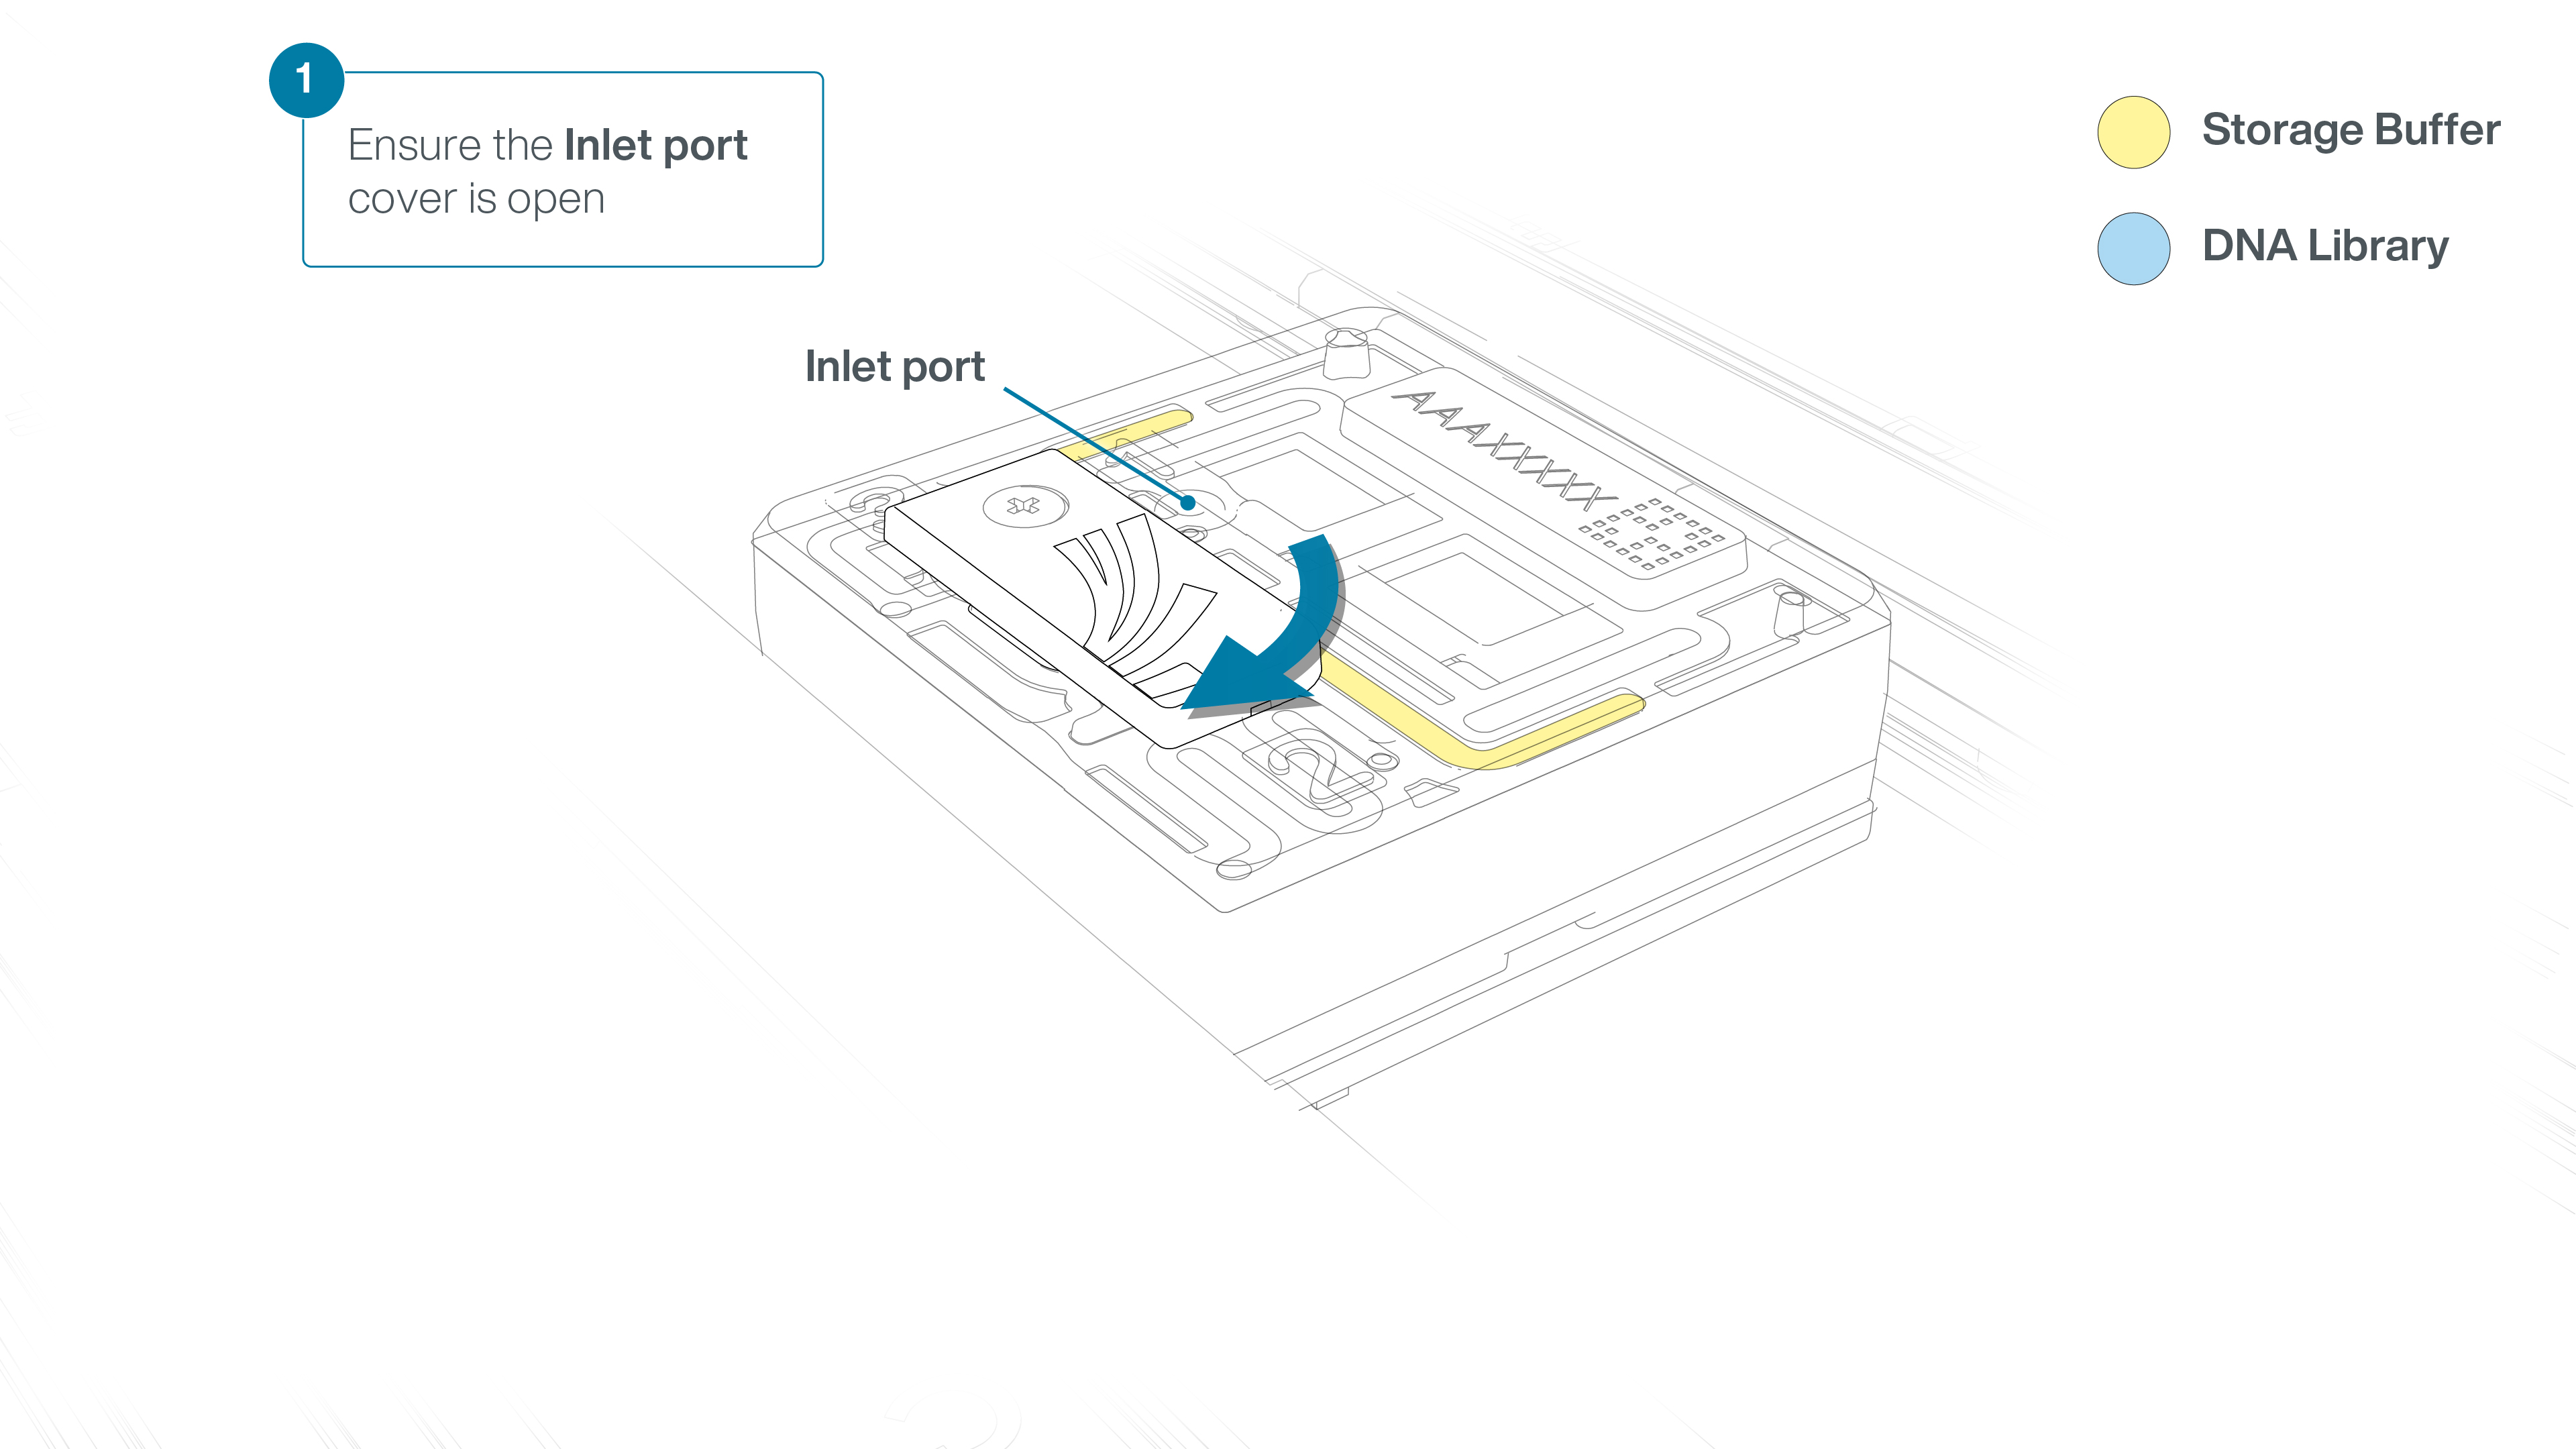
-
Aspirate the DNA library with a wide-bore pipette tip. Ensure there are no air bubbles in the pipette tip. Place the wide-bore pipette tip directly on the inlet port. Slowly depress the pipette to dispense the library into the inlet port.
There can be a delay between depressing the pipette and the library dispensing from the pipette tip.
Dispense the library slowly, allowing the library to dispense from the pipette tip before depressing the pipette further.It is important to dispense the library slowly to prevent air being introduced onto the flow cell.
Note: The DNA library loaded in this step is viscous and may not readily flow through the inlet port into the flow cell. In this case, we recommend applying negative pressure in the flow cell as explained in the steps below.
-
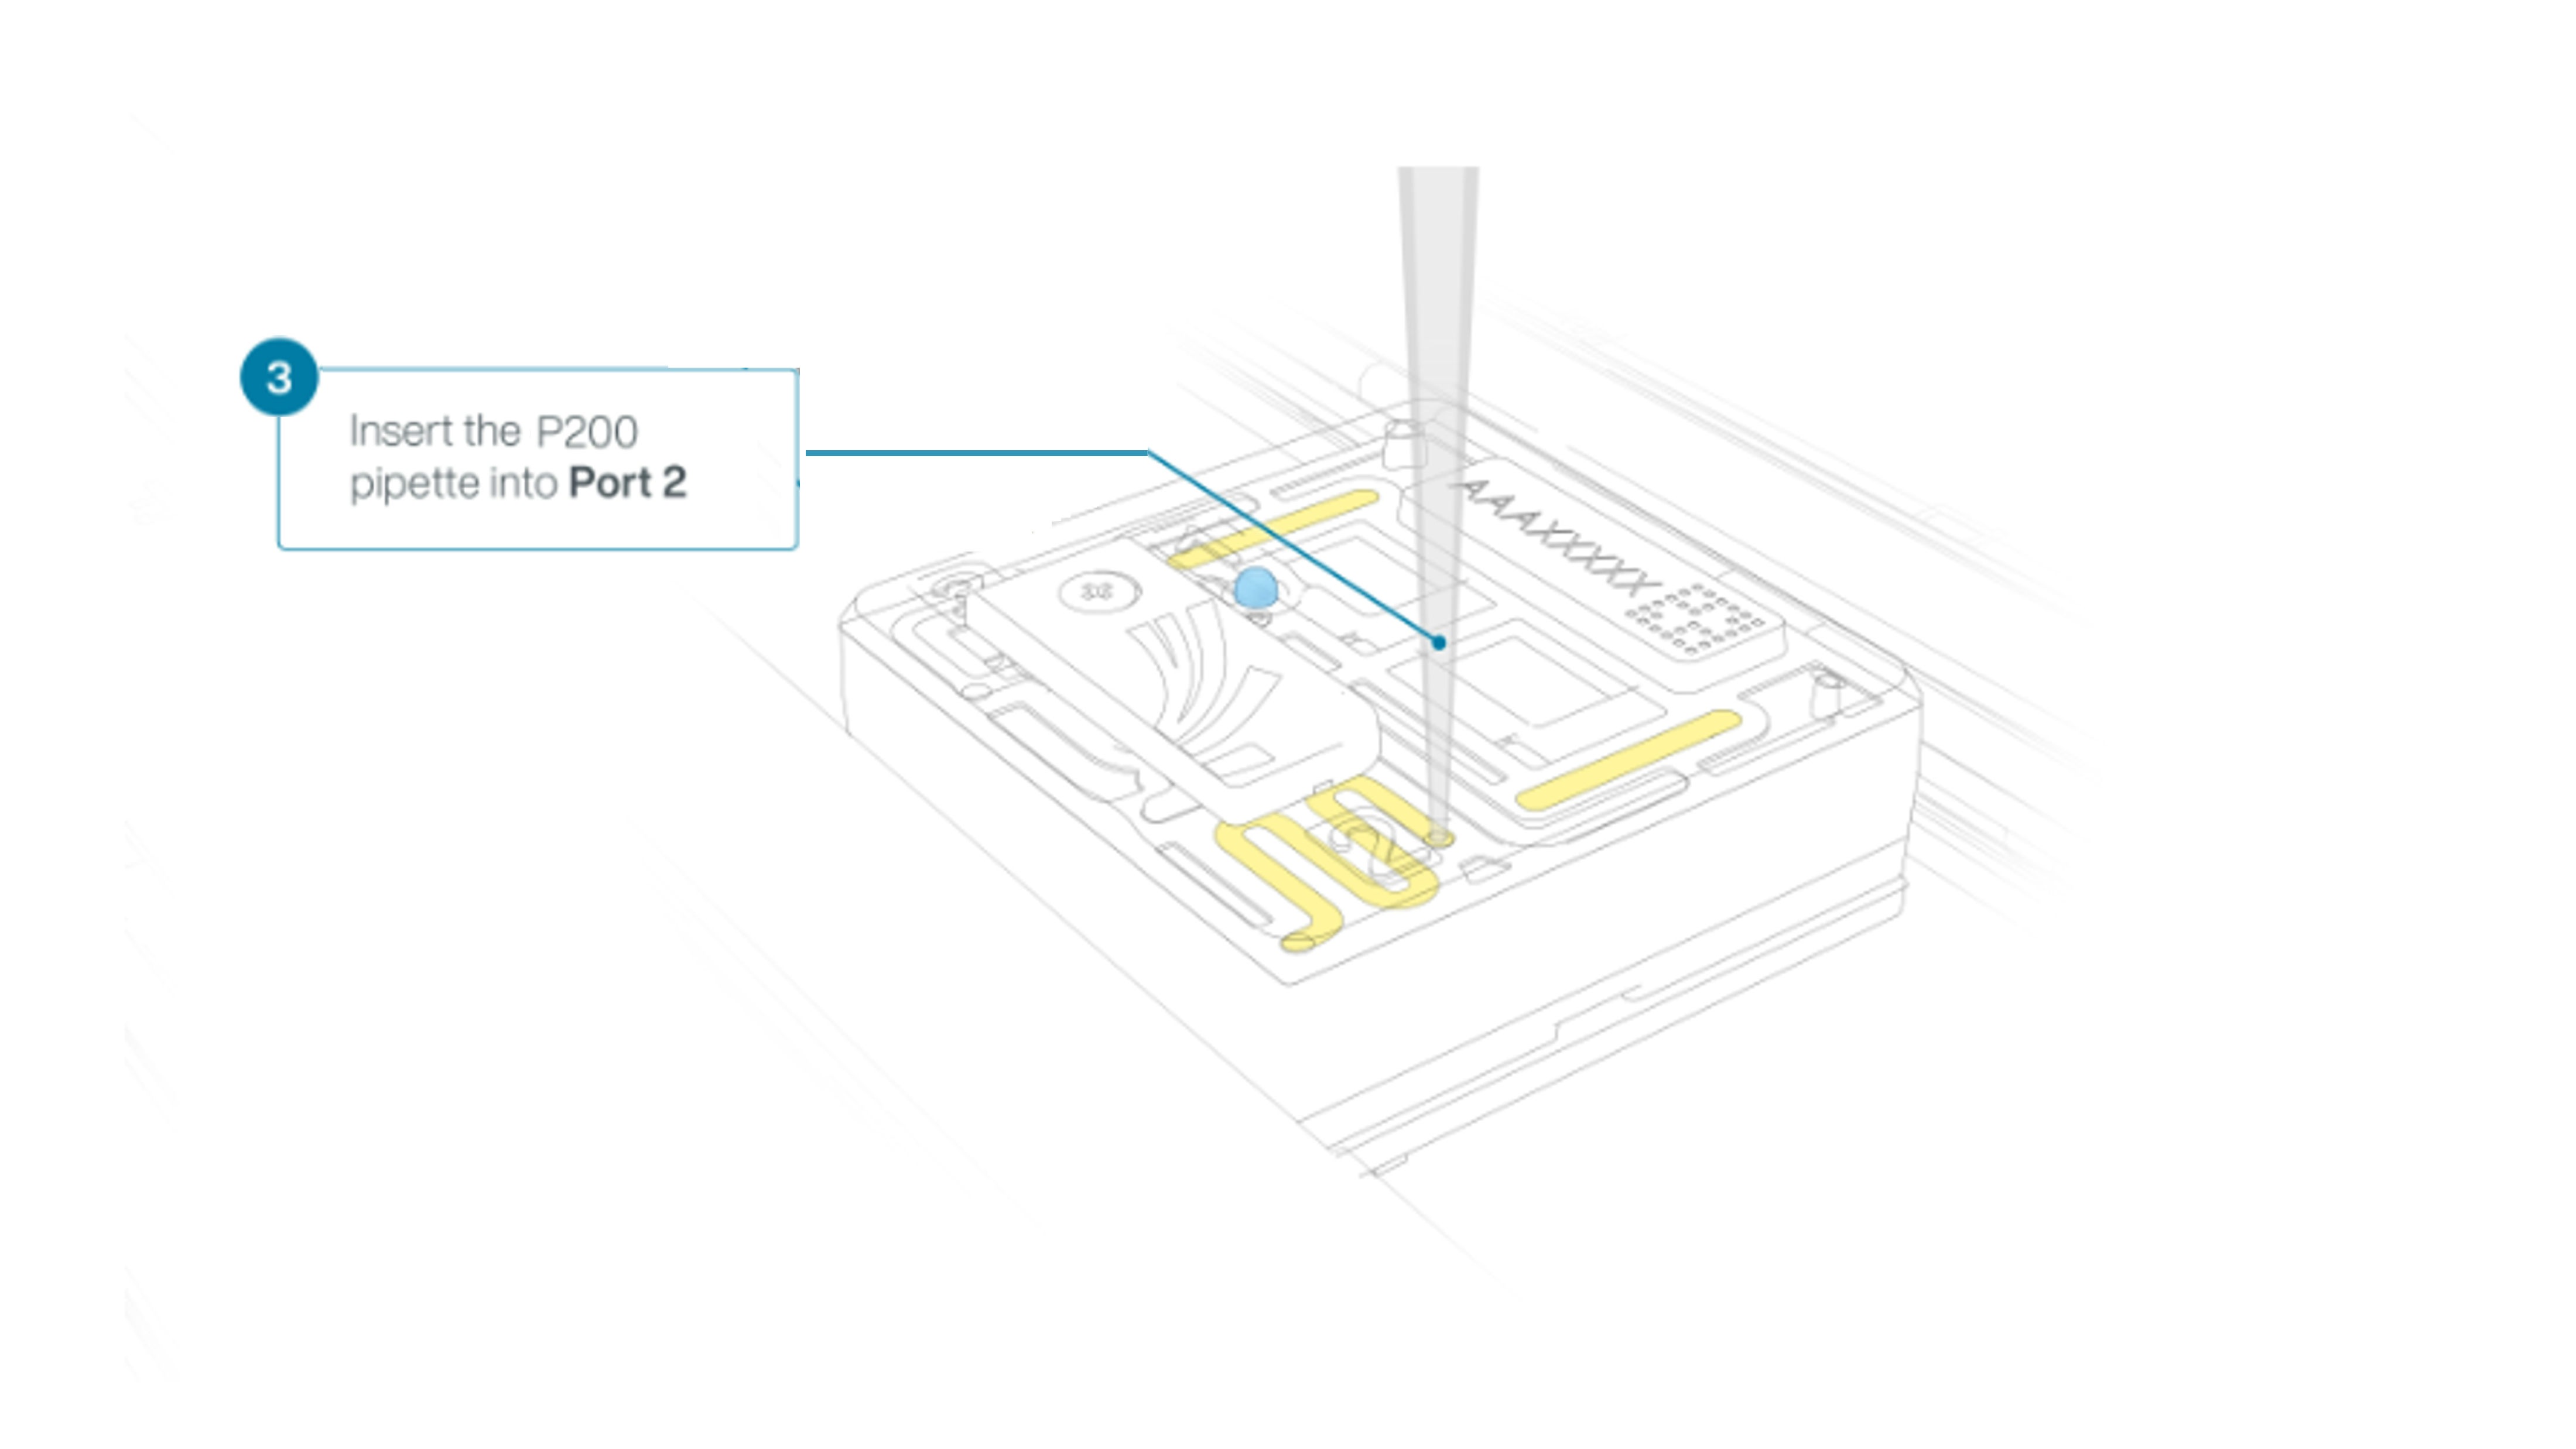
Using a P200 pipette, set the pipette to 50 µl and insert the tip into Port 2.
-
Very slowly turn the wheel of the pipette to pull the DNA library into the inlet port. Closely watch the DNA library on the inlet port and completely remove the pipette as soon as the library starts to be pulled into the port.
This step is required if the DNA library has not been fully absorbed into the inlet port.
Note: Take care to not apply too much negative pressure too quickly to avoid bringing air bubbles into the flow cell. Air bubbles will cause irreversible damage to the flow cell.

-
Close the valve to seal the inlet port.

-
If the light shield has been removed from the flow cell, install the light shield as follows:
- Align the inlet port cut out of the light shield with the inlet port cover on the flow cell. The leading edge of the light shield should sit above the flow cell ID.
- Firmly press the light shield around the inlet port cover. The inlet port clip will click into place underneath the inlet port cover.

-
We recommend loading an ultra-long DNA library three times per flow cell to increase output.
A nuclease wash using the Flow Cell Wash Kit (EXP-WSH004) is required between each subsequent library load to recover channels and maximise sequencing output.
For PromethION flow cells, there is enough ultra-long DNA library generated for three consecutive loads per reaction, using 90 µl of fresh library combined with 100 µl of Sequencing Buffer UL (SBU) and 10 µl of Loading Solution UL (LSU) before re-loading for further sequencing.
Please follow Flushing a PromethION Flow Cell in the Flow Cell Wash Kit protocol for the nuclease wash instructions. To run another ultra-long library straight away, follow the modified method: Reloading ultra-long DNA library on a PromethION flow cell.


