- Materials
-
- Flow Cell Wash Kit (EXP-WSH004)
- Flush Tether UL (FTU)
- Flow Cell Flush (FCF)
- Loading Solution UL (LSU)
- Sequencing Buffer UL (SBU)
- Consumables
-
- 1.5 ml Eppendorf DNA LoBind tubes
- Equipment
-
- P1000 pipette and tips
- P200 pipette and tips
- P20 pipette and tips
-
To run a second library of ultra-long DNA straight after flushing a flow cell, we recommend removing all fluid from the waste channel after each priming step.
-
Thaw the Sequencing Buffer UL (SBU), Loading Solution UL (LSU), Flush Tether UL (FTU) and one tube of Flow Cell Flush (FCF) at room temperature and mix by vortexing. Then spin down and place on ice.
-
In a fresh 1.5 ml Eppendorf DNA LoBind tube, prepare the DNA library for loading as follows using a wide-bore pipette tip for the addition of the DNA library:
Reagent Volume per flow cell Sequencing Buffer UL (SBU) 100 µl Loading Solution UL (LSU) 10 µl DNA library 90 µl Total 200 µl Note: ensure the Sequencing Buffer UL (SBU) and Loading Solution UL (LSU) are thoroughly mixed by pipetting before the addition of the DNA library.
-
Gently mix the prepared DNA library by slowly pipetting ten times using a wide-bore pipette tip.
-
Incubate at room temperature for 30 minutes then gently mix by slowly pipetting with a wide-bore tip. Visually inspect to ensure the sample is homogenous.
-
Prepare the flow cell priming mix in a 1.5 ml Eppendorf DNA LoBind tube and mix by vortexing at room temperature.
Reagent Volume Flush Tether UL (FTU) 30 µl Flow Cell Flush (FCF) 1170 µl Total 1200 µl -
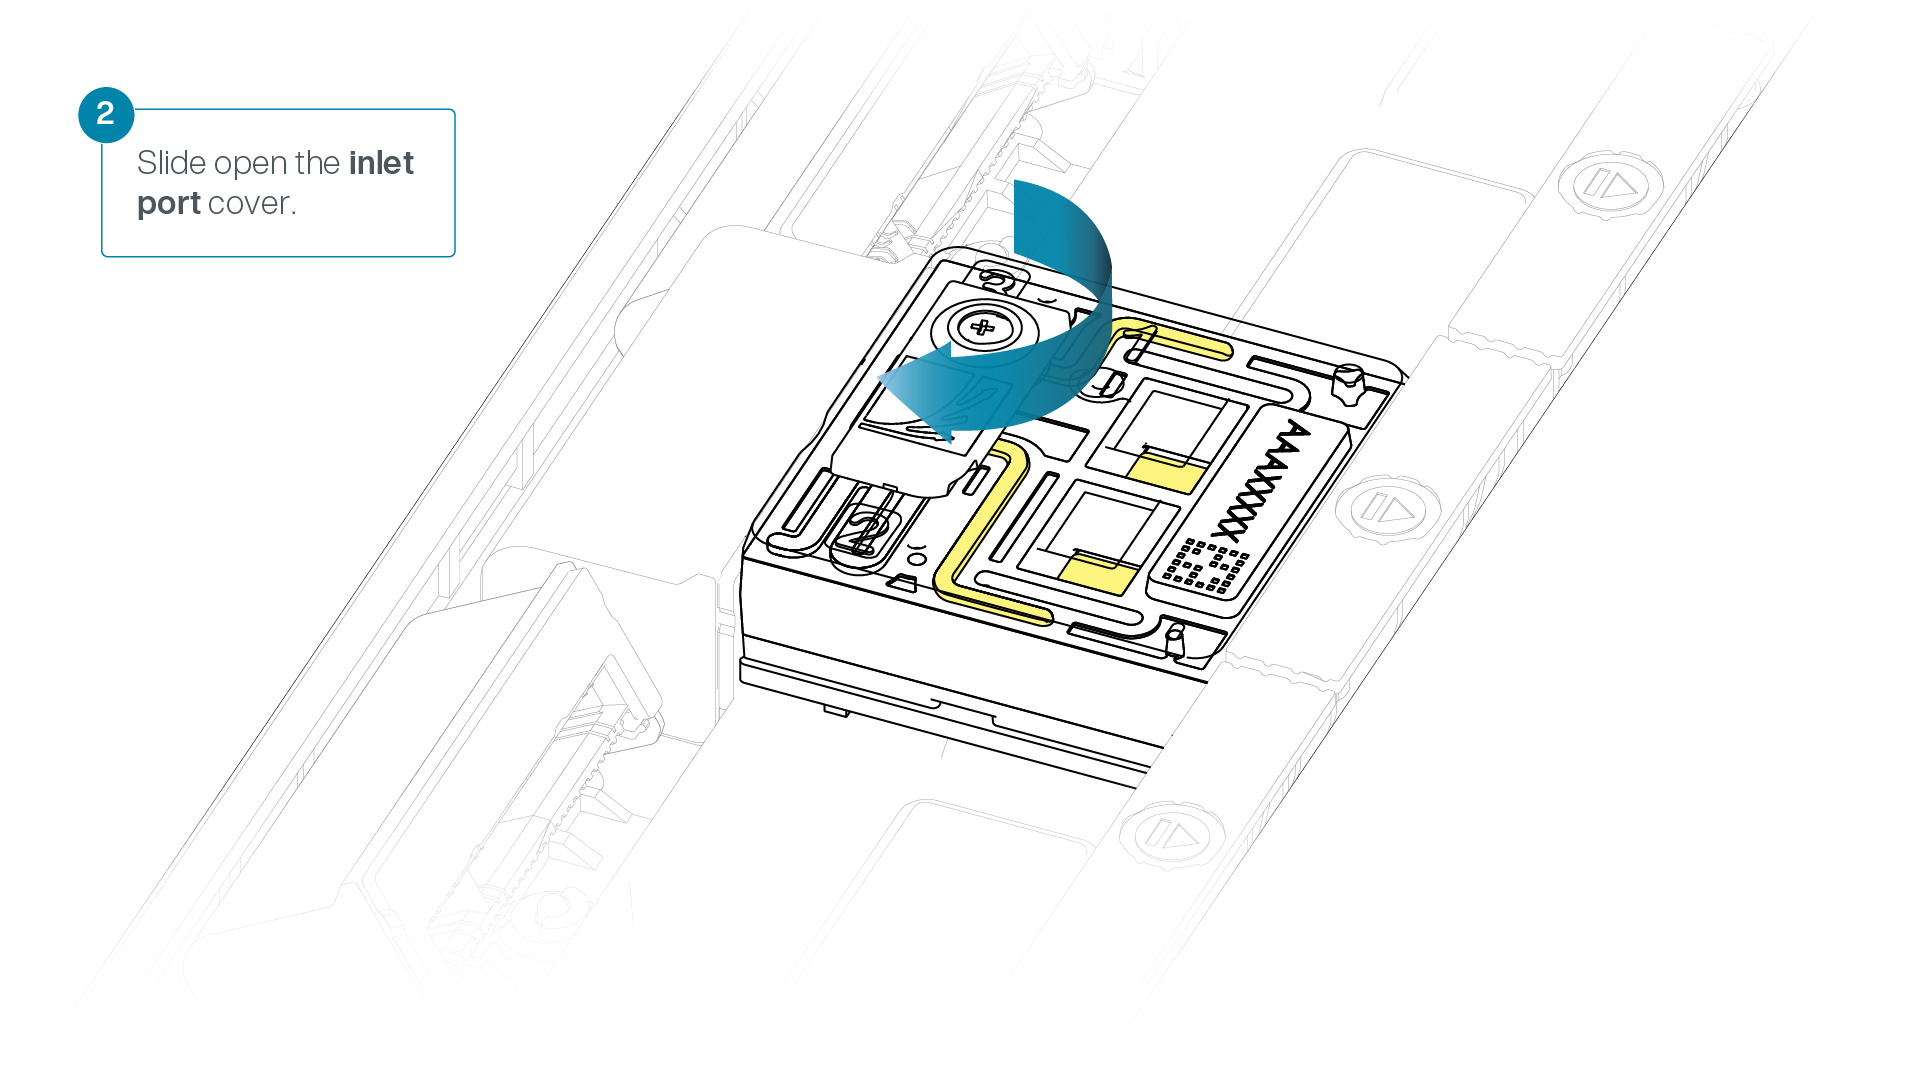
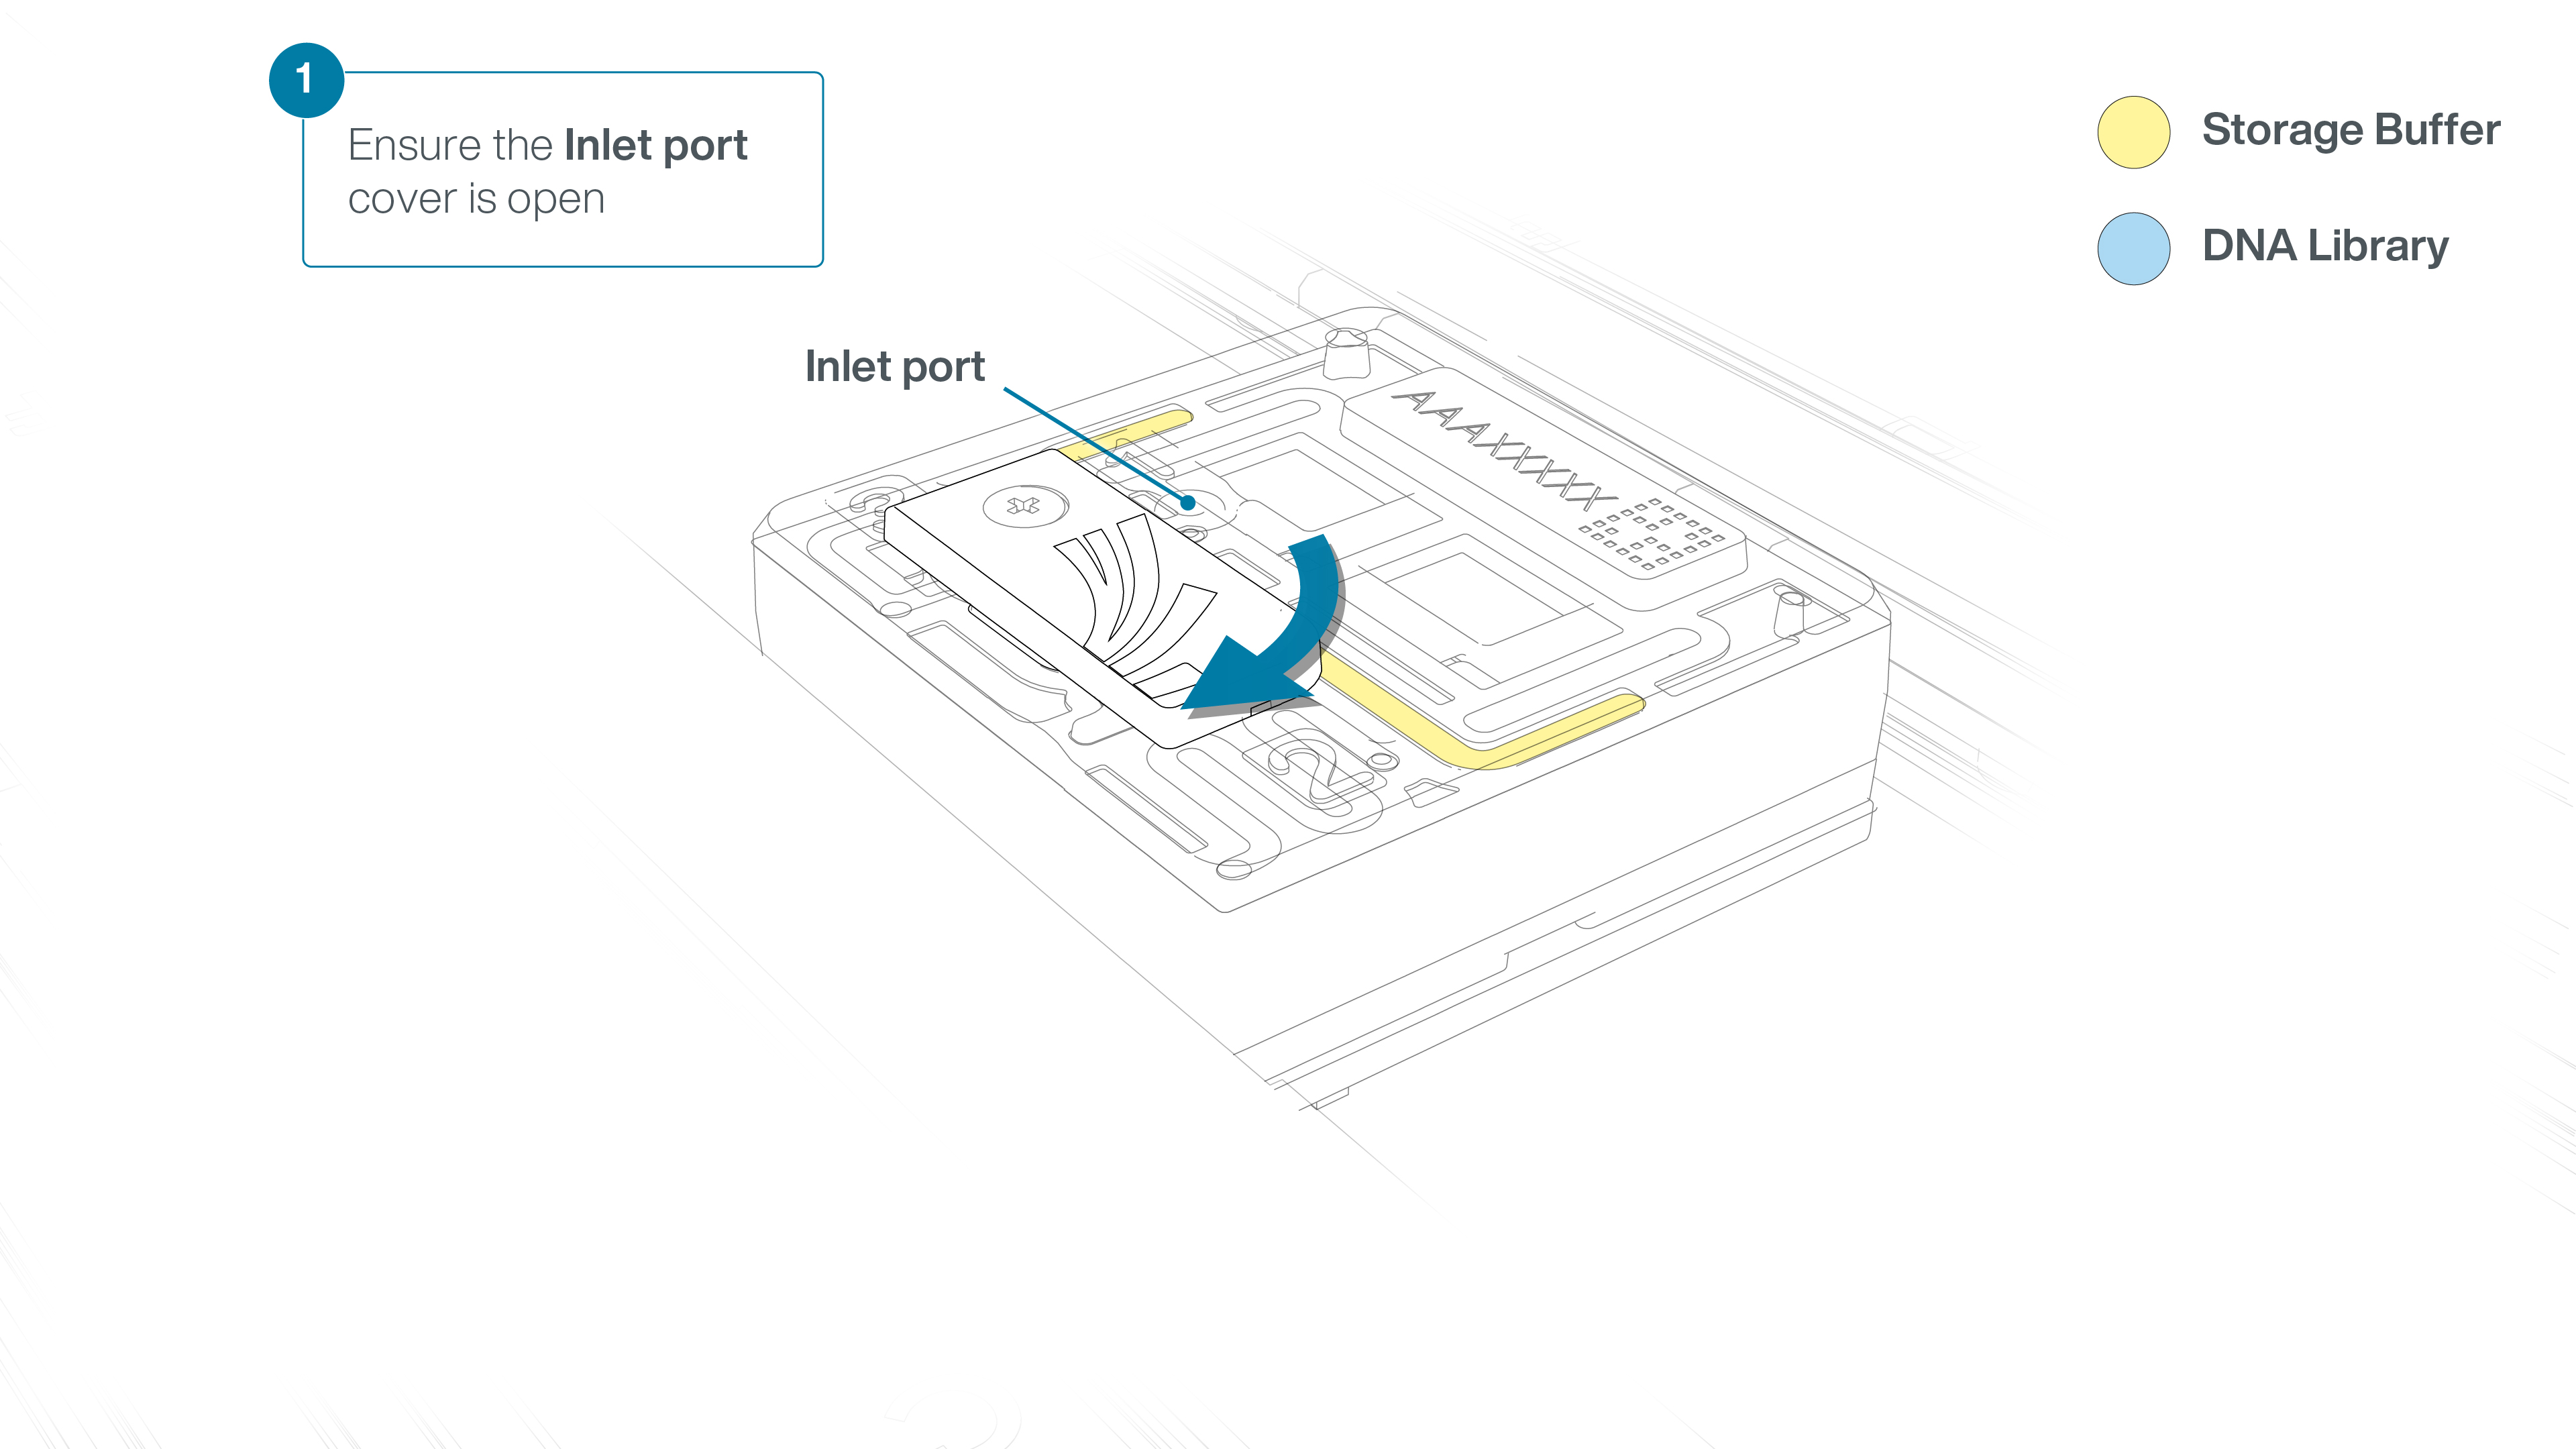
Turn the valve to expose the inlet port.
-
After opening the inlet port, draw back a small volume to remove any air bubbles:
- Set a P1000 pipette tip to 200 µl.
- Insert the tip into the inlet port.
- Turn the wheel until the dial shows 220-230 µl, or until you see a small volume of buffer entering the pipette tip.
-
Load 500 µl of the priming mix into the flow cell via the inlet port, avoiding the introduction of air bubbles. Wait five minutes.
-
Remove waste buffer, as follows:
- Close the inlet port.
- Insert a P1000 pipette into a waste port and remove the waste buffer.
Note: As both the inlet port is closed, no fluid should leave the sensor array area.
-
Slide open the inlet port and load 500 µl of the priming mix into the flow cell via the inlet port to complete a second flow cell flush, avoiding the introduction of air bubbles.
-
Close the inlet port and use a P1000 to remove all fluid from the waste channel through a waste port again.
-
Open the inlet port cover of the flow cell in preparation for loading.
-
Aspirate the DNA library with a wide-bore pipette tip. Ensure there are no air bubbles in the pipette tip. Place the wide-bore pipette tip directly on the inlet port. Slowly depress the pipette to dispense the library into the inlet port.
There can be a delay between depressing the pipette and the library dispensing from the pipette tip.
Dispense the library slowly, allowing the library to dispense from the pipette tip before depressing the pipette further.It is important to dispense the library slowly to prevent air being introduced onto the flow cell.
Note: The DNA library loaded in this step is viscous and may not readily flow through the inlet port into the flow cell. In this case, we recommend applying negative pressure in the flow cell as explained in the steps below.
-
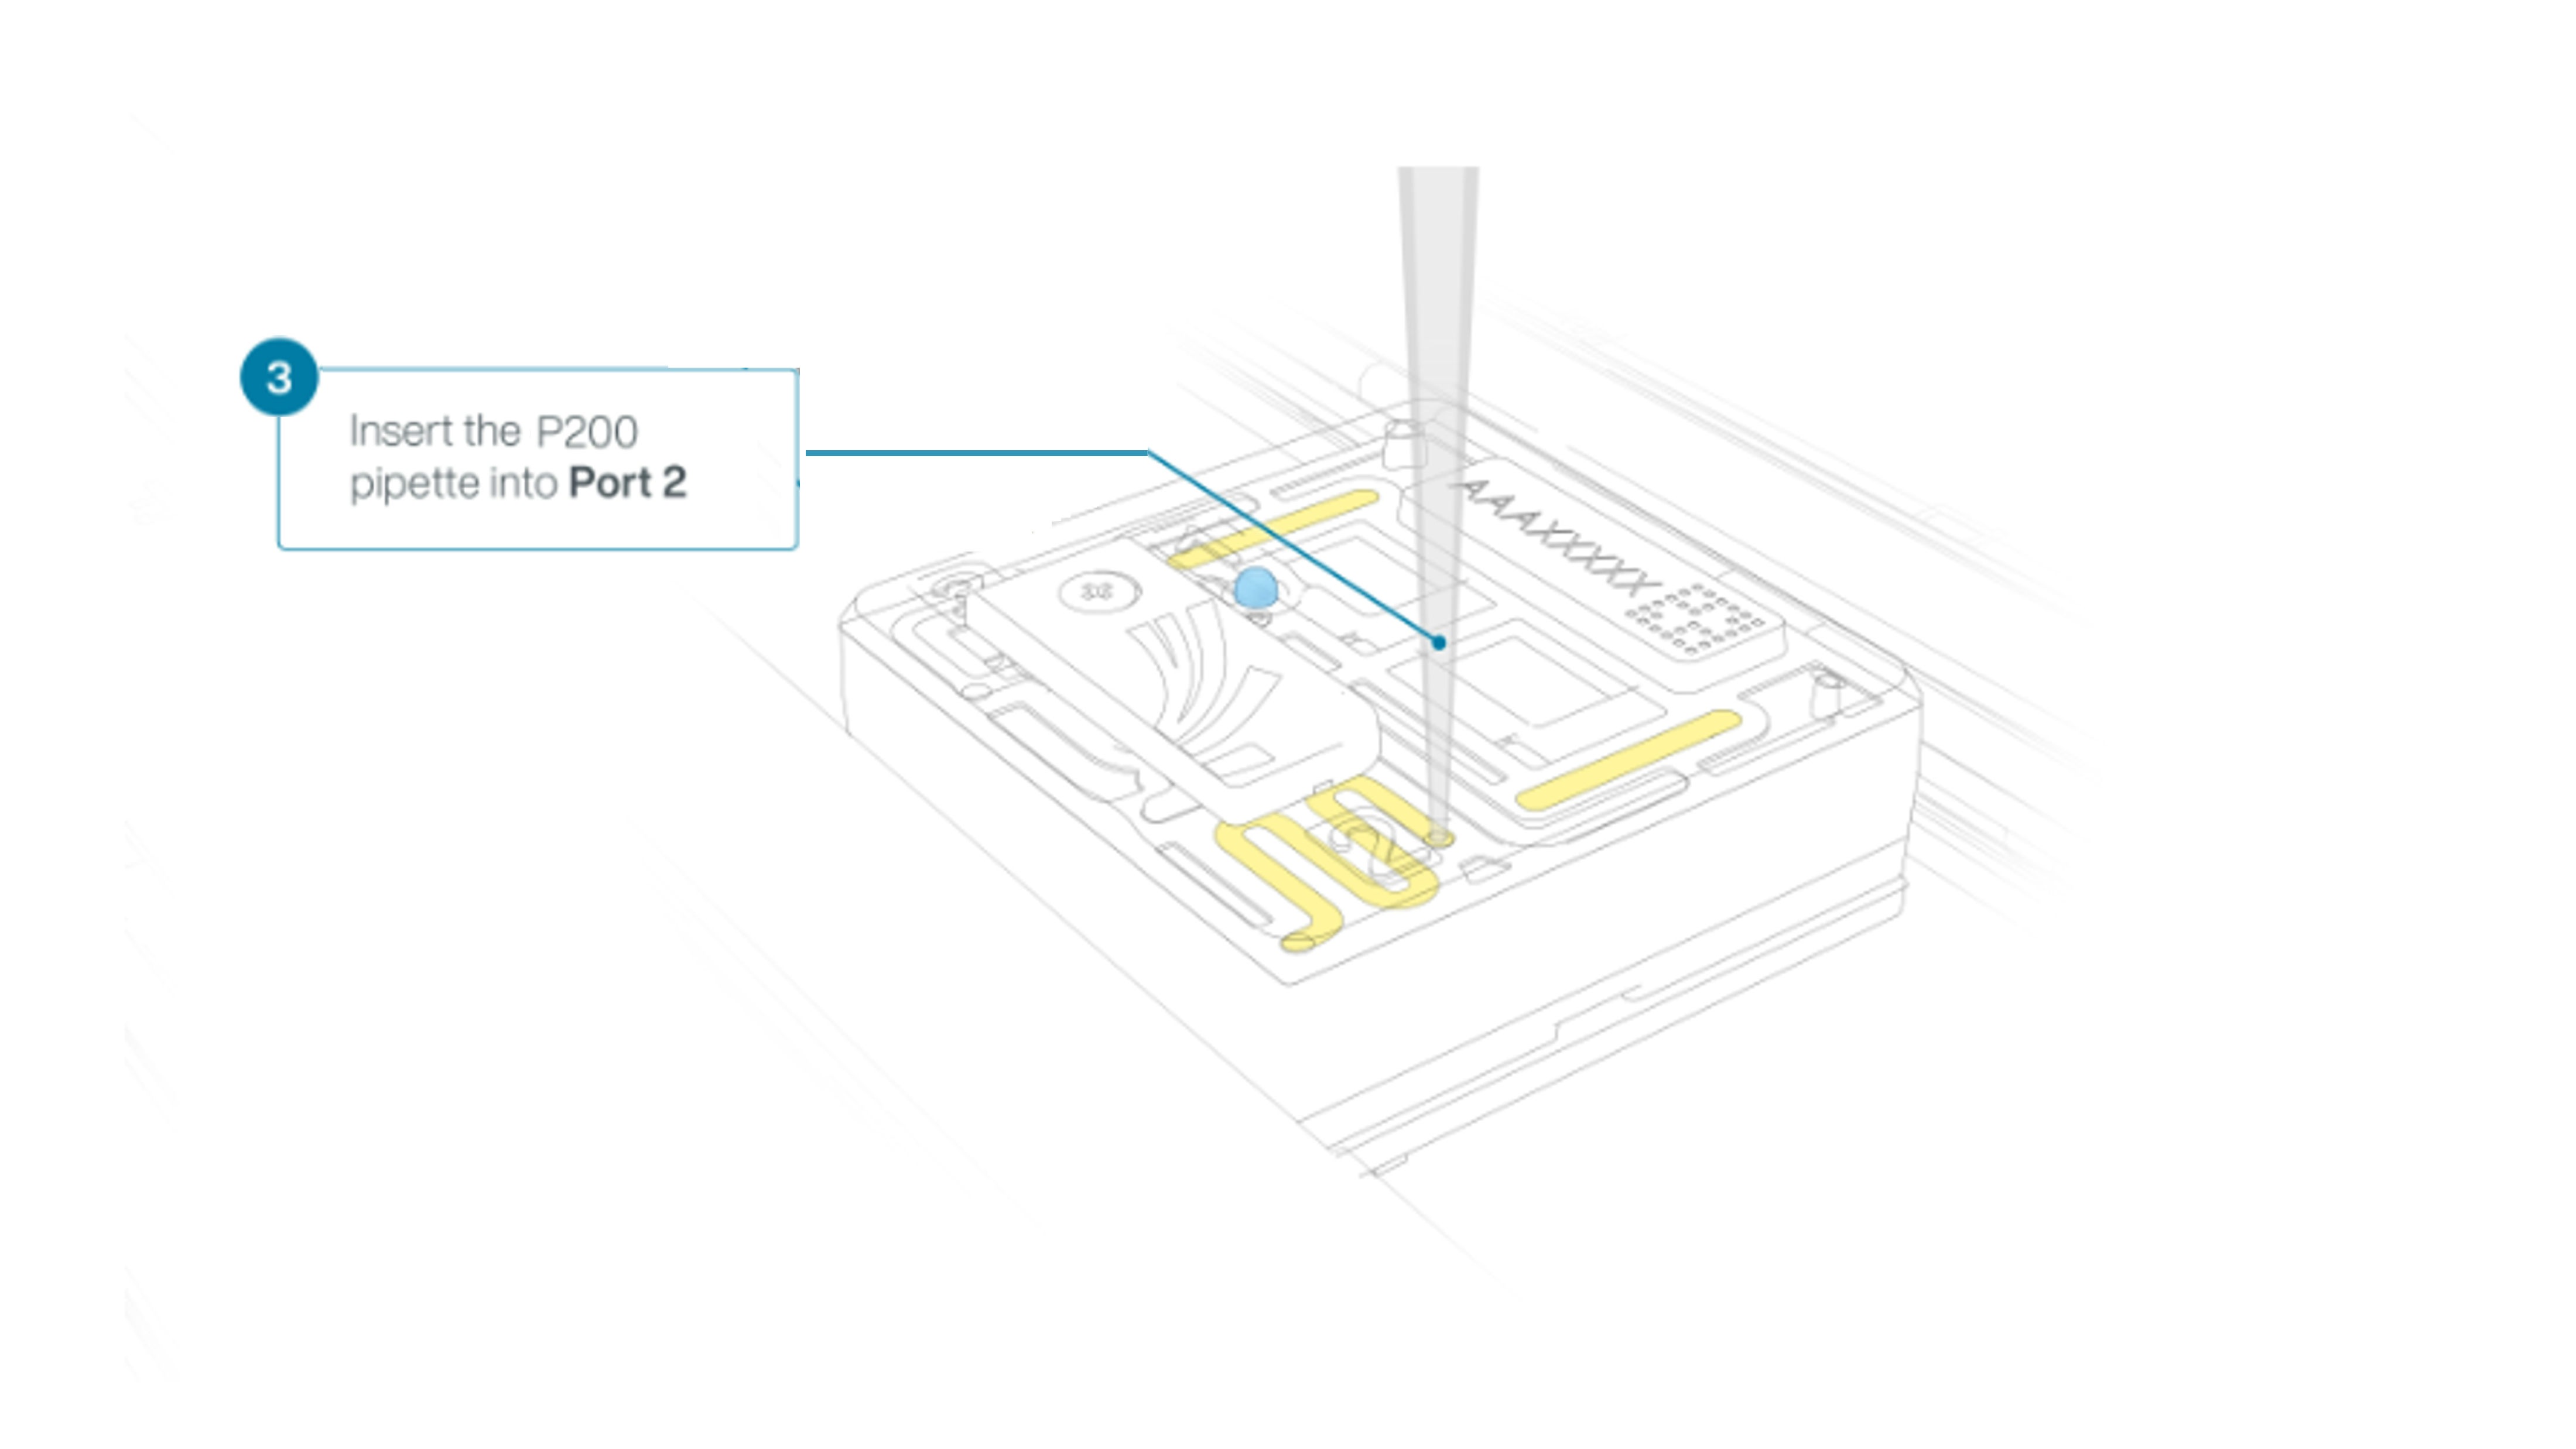
Using a P200 pipette, set the pipette to 50 µl and insert the tip into Port 2.
-
Very slowly turn the wheel of the pipette to pull the DNA library into the inlet port. Closely watch the DNA library on the inlet port and completely remove the pipette as soon as the library starts to be pulled into the port.
This step is required if the DNA library has not been fully absorbed into the inlet port.
Note: Take care to not apply too much negative pressure too quickly to avoid bringing air bubbles into the flow cell. Air bubbles will cause irreversible damage to the flow cell.

-
Close the valve to seal the inlet port.

-
If the light shield has been removed from the flow cell, install the light shield as follows:
- Align the inlet port cut out of the light shield with the inlet port cover on the flow cell. The leading edge of the light shield should sit above the flow cell ID.
- Firmly press the light shield around the inlet port cover. The inlet port clip will click into place underneath the inlet port cover.

-
Once the flow cell is reloaded, resume the sequencing run on MinKNOW and trigger a pore scan.
To resume sequencing run, navigate to the Experiments page, click 'Resume' and select flow cell position.
To manually trigger a channel scan, click 'Start pore scan' and select flow cell position.
For further information, please see the MinKNOW protocol.
Resume run:


Pore scan:


