- Materials
-
- Flush Buffer (FB)
- Flush Tether (FLT)
- Consumables
-
- PromethION Flow Cell
- 1.5 ml Eppendorf DNA LoBind tubes
- 2 ml Eppendorf DNA LoBind tubes
- Equipment
-
- PromethION 2 Solo device
- PromethION sequencing device
- PromethION Flow Cell Light Shield
- P1000 pipette and tips
- P200 pipette and tips
- P20 pipette and tips
-
Thaw the Flush Tether (FLT) and Flush Buffer (FB) at room temperature before mixing the reagents by vortexing and spin down at room temperature.
-
Prepare the flow cell priming mix in a suitable vial for the number of flow cells to flush. Once combined, mix well by briefly vortexing.
Reagent Volume per flow cell Flush Tether (FLT) 30 µl Flush Buffer (FB) 1,170 µl -
For PromethION 2 Solo, load the flow cell(s) as follows:
Place the flow cell flat on the metal plate.
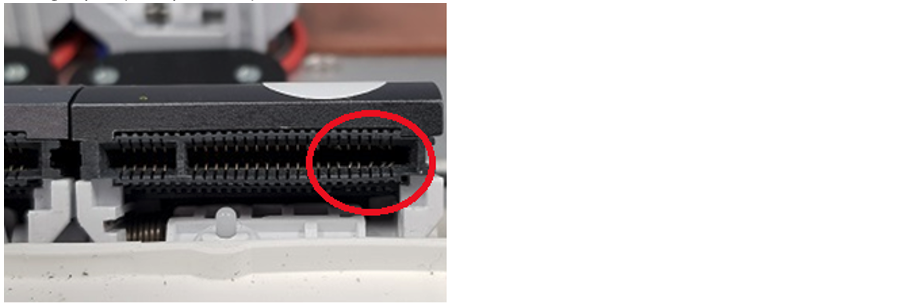
Slide the flow cell into the docking port until the gold pins or green board cannot be seen.
-
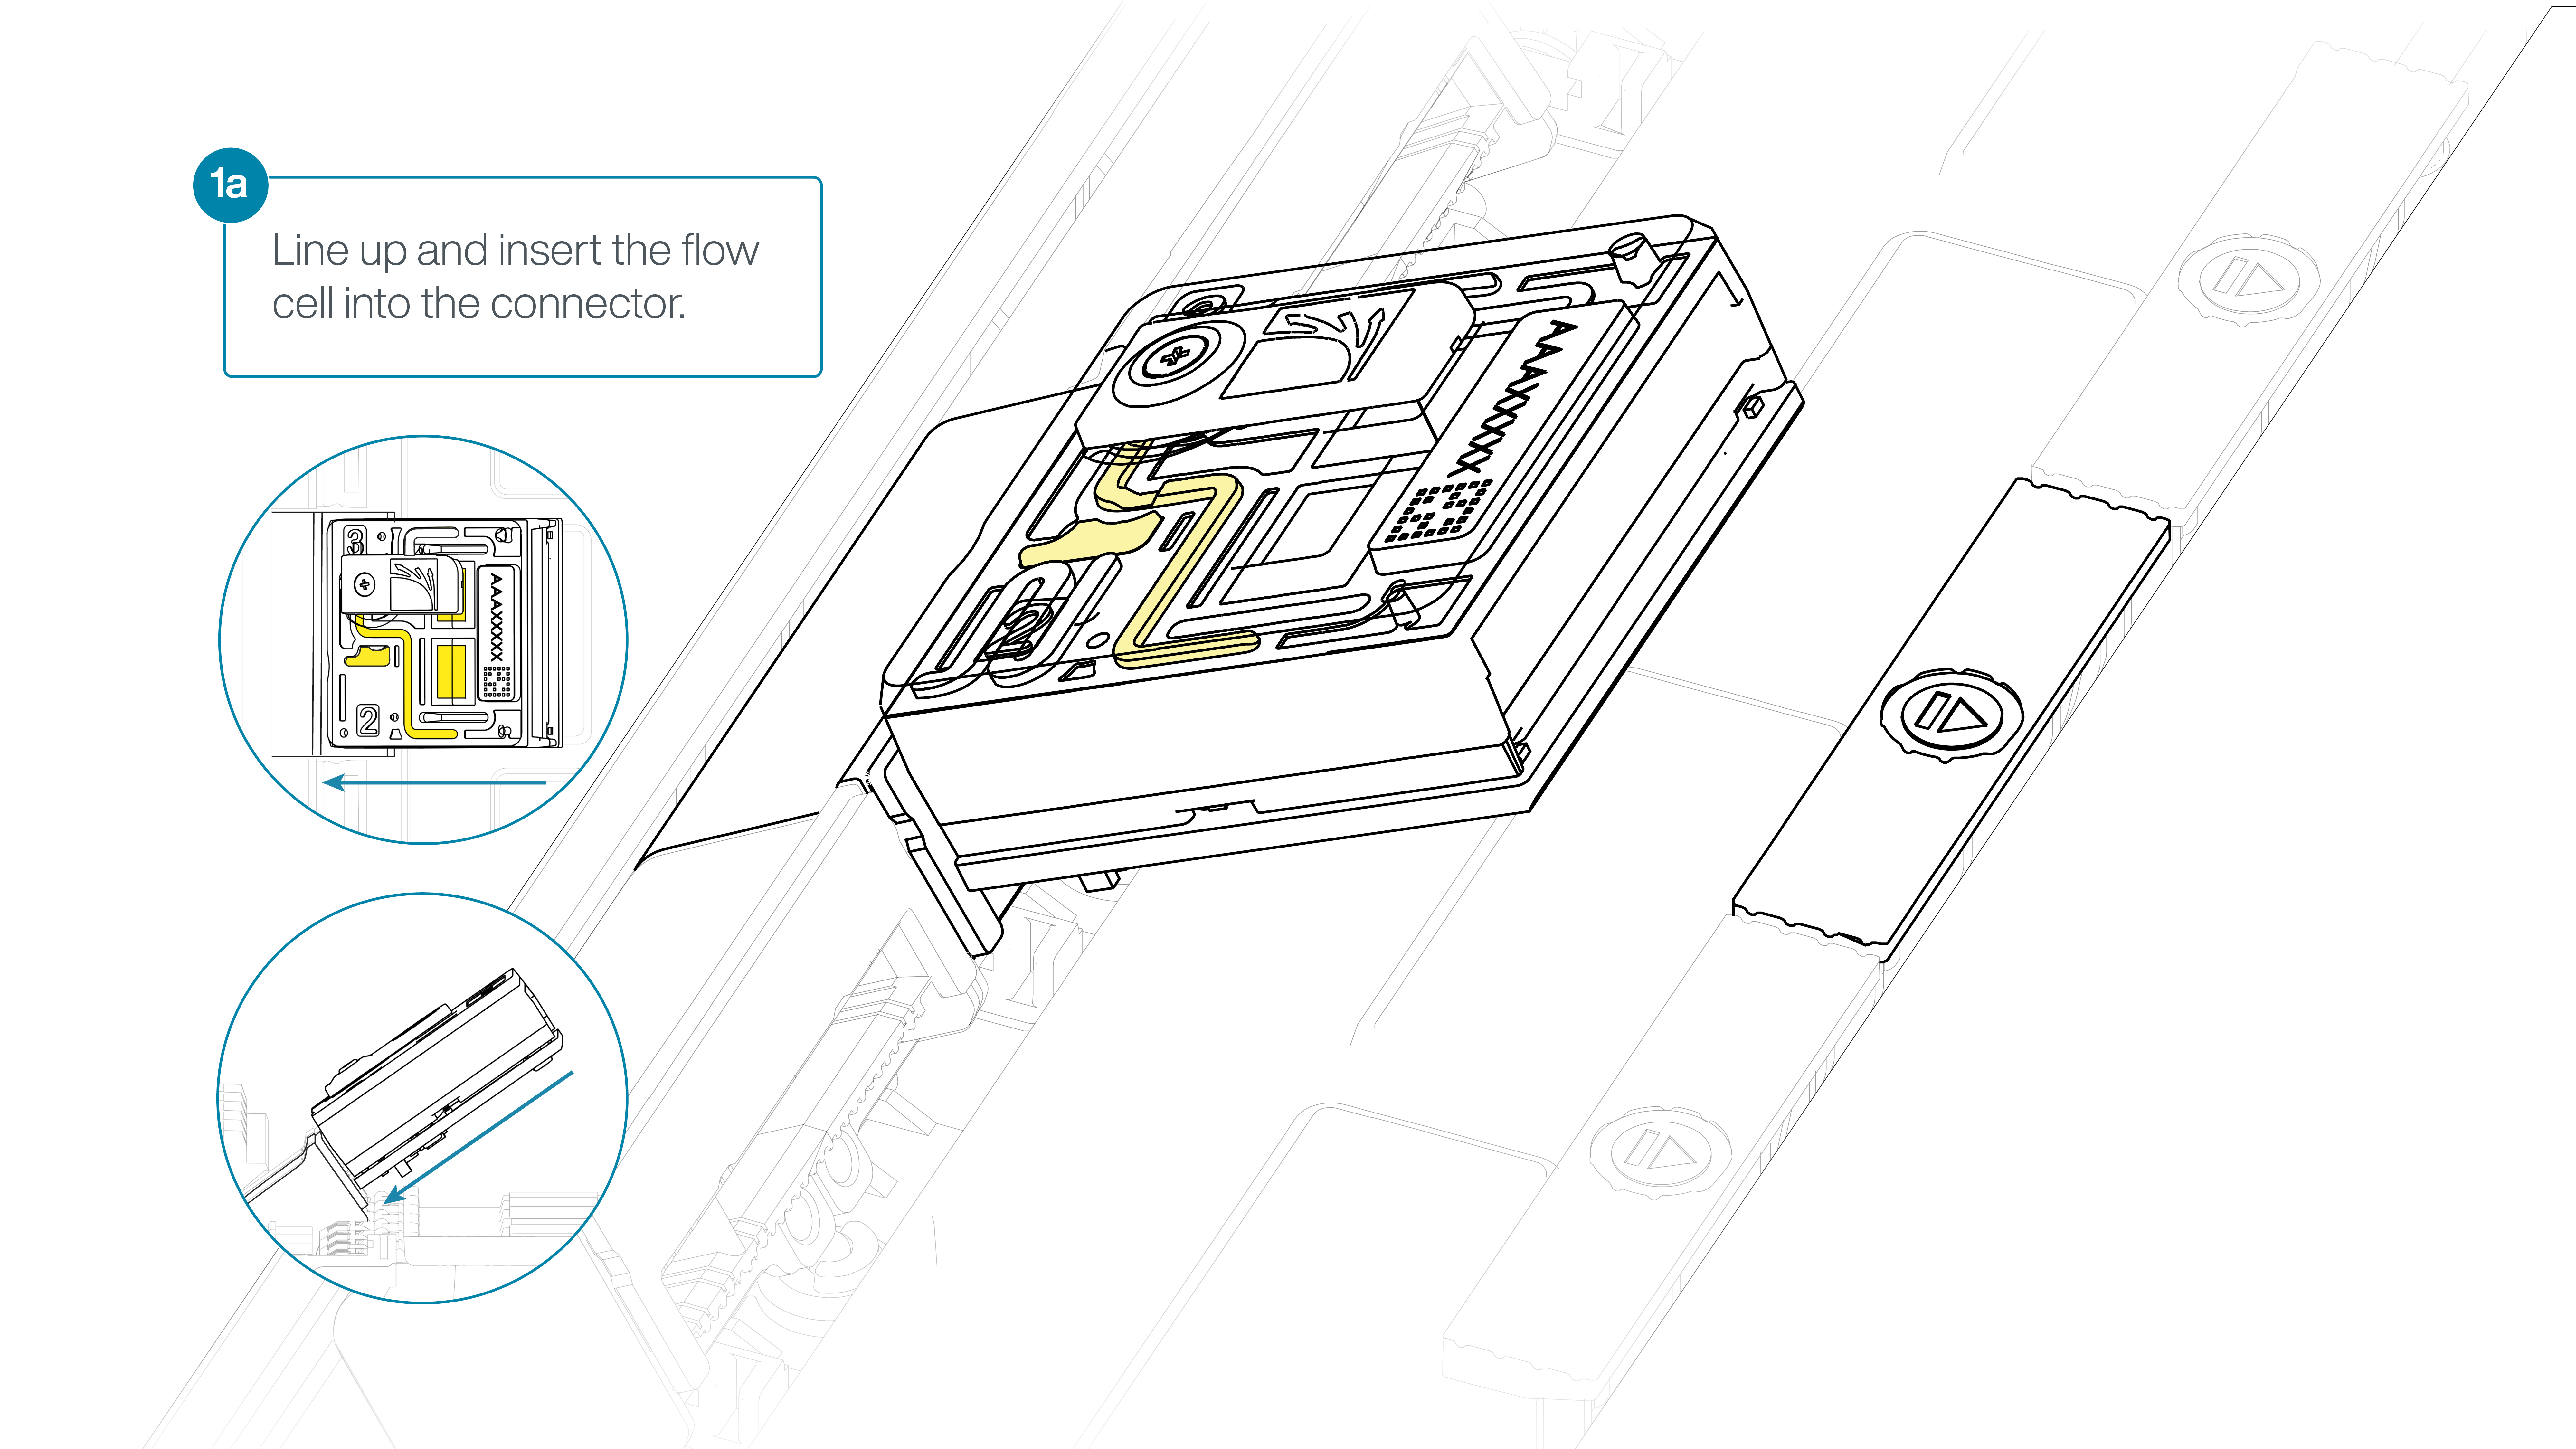
For the PromethION 24/48, load the flow cell(s) into the docking ports:
- Line up the flow cell with the connector horizontally and vertically before smoothly inserting into position.
- Press down firmly onto the flow cell and ensure the latch engages and clicks into place.
-
-
If not already completed, perform a flow cell check on all flow cells.
Please refer to the Flow Cell Check protocol for further information.
-
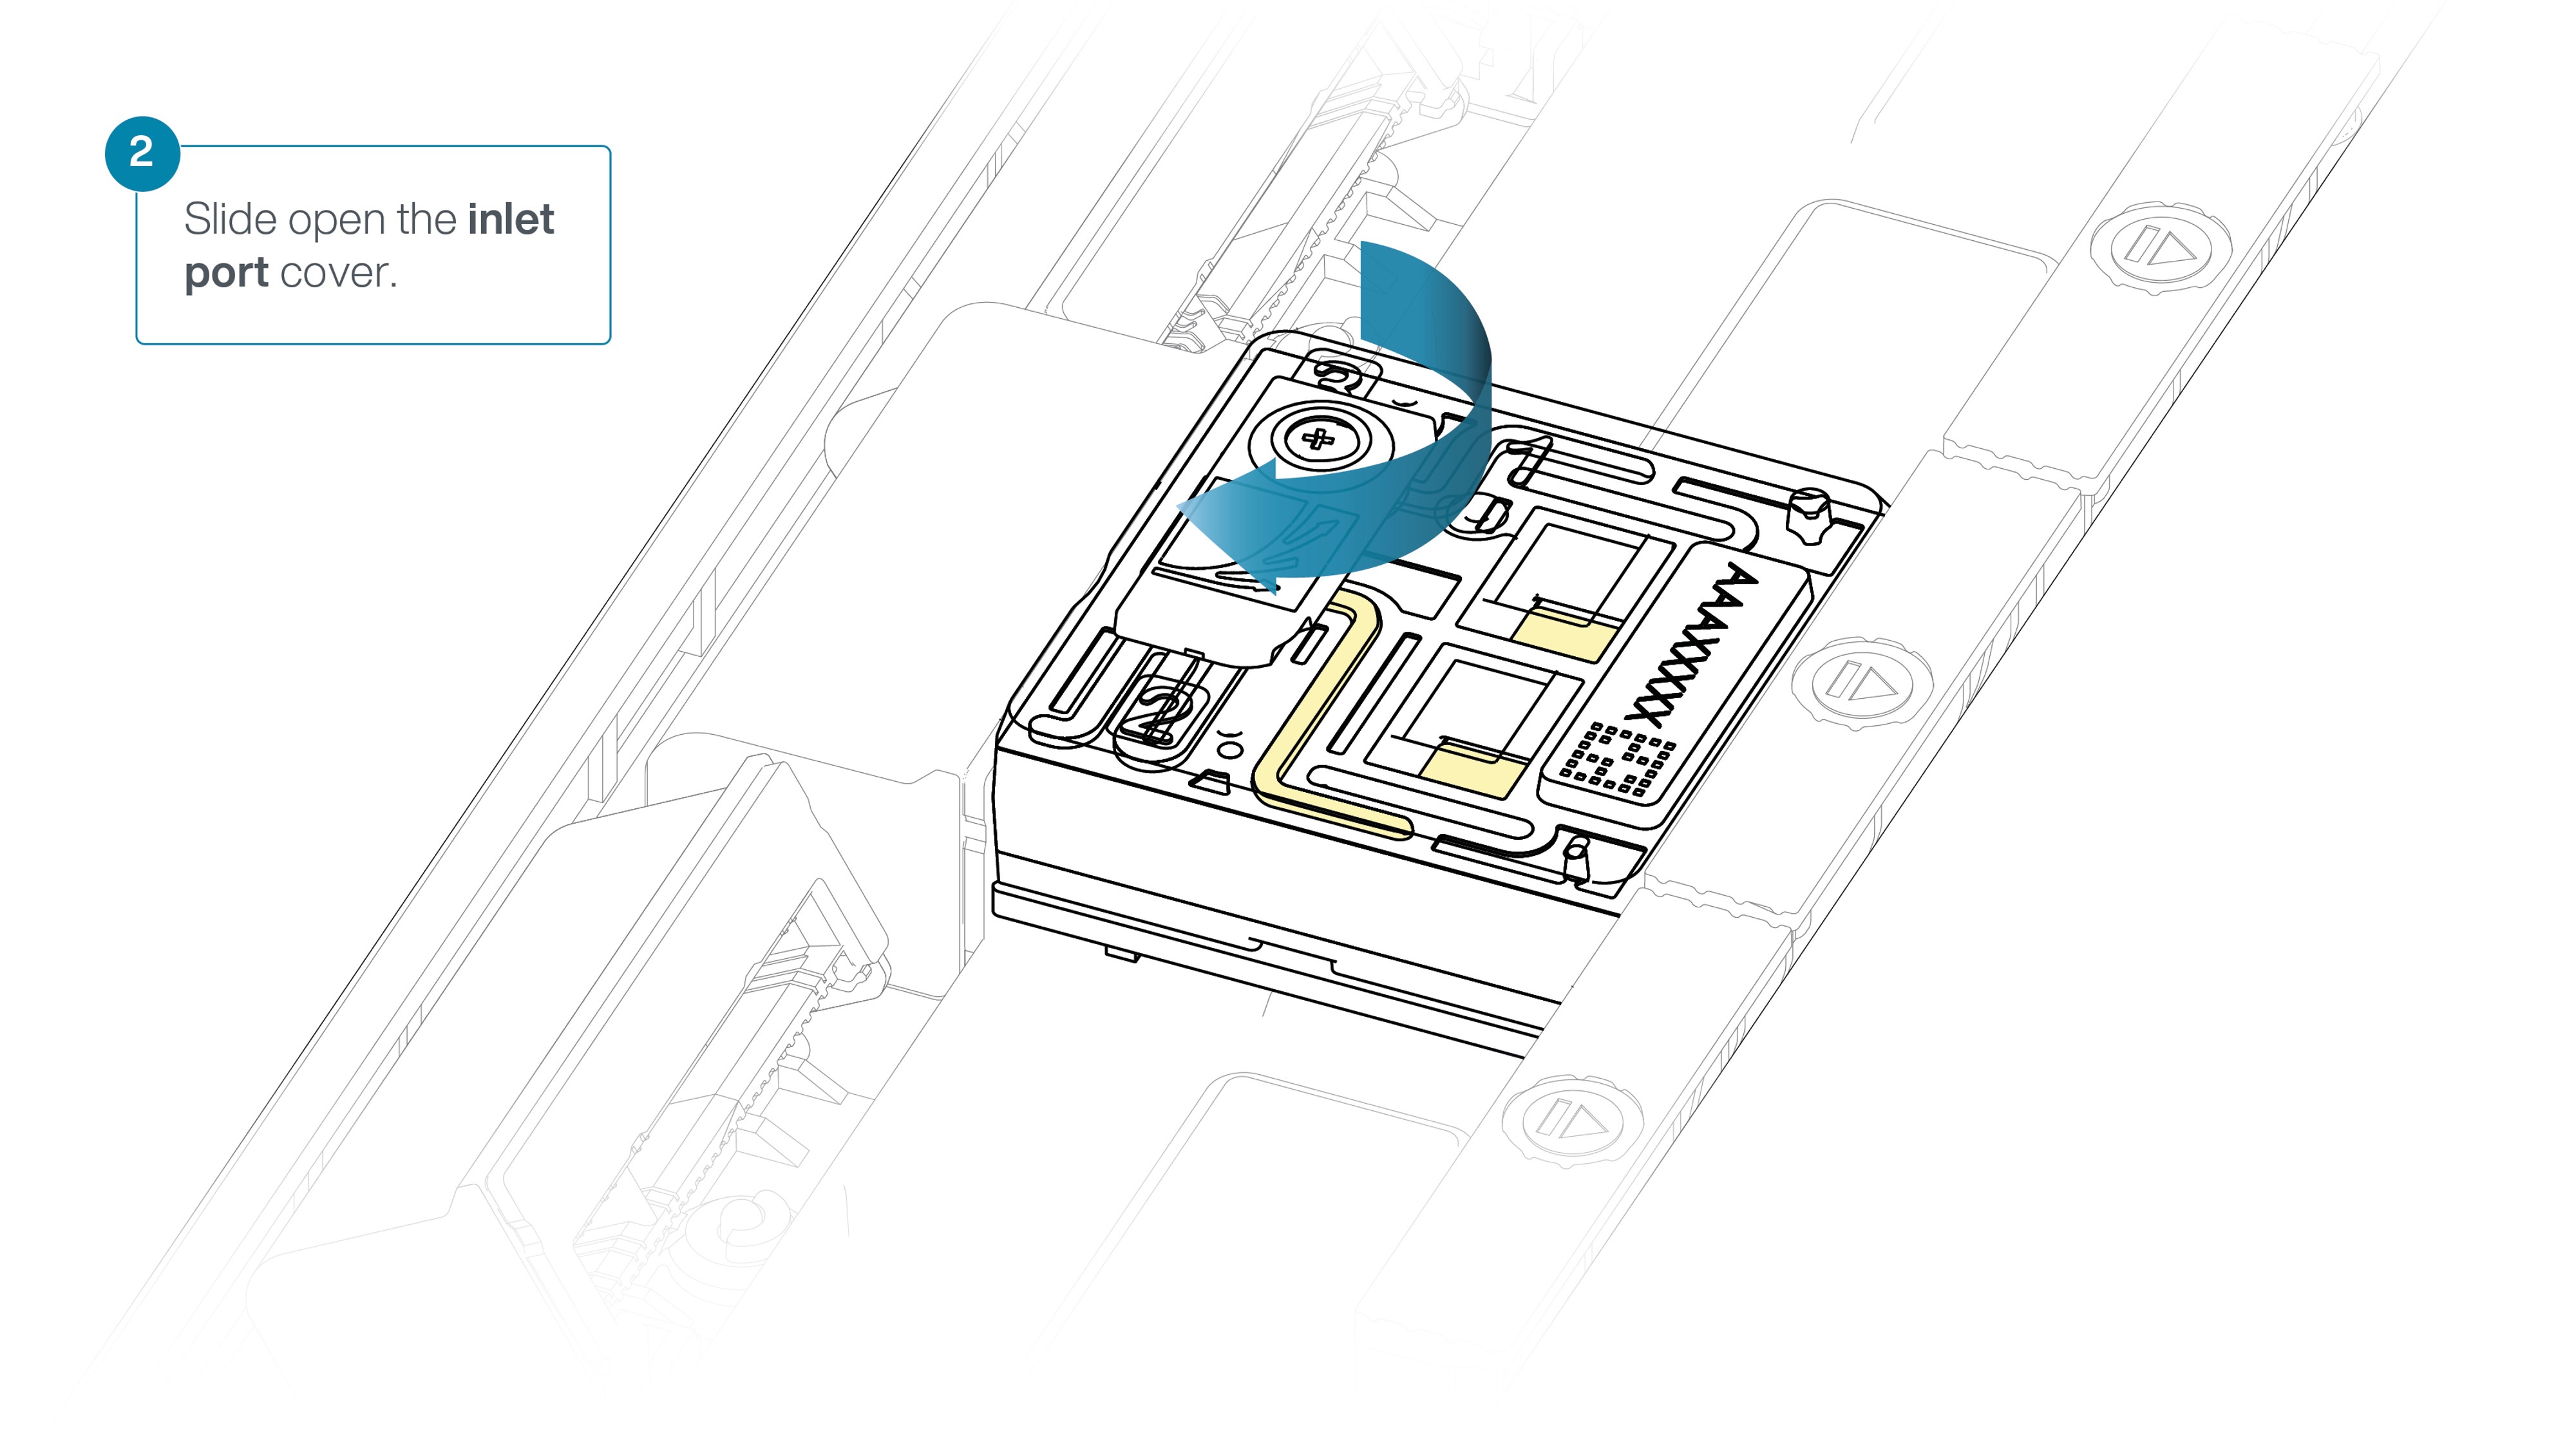
Slide the inlet port cover clockwise to open.
-
After opening the inlet port, draw back a small volume to remove any air bubbles:
- Set a P1000 pipette tip to 200 µl.
- Insert the tip into the inlet port.
- Turn the wheel until the dial shows 220-230 µl, or until you see a small volume of buffer entering the pipette tip.
-
Load 500 µl of the priming mix into the flow cell via the inlet port, avoiding the introduction of air bubbles. Wait five minutes.
-
Complete the flow cell priming by slowly loading 500 µl of the priming mix into the inlet port.
-
Mix the prepared library gently by pipetting up and down just prior to loading.
-
Using a P1000, insert the pipette tip into the inlet port and add 150 µl of library.

-
Close the valve to seal the inlet port.

-
If the light shield has been removed from the flow cell, install the light shield as follows:
- Align the inlet port cut out of the light shield with the inlet port cover on the flow cell. The leading edge of the light shield should sit above the flow cell ID.
- Firmly press the light shield around the inlet port cover. The inlet port clip will click into place underneath the inlet port cover.

-
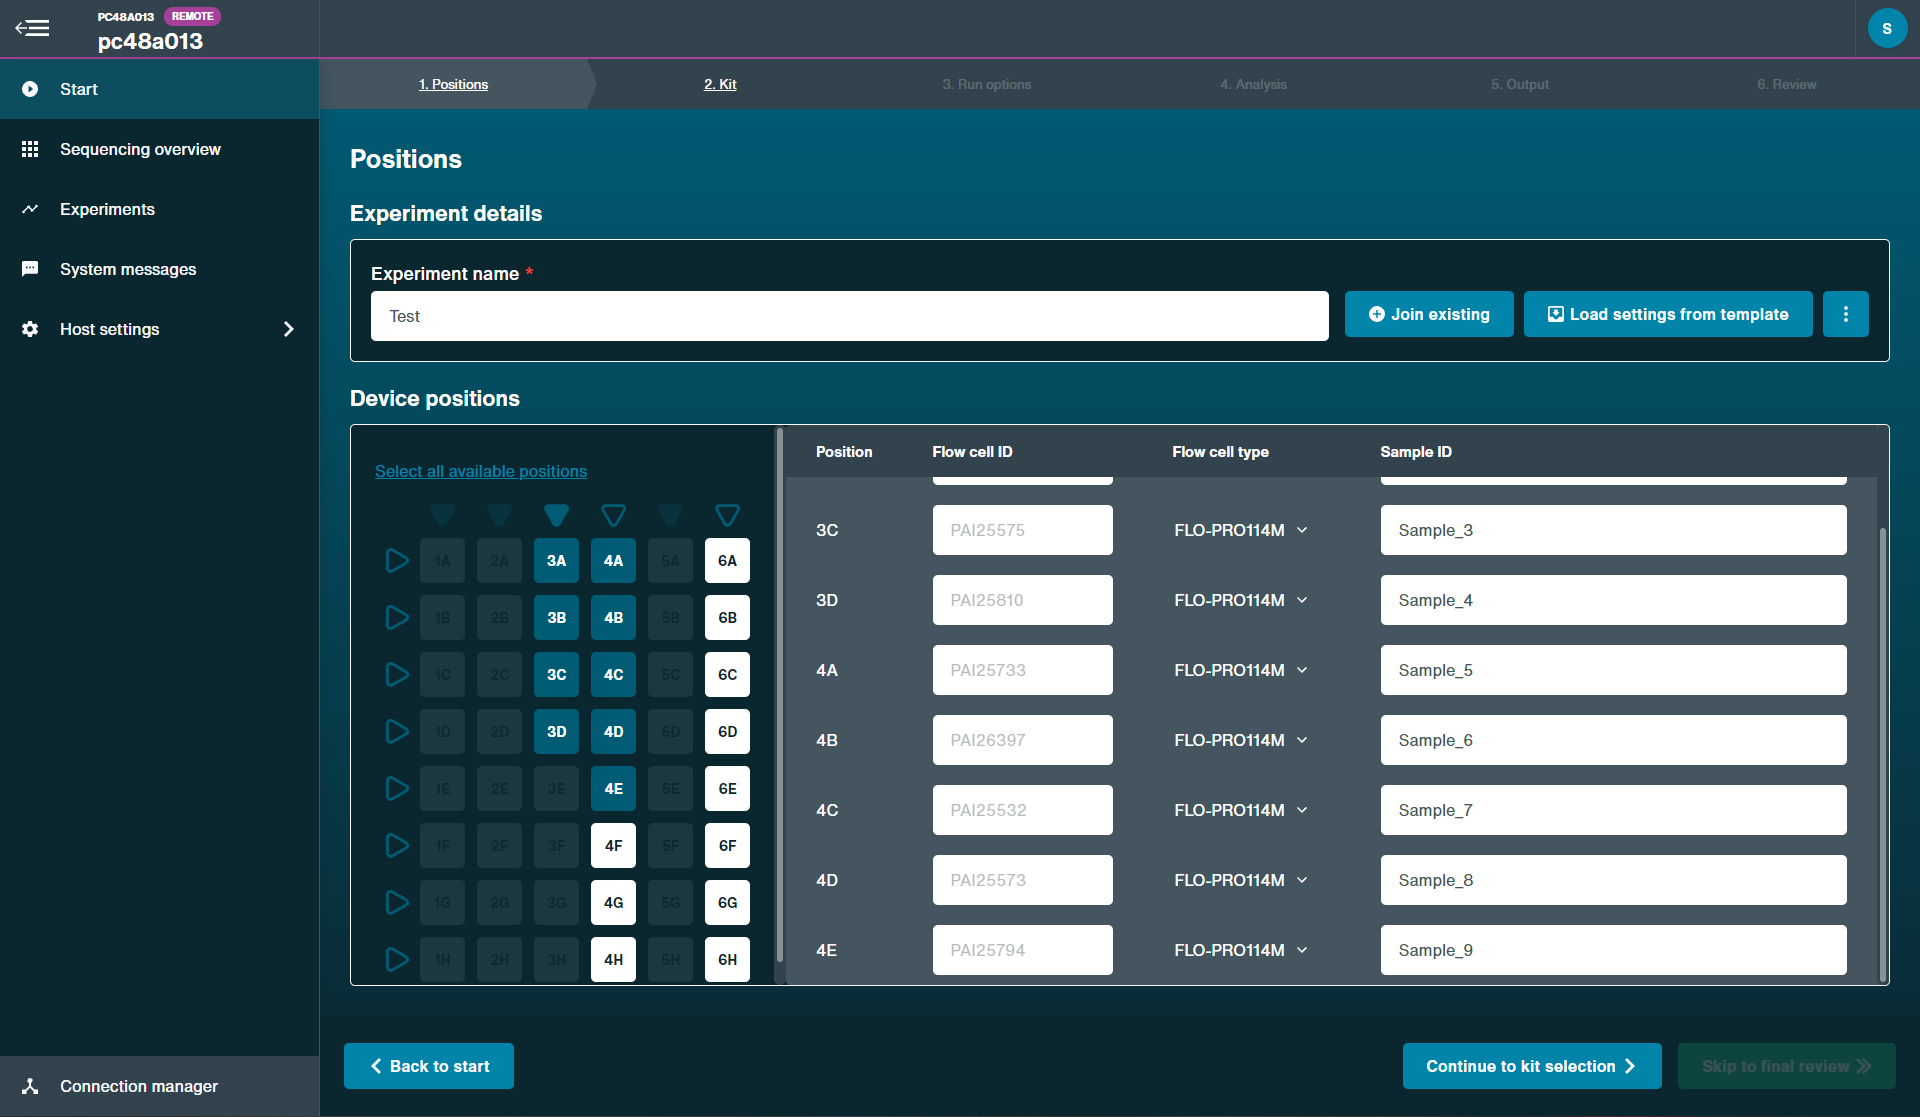
For multiple flow cell washing, use the same experiment name and identifying sample IDs for all runs to enable all flow cells to be paused simultaneously.