- Materials
-
- Rapid Barcode Plate (RB96)
- AMPure XP Beads (AXP, or SPRI)
- Elution Buffer from the Oxford Nanopore kit (EB)
- Rapid Adapter F (RAP F)
- Consumables
-
- Nuclease-free water (e.g. ThermoFisher, cat # AM9937)
- Freshly prepared 80% ethanol in nuclease-free water
- Arvensis B-Frame BIOCOMPOSITE 96 Well PCR Plate Fully Skirted Low Profile 0.2 ml wells
- 96-well 0.8 ml MIDI plate (we recommend Abgene™ 96 Well 0.8 ml Polypropylene Deepwell Storage Plate: ThermoFisher, Cat # AB0859)
- PCR plate seals
- Qubit™ Assay Tubes (Invitrogen, Q32856)
- Qubit dsDNA HS Assay Kit (Invitrogen, Q32851)
- Equipment
-
- Opentrons P300 8-Channel Pipette (GEN2) and tips
- Opentrons P20 8-Channel Pipette (GEN2) and tips
- Ice bucket with ice
- Timer
- Qubit fluorometer (or equivalent)
- Thermal cycler
- Opentrons OT-2 robot
- 1x Opentrons Magnetic Module (GEN2)
- Opentrons Thermocycler Module
-
Reagent quantities:
Reagent X96 samples X48 samples X24 samples Nuclease-free water 1200 µl 640 µl 400 µl SPRI beads 1200 µl 600 µl 300 µl 80% ethanol 2000 µl 1000 µl 500 µl Elution Buffer (EB) 66 µl 44 µl 22 µl Rapid adapter F (RAP-F) 6 µl 4 µl 2 µl Note: Dead volumes are included.
-
Opentrons setup:
-
Download and install the Opentrons App for OT-2 robot from Opentrons official website on your PC.
Follow the link to the get the Opentrons App.
-
Attach P300 8-channel GEN2 pipette and P20 8-channel GEN2 pipette to the Opentrons following the vendor’s instruction.
Follow the link to the manufacturers instuctions on Getting started: Attaching Opentrons Pipettes.
-
Place the thermocycler and magnet modules and connect the USB ports to the Opentrons.
Follow the link to the manufacturers instuctions for the Opentrons Thermocycler manual.
-
Connect the Opentrons USB port to the PC you will be using.
Follow the link to the manufacturers instuctions for the Get started: connect to your OT-2 over USB.
-
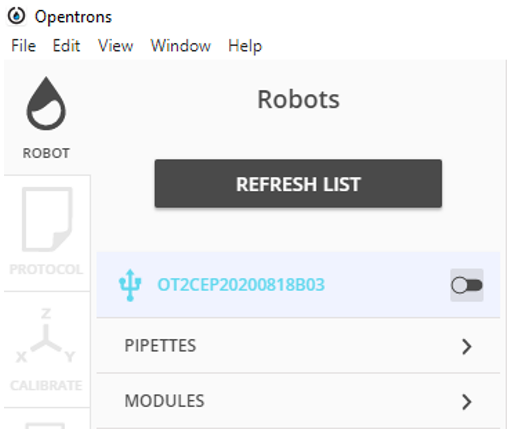
Connect the Opentrons to the software by pressing 'TRY AGAIN' or 'REFRESH LIST' and pressing on the name of the Opentrons you are using.
-
Run setup:
For reference, the vendors instructions for file loading and start-up are available following the link to Get started: Run your protocol.
-
Turn on the Opentrons, the thermocycler, and the magnet modules.
-
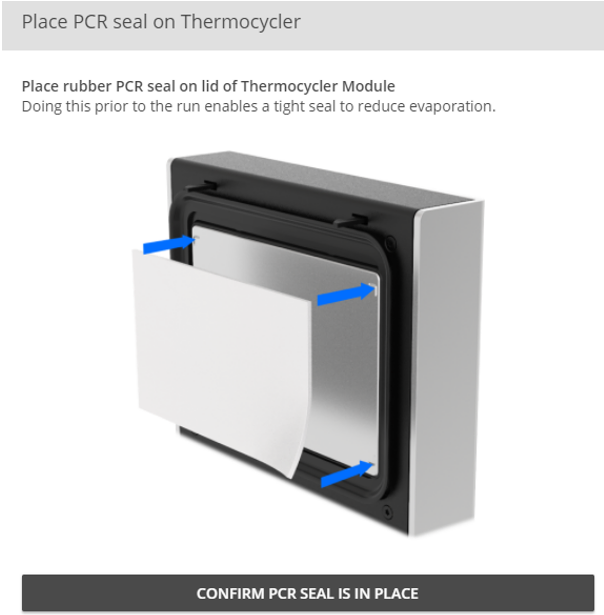
Place the Rubber PCR Seal on the thermocycler lid and clean it with ethanol.
Note: Rubber seal does not need to be replaced each use. Opentrons suggest changing the rubber seal every 20 uses.
If reusing the rubber seal, ensure it is cleaned with ethanol between each use. -
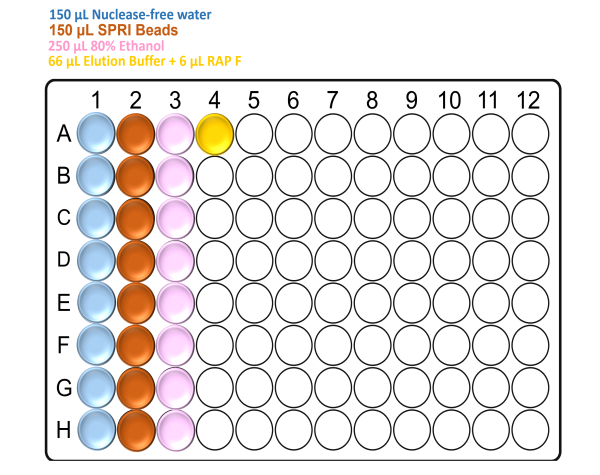
Prepare the deep well plate with the reagents according to the following figure:
Note: Make sure to mix the SPRI beads well by vortexing before the addition.
For x24 samples:

For x48 samples:

For x96 samples:
-
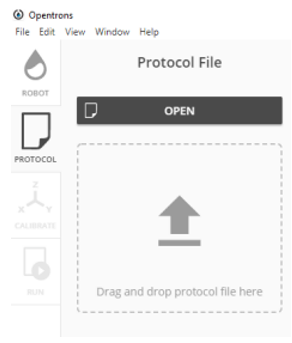
Load the scripts to match the number of samples to be processed and the columns to be used from the RBK plate by dragging and dropping the script file or using the path for the script file.
Scripts are available for x24, x48 and x96 samples.
-
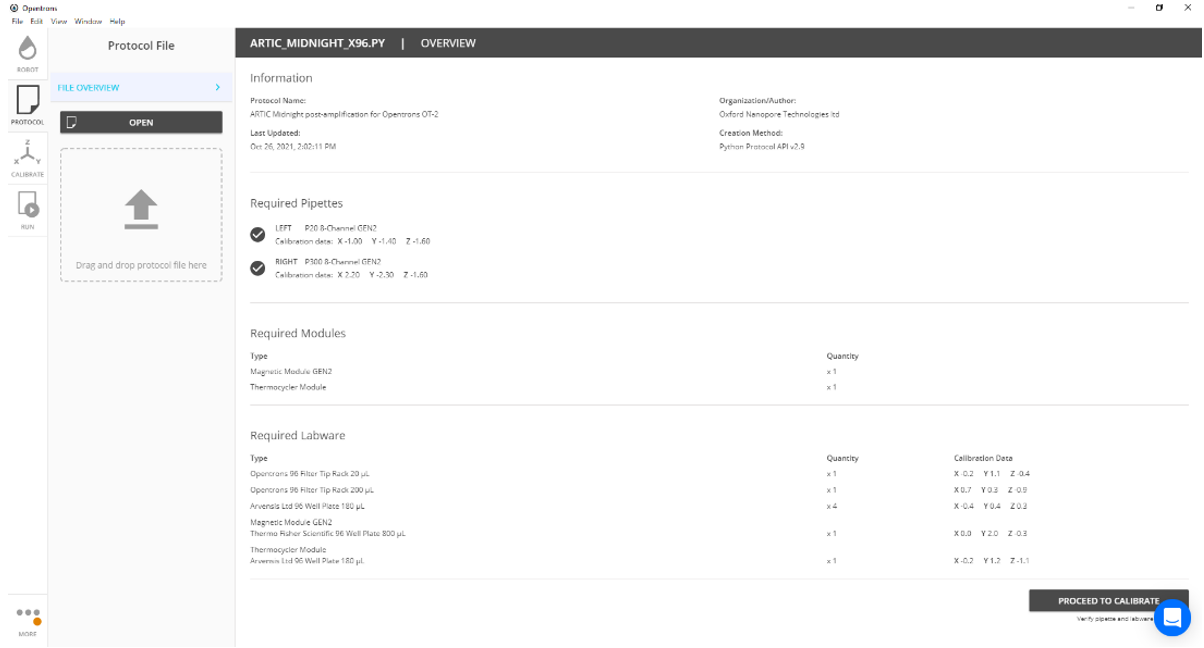
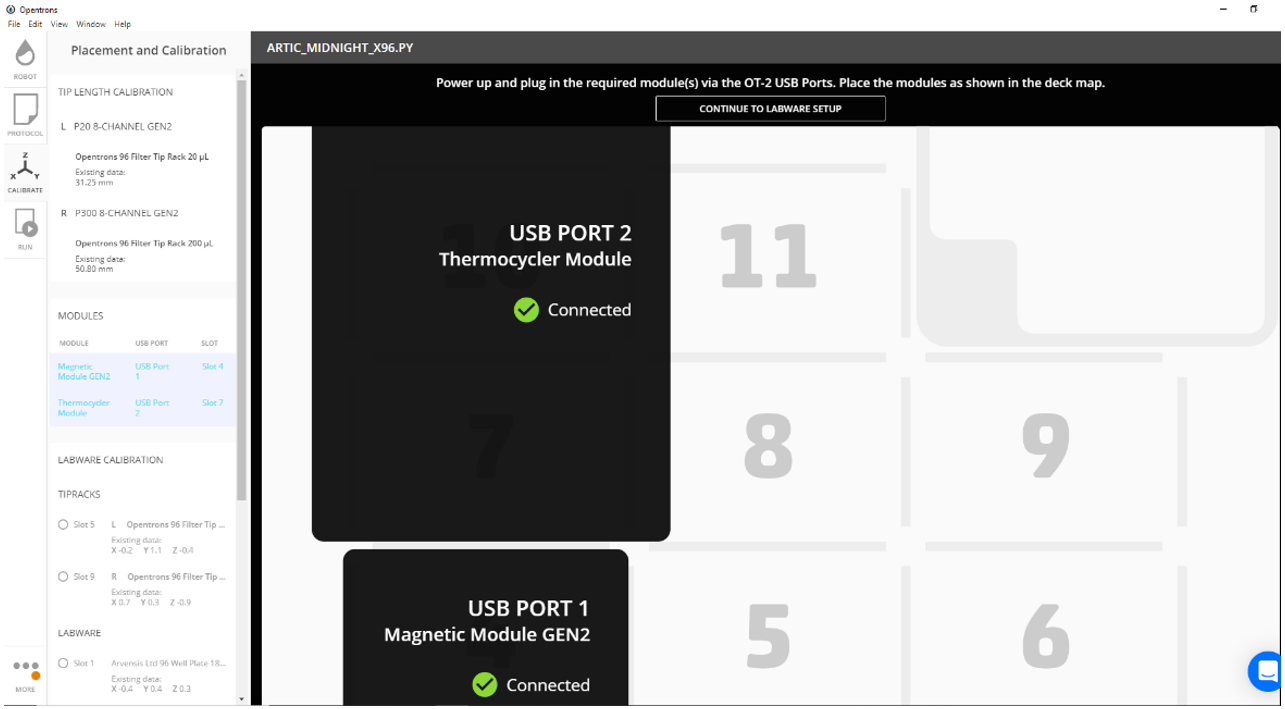
Select 'Proceed to calibration'.
-
Ensure the thermocycler and magnet modules are connected. Proceed to labware setup.
-
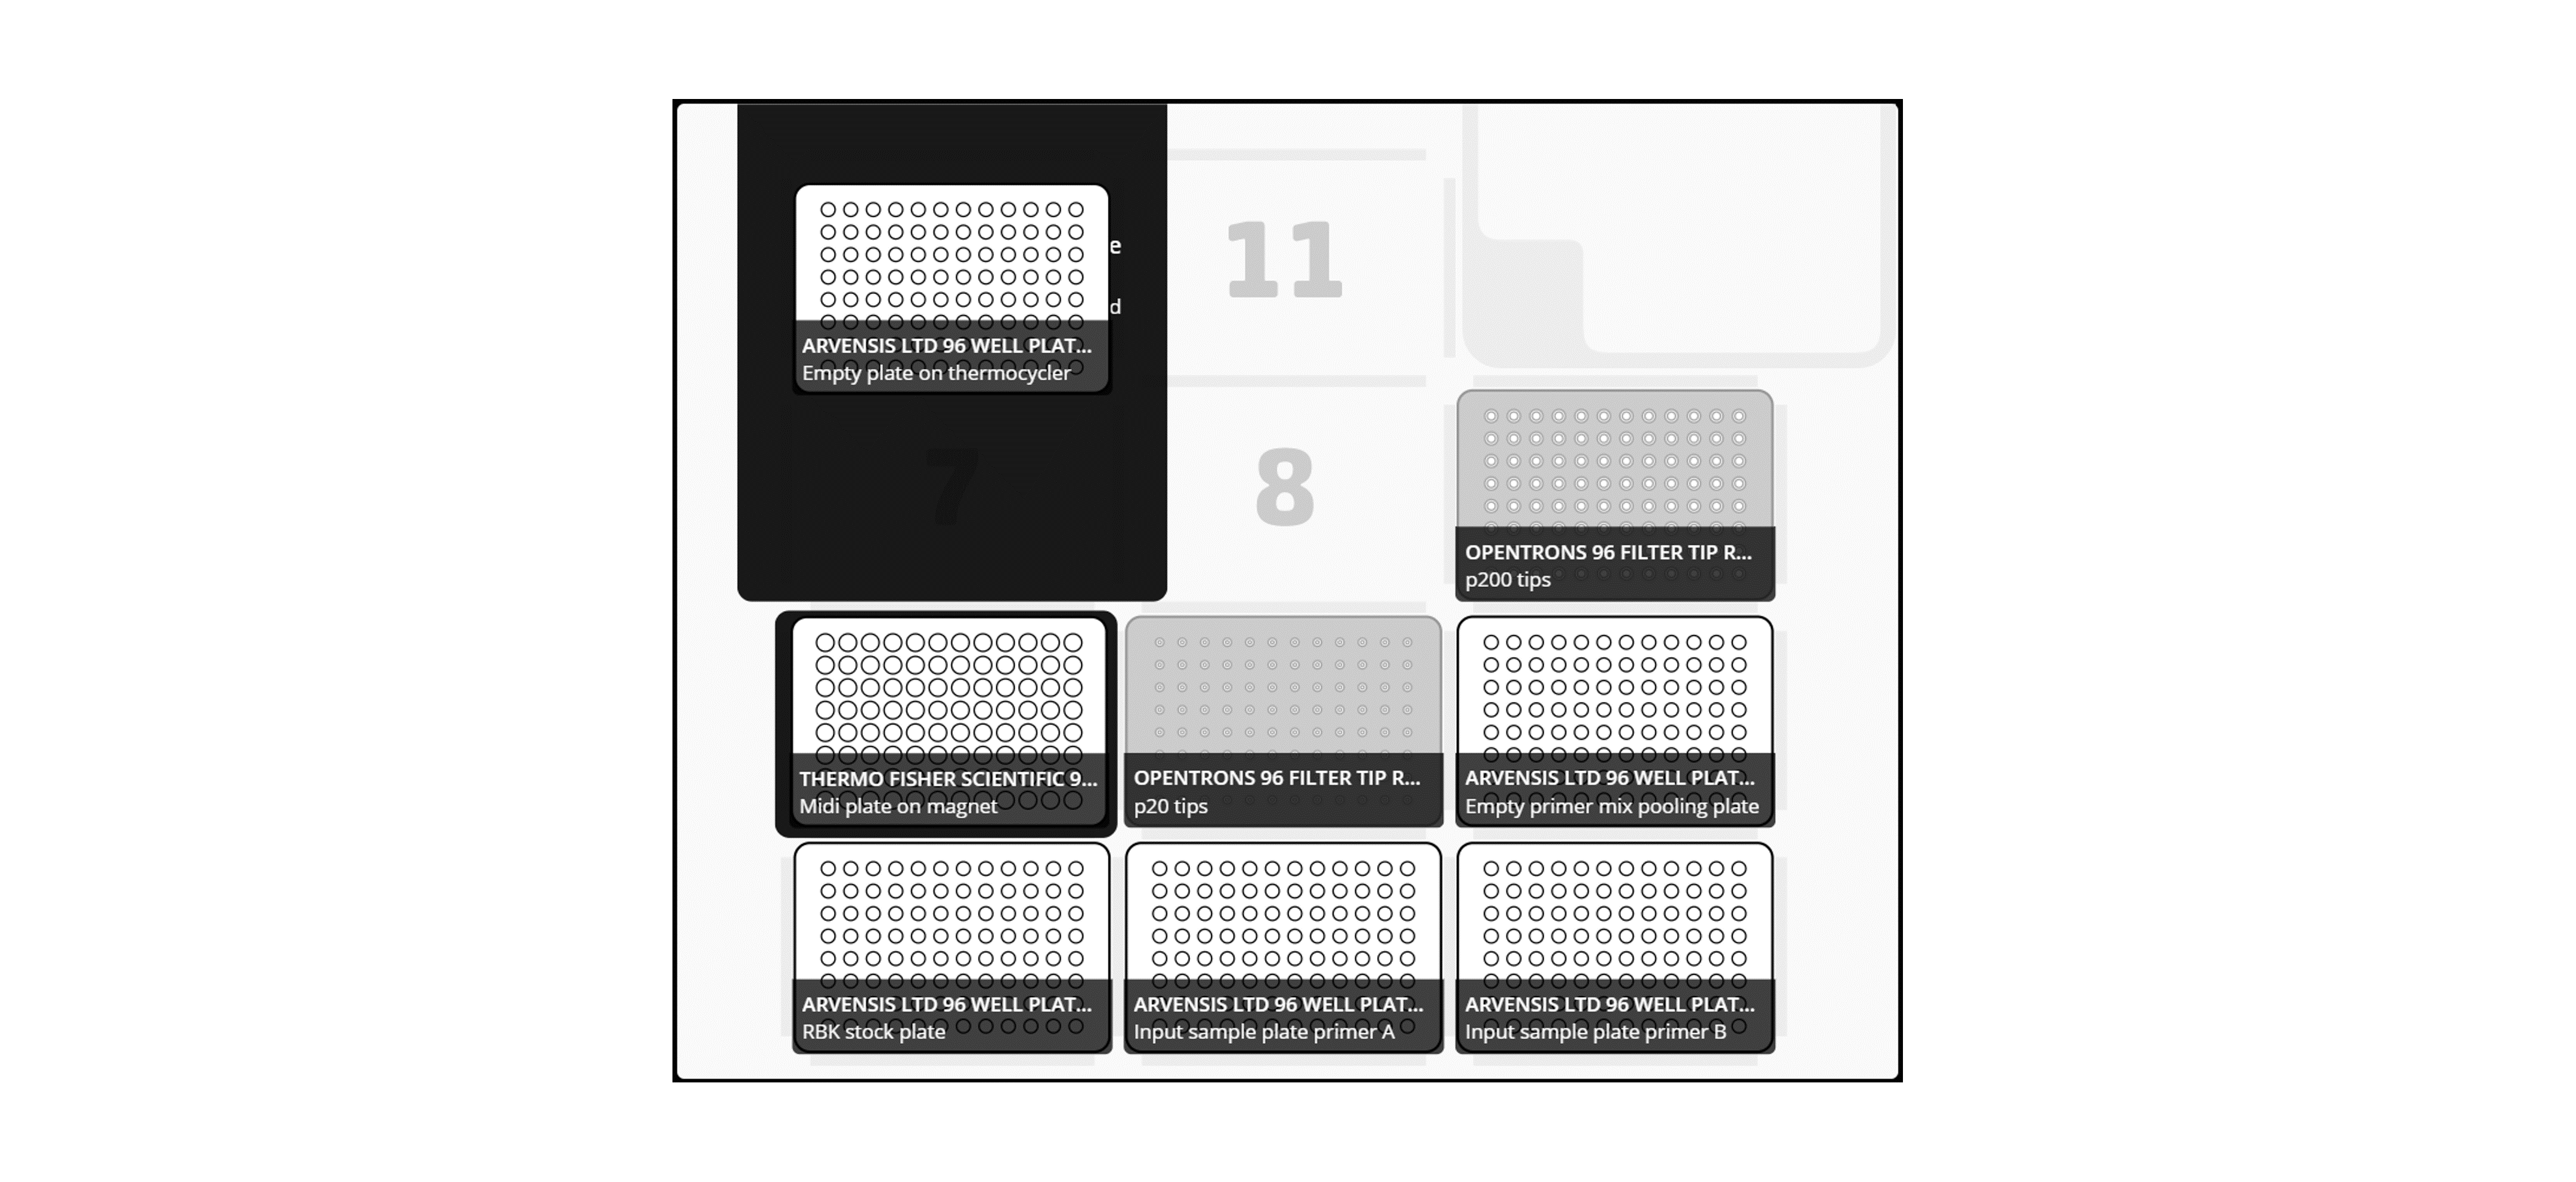
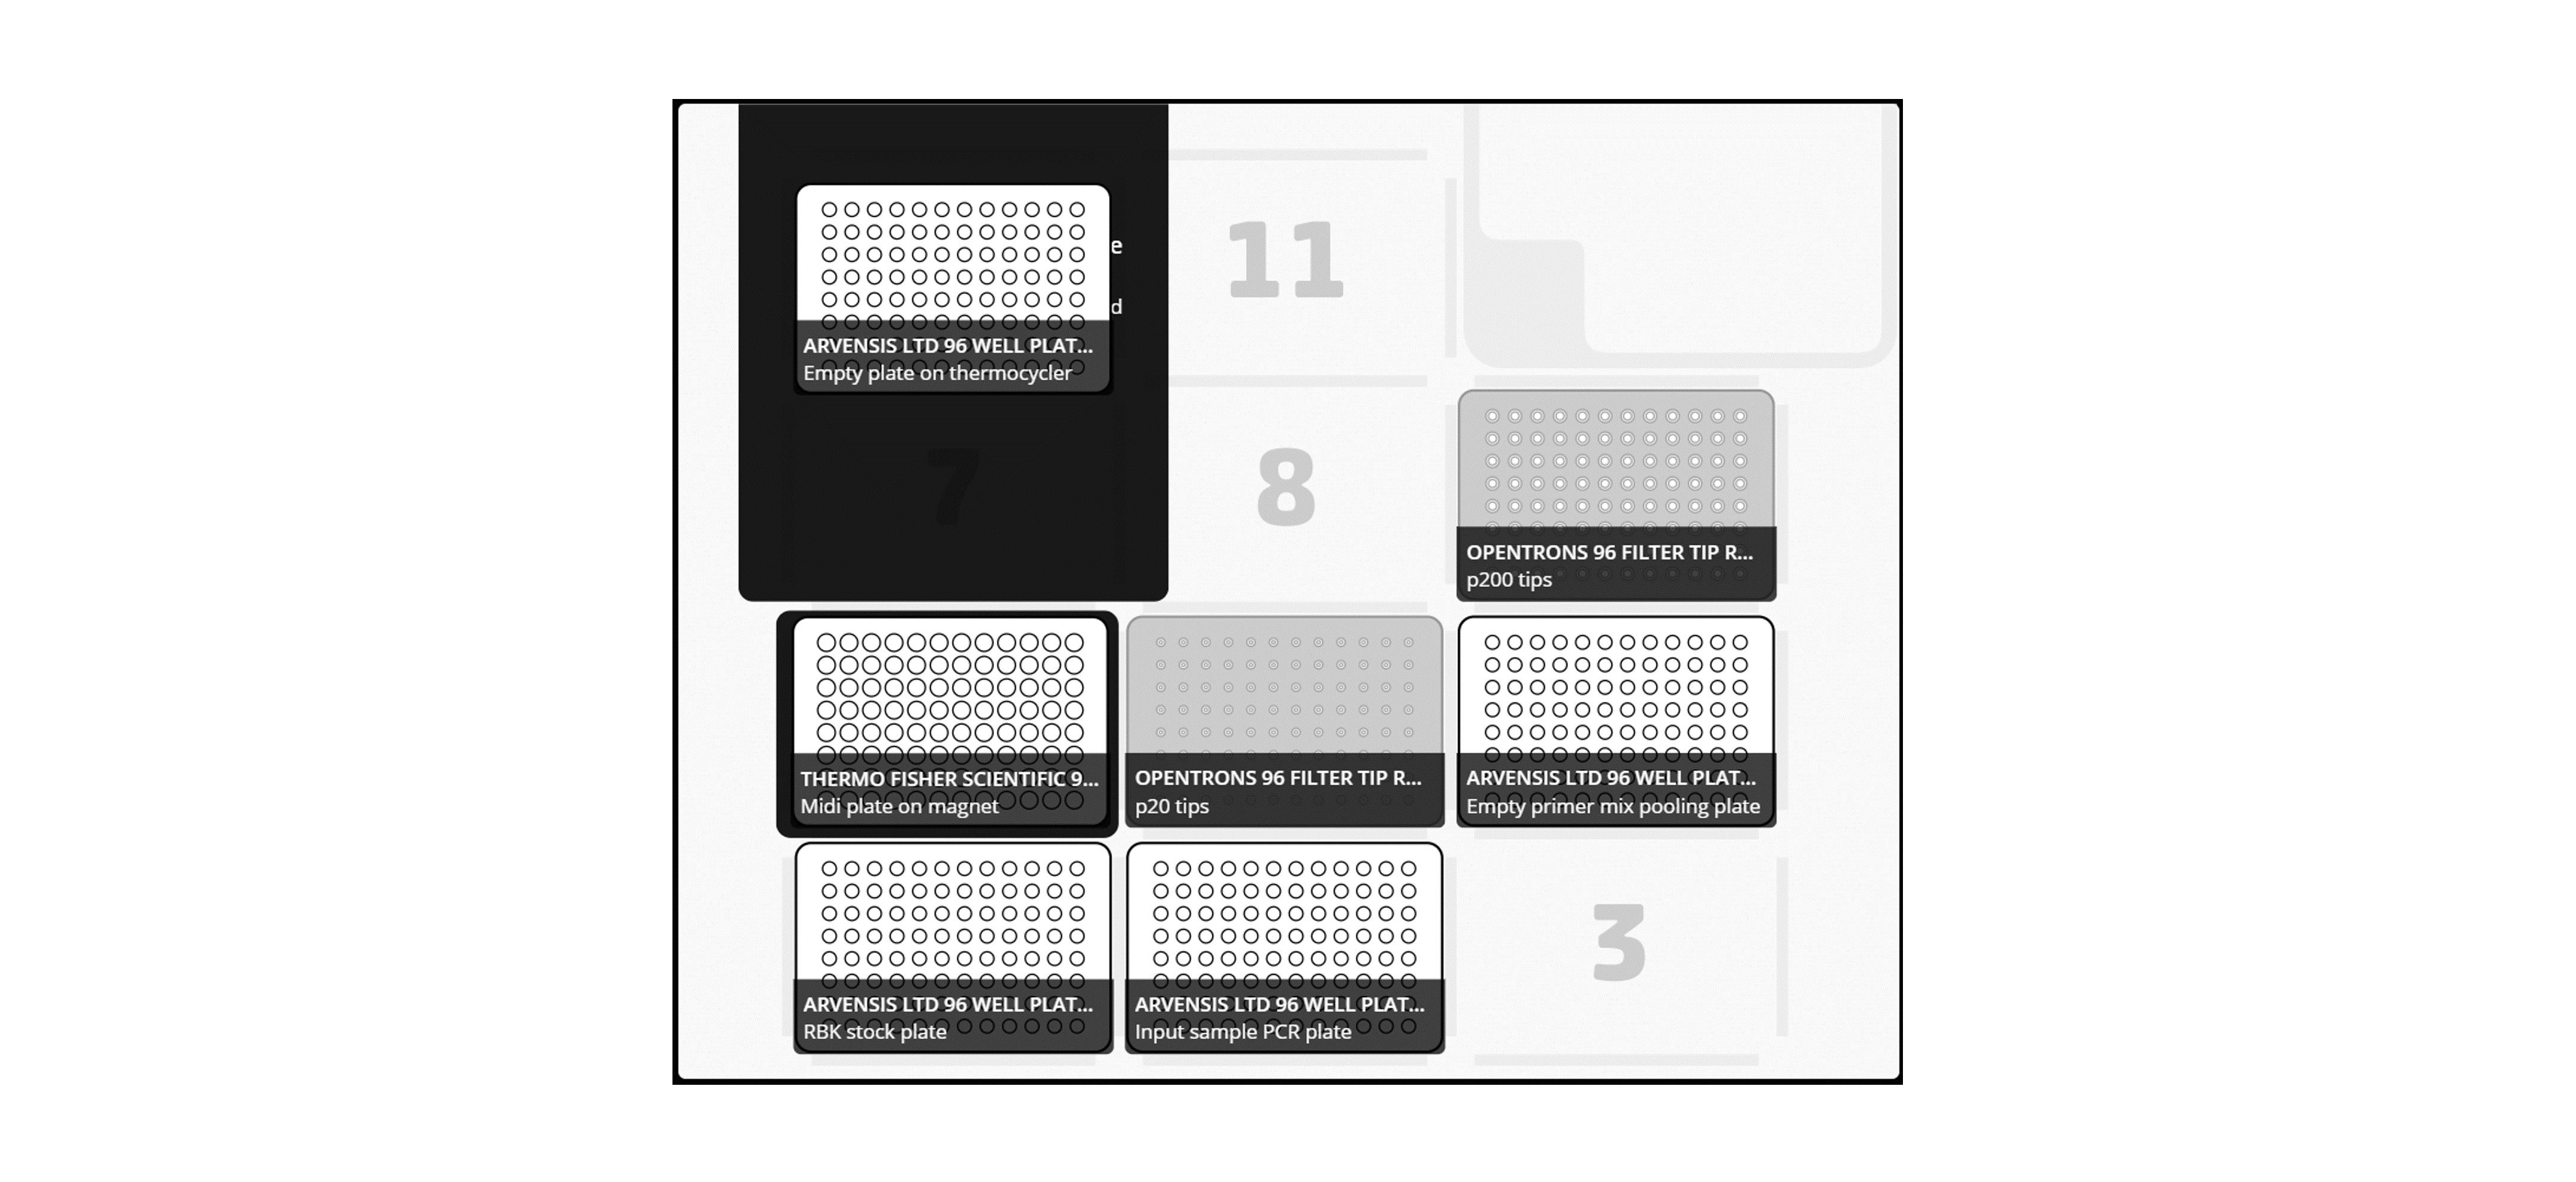
Add the plate to the Opentrons deck according to the following layout:
Note: Take care when adding the plates to the deck to not cause any splashing and avoid cross-contamination.
For X96 samples:
For X24 or X48 samples:
-
Start the calibration process by selecting 'CONTINUE MOVING TO TIPRACK' and following the on-screen instructions:
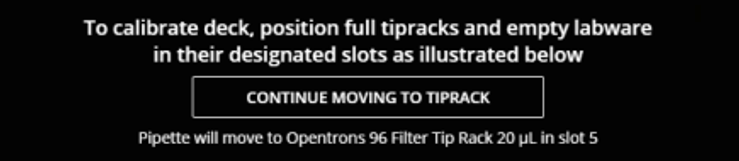
-
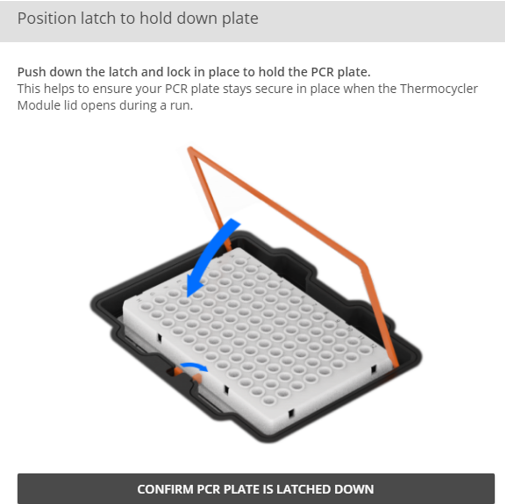
Ensure the empty PCR plate is latched down on the thermocycler module.
-
Follow the on-screen prompts and calibrate your equipment in accordance to manufacturers instructions.
-
Ensure the rubber PCR seal is placed on the lid of the thermocycler module.
-
Select 'START RUN' for your run to begin.
-
Optional actionFor runs of 96 samples the P20 tips will need to be replaced mid-run.
After 25 minutes of the start of the run, the robot will flash the lights for a few seconds and request the P20 tips be replaced.
Remove the used tips and place a fresh set of P20 tips in the corresponding position.
Once replaced, select 'RESUME' to continue the run. -
After the process ends, the final library can be collected from position A12 in the deep-well plate. Remove and retain the final elution into a clean 1.5 ml Eppendorf DNA LoBind tube.
-
Quantify DNA concentration of the final elution by using the Qubit dsDNA HS Assay Kit.


