- Materials
-
- Elution Buffer (EB)
- Sequencing Buffer (SB)
- Library Beads (LIB)
- Library Solution (LIS)
- Flow Cell Flush (FCF)
- Flow Cell Tether (FCT)
- Consumables
-
- PromethION Flow Cell
- 1.5 ml Eppendorf DNA LoBind tubes
- Equipment
-
- PromethION sequencing device
- PromethION Flow Cell Light Shield
- P1000 pipette and tips
- P200 pipette and tips
- P20 pipette and tips
-
Loading multiple PromethION Flow Cells
To load libraries into multiple PromethION Flow Cells as efficiently as possible, we recommend completing each step of the protocol per flow cell, following the same order of flow cells for each step.
Note: PromethION Flow Cells are shipped with light shields already installed. We recommend keeping the light shields on the flow cell to save having to intall them after loading your library.
For example, if flow cells in positions 1A, 1B and 1C are loaded into the device sequentially, the next step is completed in the same order.
Below is an animation for how we recommend loading a full column of eight flow cells. This can be applied to any number of flow cells. In the animation, we illustrate how to complete the step for one flow cell and highlight the next flow cell the step is performed on, to give a quick overview of the entire process.
-
Using the Library Solution
We recommend using the Library Beads (LIB) for loading your library onto the flow cell for most sequencing experiments. However, if you have previously used water to load your library, you must use Library Solution (LIS) instead of water.
Note: Some customers have noticed that viscous libraries can be loaded more easily when not using Library Beads (LIB). -
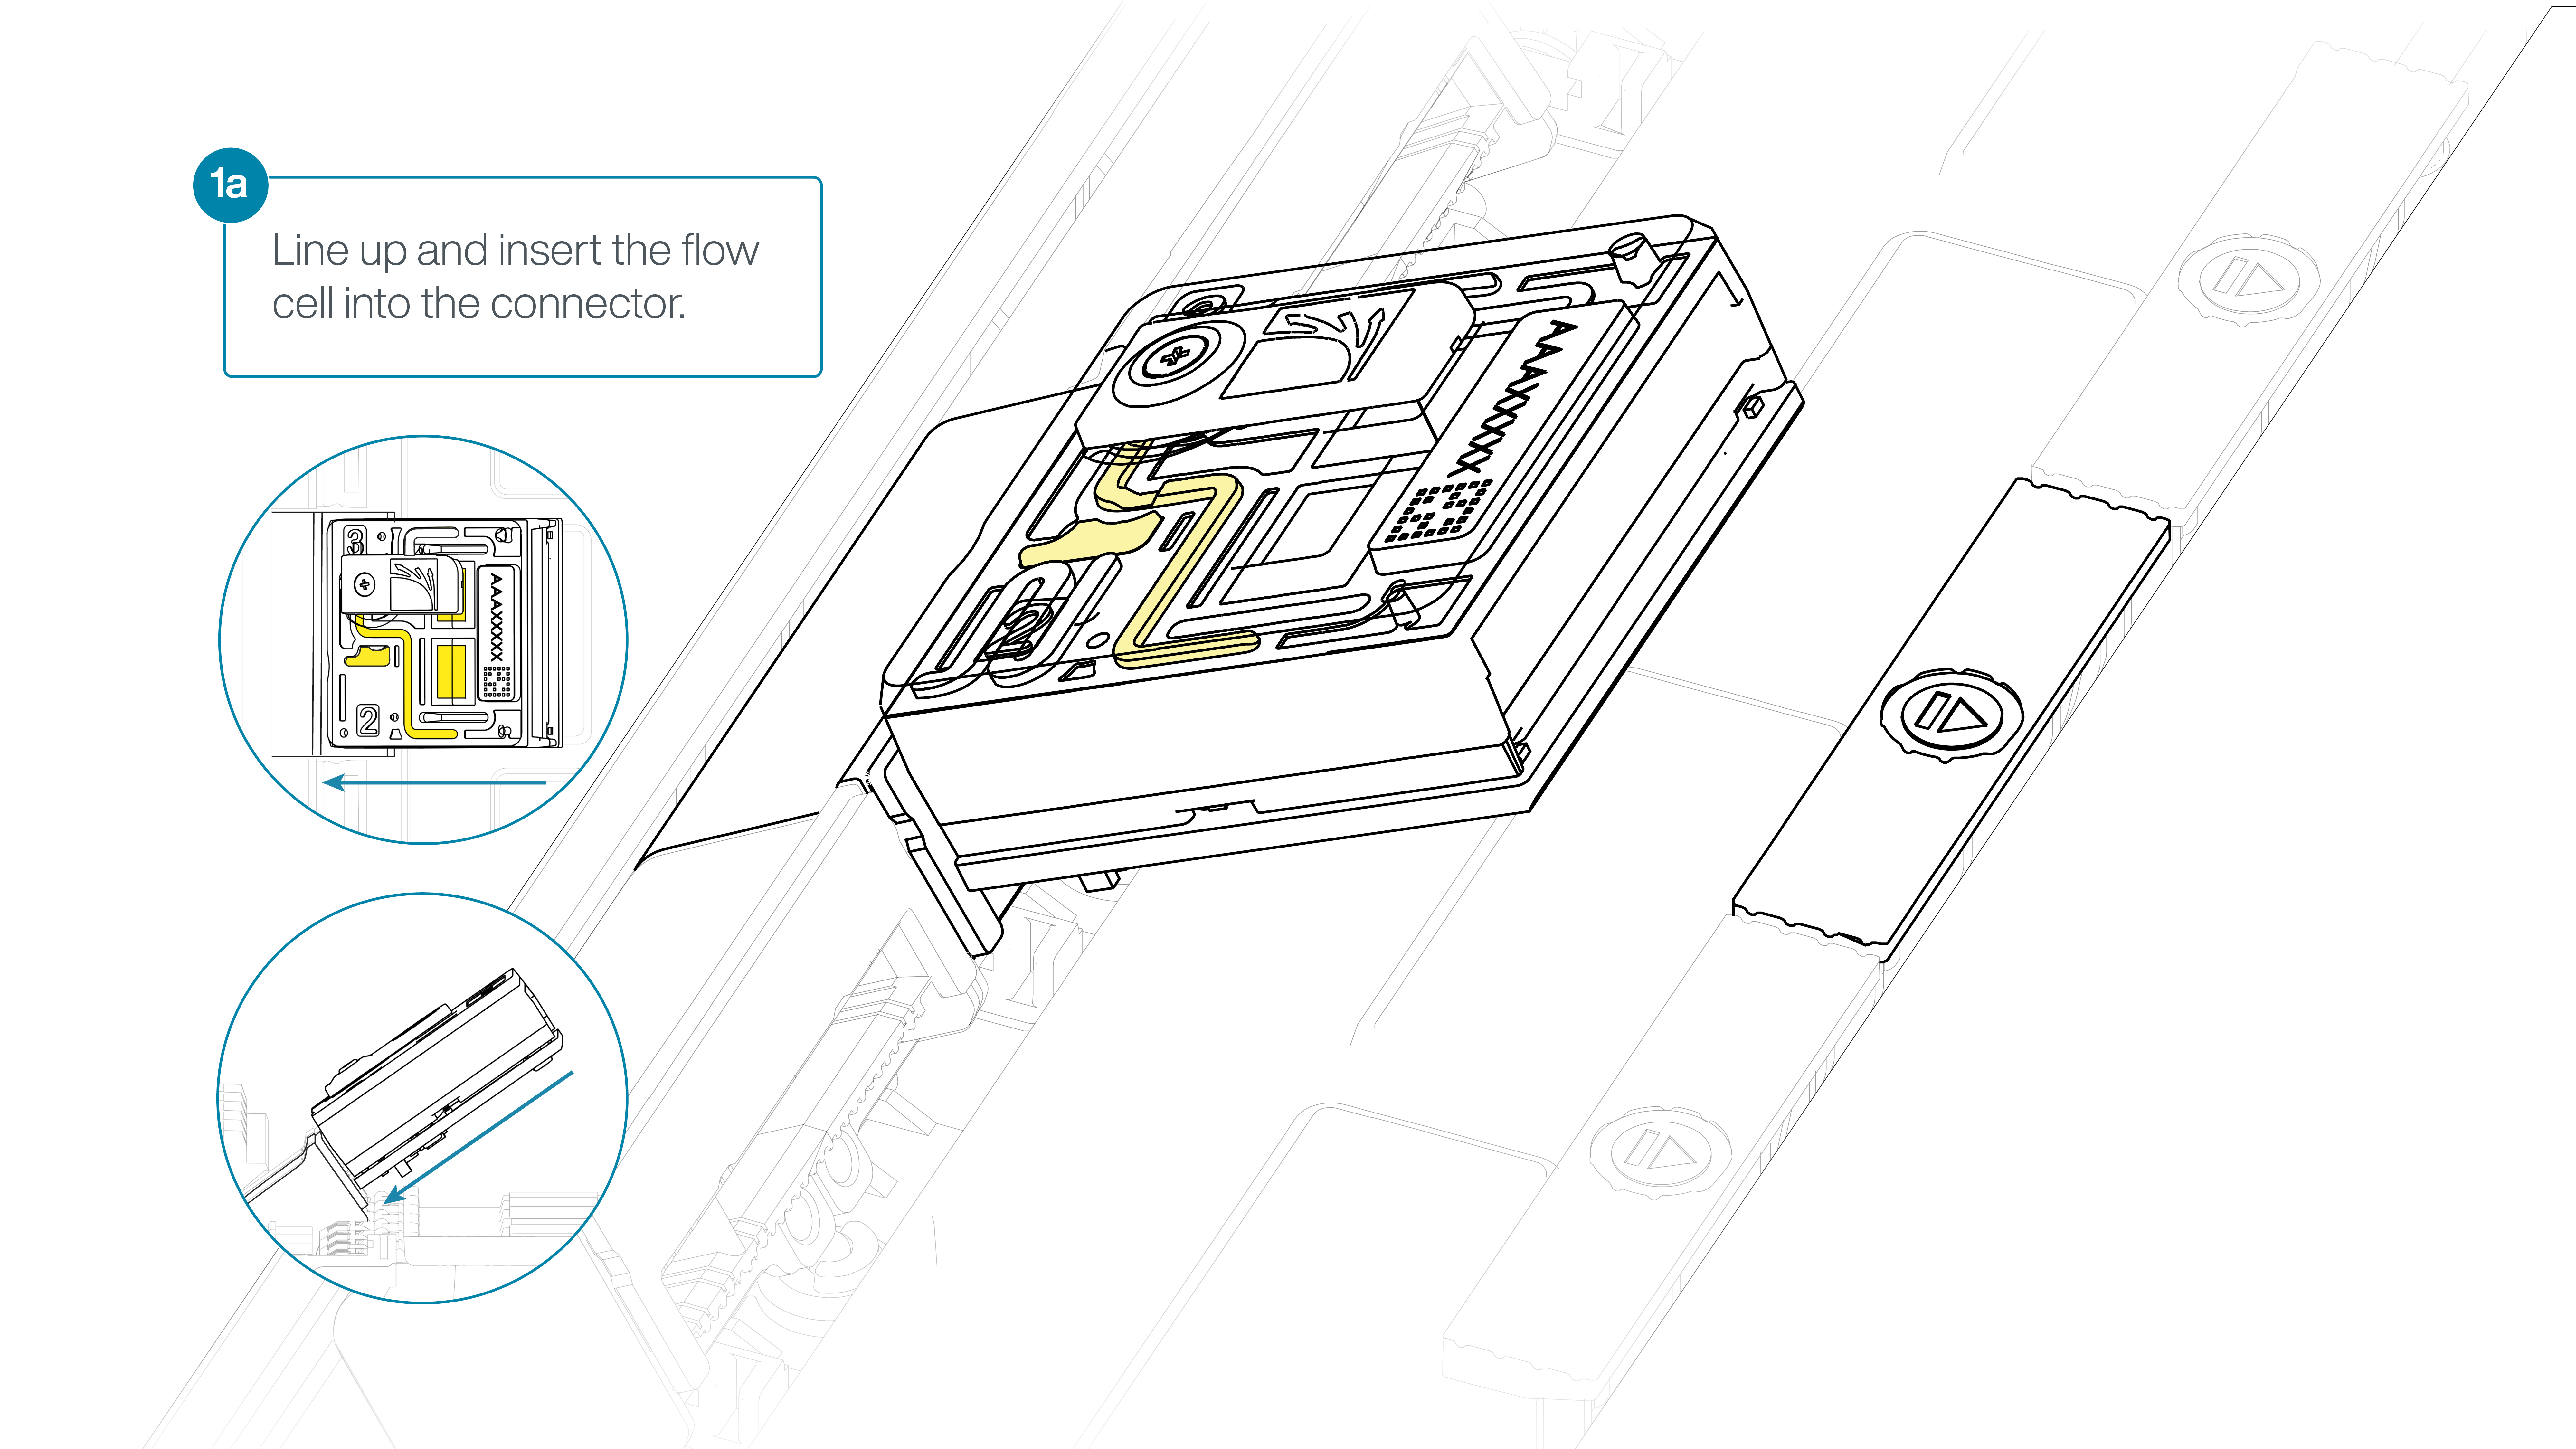
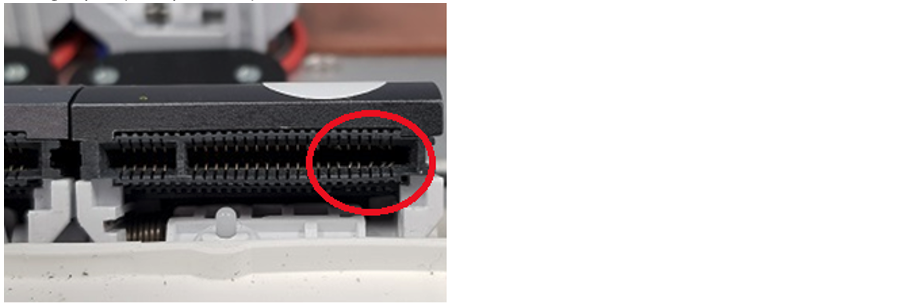
Insert all flow cells into the docking ports within the PromethION:
- Line up the first flow cell in position 1A with the connector horizontally and vertically before smoothly inserting into position.
- Press down firmly onto the flow cell and ensure the latch engages and clicks into place.
- Repeat for the next flow cell until all flow cells are loaded.
-
-
If not already completed, perform a flow cell check on all flow cells.
Please refer to the Flow Cell Check protocol for further information.
-
Thaw the Sequencing Buffer (SB), Library Beads (LIB) or Library Solution (LIS, if using), Flow Cell Tether (FCT) and Flow Cell Flush (FCF) at room temperature, before mixing by vortexing. Then spin down before storing on ice.
-
Prepare the flow cell priming mix in a suitable vial for the number of flow cells to flush. Once combined, mix well by vortexing and keep at room temperature.
Reagents Volume X1 flow cell Volume X24 flow cells, including excess Volume X48 flow cells, including excess Flow Cell Tether (FCT) 30 µl 780 µl 1,500 µl Flow Cell Flush (FCF) 1,170 µl 30,420 µl 58,500 µl Total 1,200 µl 31,200 µl 60,000 µl -
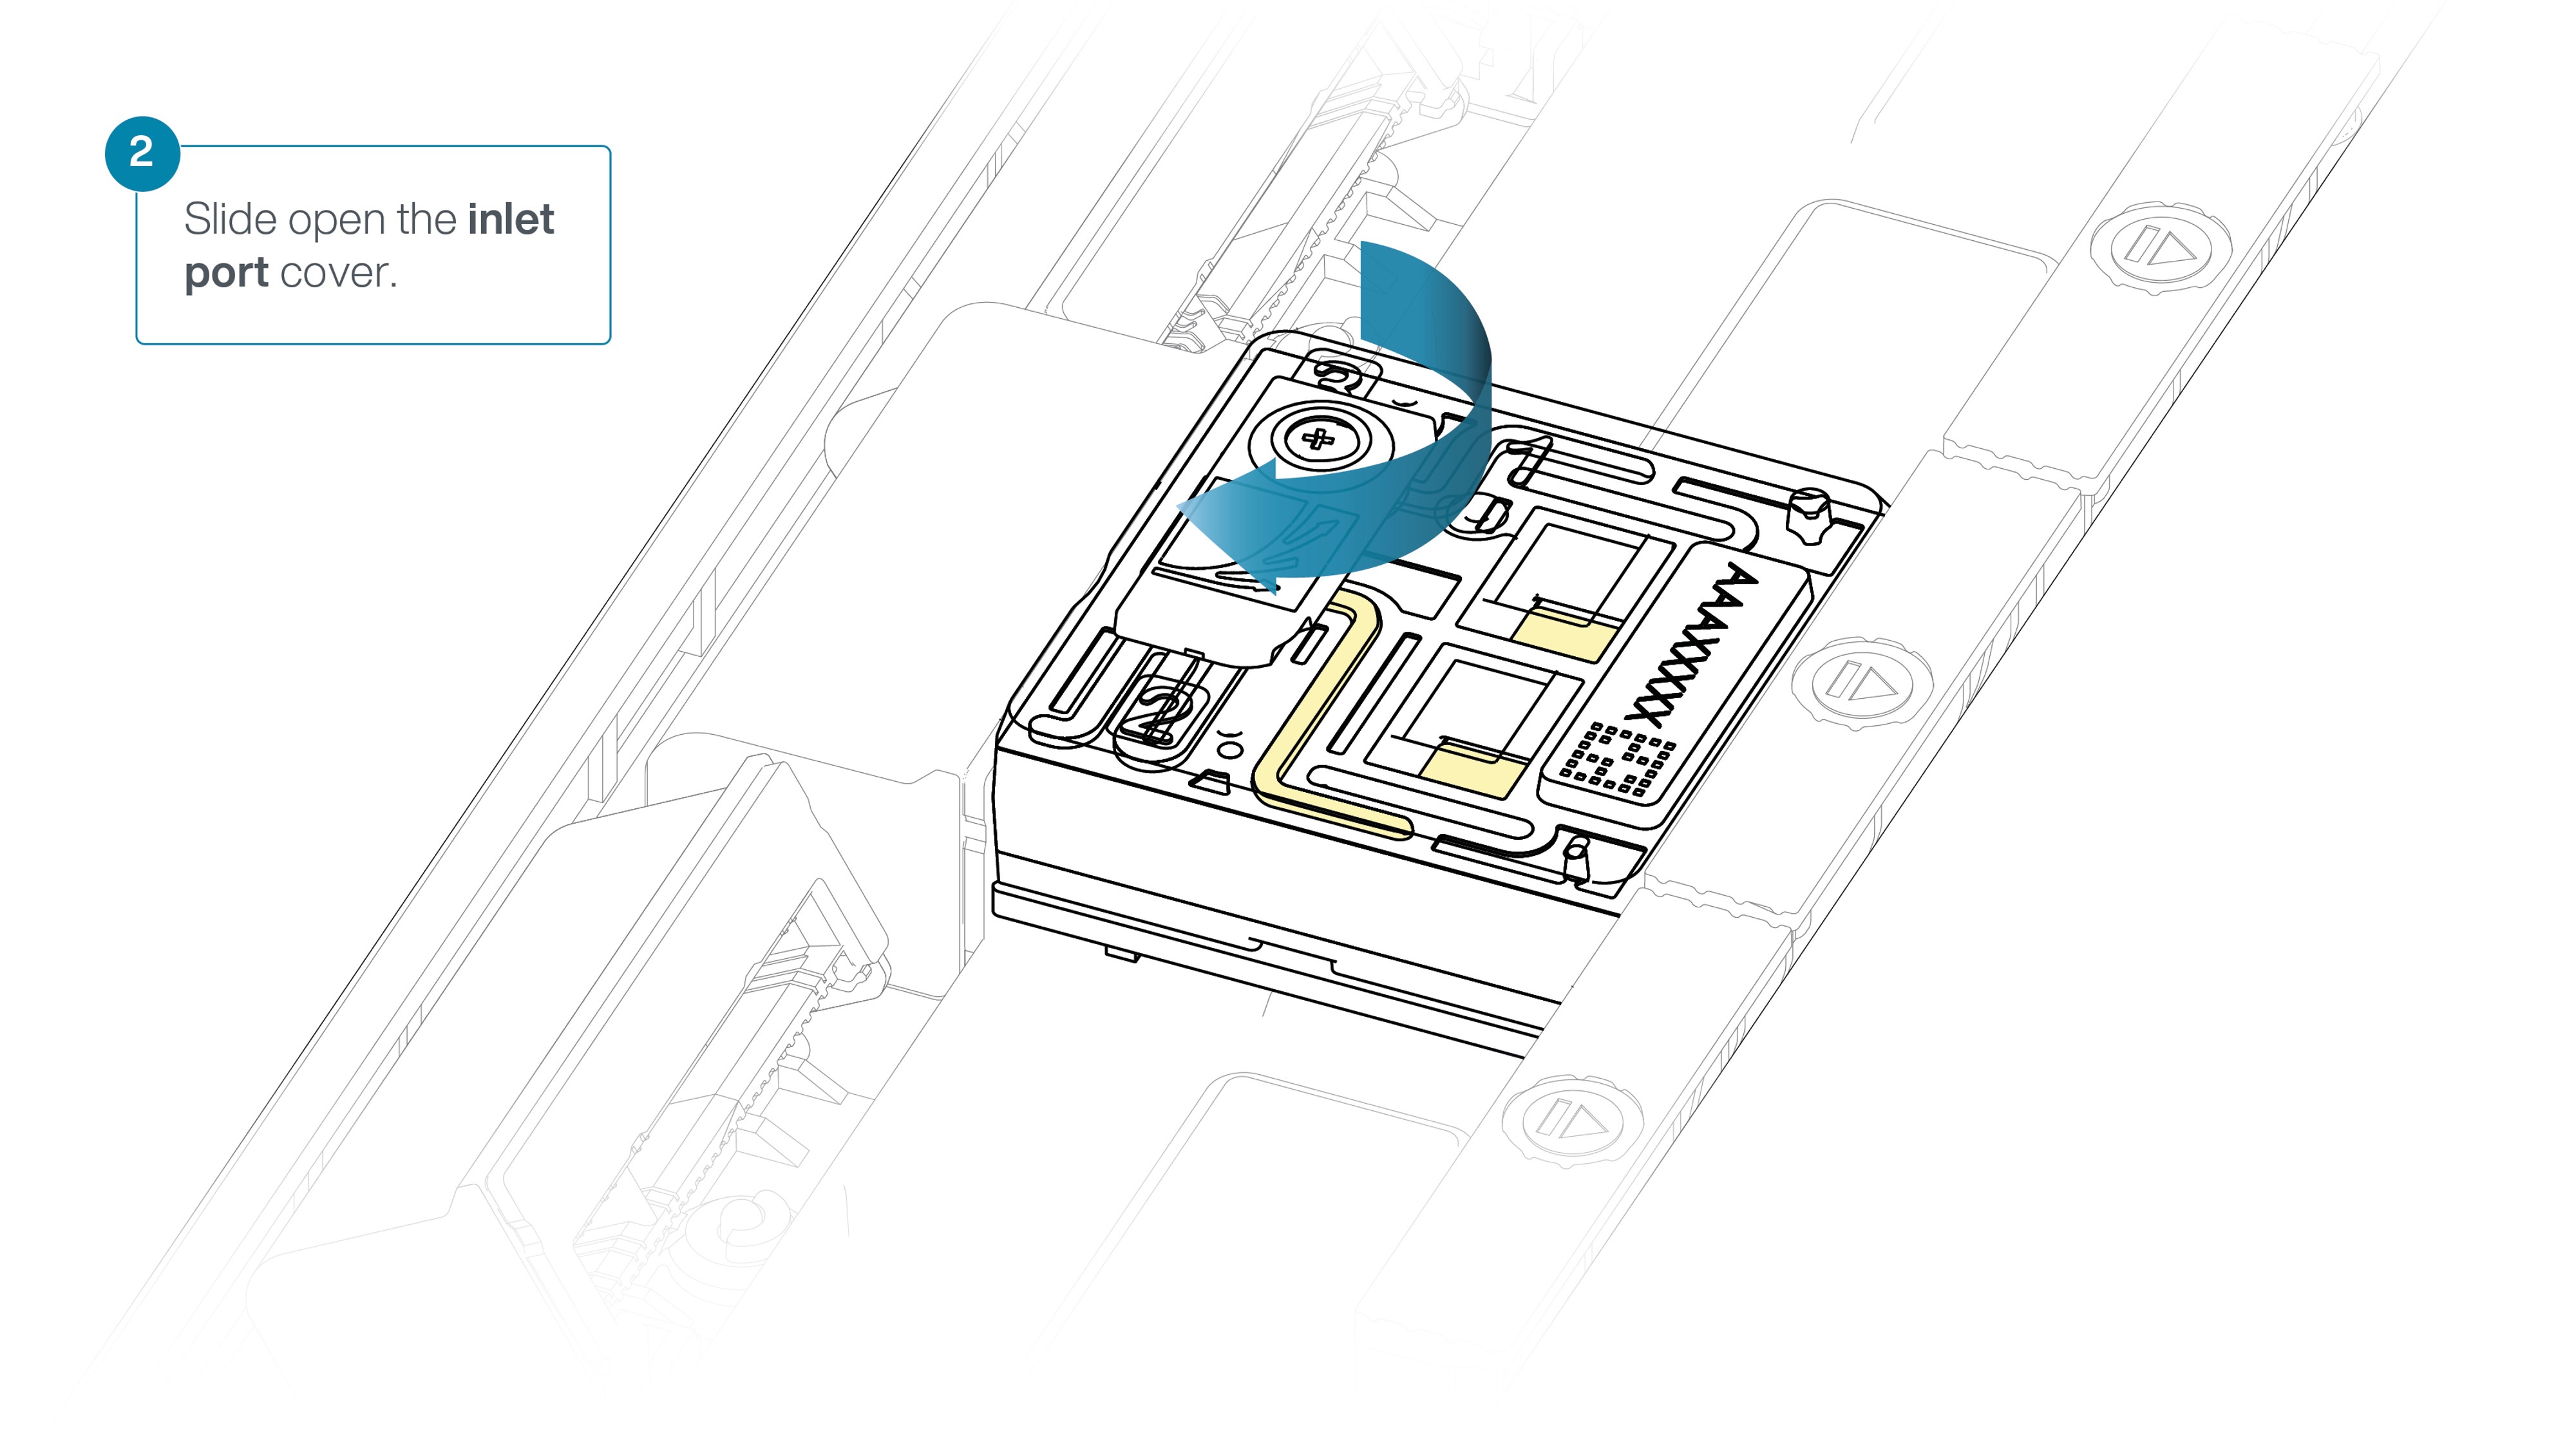
Slide the inlet port cover clockwise to open the inlet port of the first flow cell inserted. Repeat for all flow cells.
-
After opening the inlet port, draw back a small volume to remove any air bubbles for all flow cells:
- Set a P1000 pipette tip to 200 µl.
- Insert the tip into the inlet port of the first flow cell.
- Turn the wheel until the dial shows 220-230 µl, or until you see a small volume of buffer entering the pipette tip.
- Repeat for all the flow cells using the same pipette tip.
-
Complete the first flush as follows for all flow cells:
- Load 500 µl of the priming mix into the first flow cell via the inlet port, avoiding the introduction of air bubbles.
- Start a timer for 5 minutes. This is to ensure 5 minutes passes for the first flow cell before the second flush is started.
- Immediately repeat step 1 for the remaining flow cells using the same pipette tip.
Note: After each column (8 flow cells), thoroughly mix the priming mix to ensure it is homogenous.
-
Complete a second flush once all the flow cells have been flushed once, as follows:
- Check that the timer has finished to ensure it has been at least 5 minutes since the first flow cell was flushed.
- Load 500 µl of the priming mix into the inlet port of the first flow cell, avoiding the introduction of air bubbles.
- Repeat the previous step for the remaining flow cells in the same order as the first flush, using the same pipette tip.
Note: After each column (8 flow cells), thoroughly mix the priming mix to ensure it is homogenous.
-
Freshly prepare the DNA libraries for loading as outlined in the relevant protocol.
Note: Ensure you follow the relevant library preparation protocol to prepare your final library to ensure the compatible reagents and volumes are followed.
-
Load your samples:
- Gently mix the first library and load the full volume through the inlet port of the first flow cell.
- Using a new tip between each flow cell, repeat for the remaining flow cells, ensuring to gently mix each library before loading.
Note: For Kit 14, library volume is 200 µl. For previous kit chemistries, library volume is 150 µl.
-
Close the valve to seal the inlet port.

-
If the light shield has been removed from the flow cell, install the light shield as follows:
- Align the inlet port cut out of the light shield with the inlet port cover on the flow cell. The leading edge of the light shield should sit above the flow cell ID.
- Firmly press the light shield around the inlet port cover. The inlet port clip will click into place underneath the inlet port cover.

-
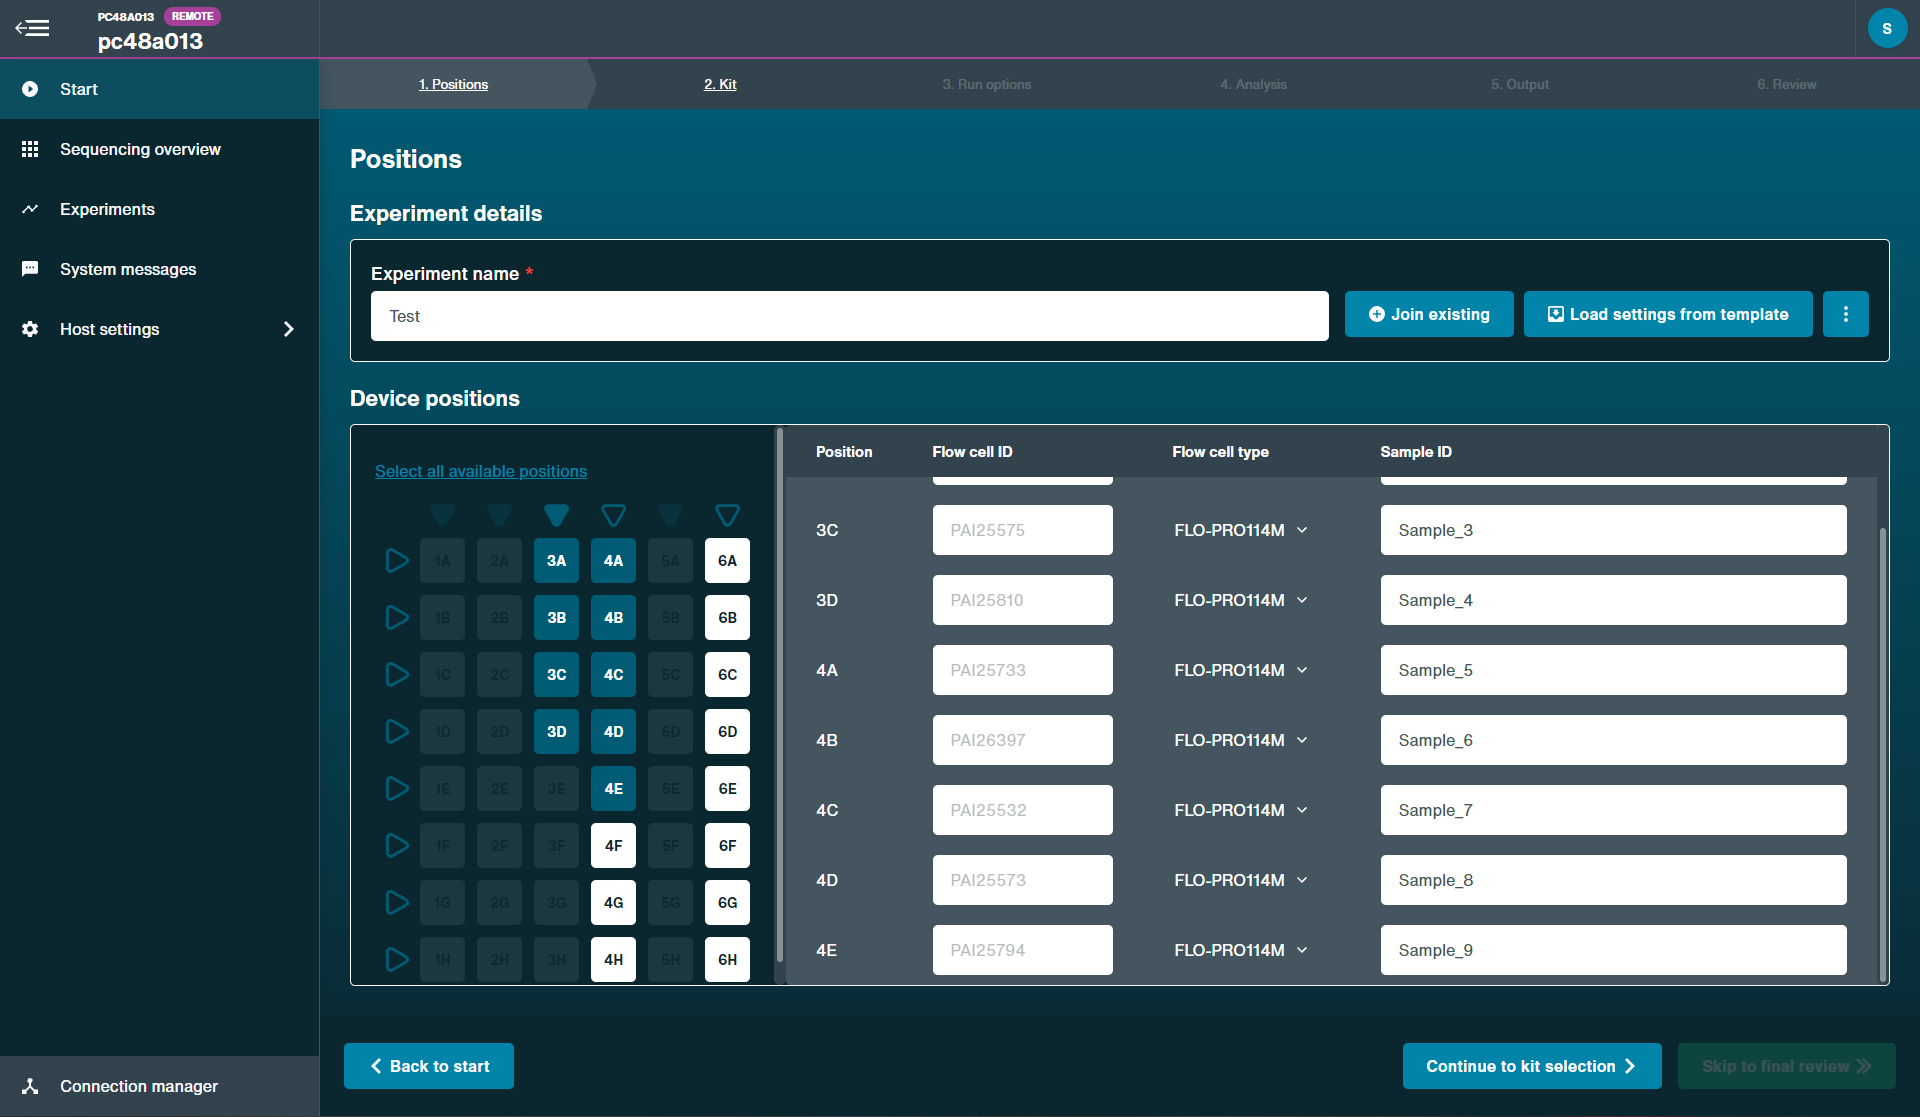
For multiple flow cell washing, use the same experiment name and identifying sample IDs for all runs to enable all flow cells to be paused simultaneously.