-
Preparing for installation
The following should be available before installing the device:
- SFP+ modules and cabling for 2x 10 Gbps fibre OR cabling for 2x 10 Gbps Copper (Ethernet - Cat6a or above)
- A single Copper cable for hardware check
- Fibre OR Copper ports providing:
- IP address through DHCP
- Outbound-only access to the internet over ports 80 and 443
- 1x VGA-capable monitor (for original PromethION 24/48 Data Acquisition Unit)
- 1x VGA-capable/DisplayPort-capable monitor (for new PromethION A-Series Data Acquisition Unit)
- 1x VGA cable
- 1x USB connected keyboard
- 1x USB connected mouse
- 3x Power supplies/wall sockets for the PromethION Data Acquisition Unit and Sequencing Unit
- 1x Power supply/wall socket for a monitor
- Optional: UPS solution with C14 cables -
Recommended laboratory location
- Place the device on a strong, clean laboratory bench. If you are using a PromethION 24 Combined, the device needs to be installed with the Sequencing and Data Acquisition units next to each other. The bench space required for a PromethION installation is 167 cm x 75 cm
- Ensure power, Ethernet and/or Fibre connectors are in close proximity
- Ensure power socket is easily accessible should a disconnection be required in case of emergency
- Sequencing should be carried out at a room temperature of +18°C to +22°C with device doors closed prior to sequencing beginning
- Allow 30 cm clearance to rear and sides of the device to ensure correct airflow
- Do not cover any ventilation grills
- WARNING - The rear of the device will heat up during operation
-
Unpack the device and place it on the bench where it is to be run.
Place the Sequencing Unit on the bench where it is to be run and the Data Acquisition Unit within two meters of the Sequencing Unit.
If you are using the PromethION 24 Combined, the device must only be unpacked and installed by an Oxford Nanopore Technologies Field Service Engineer. Once your device has been correctly installed, proceed from step 9.
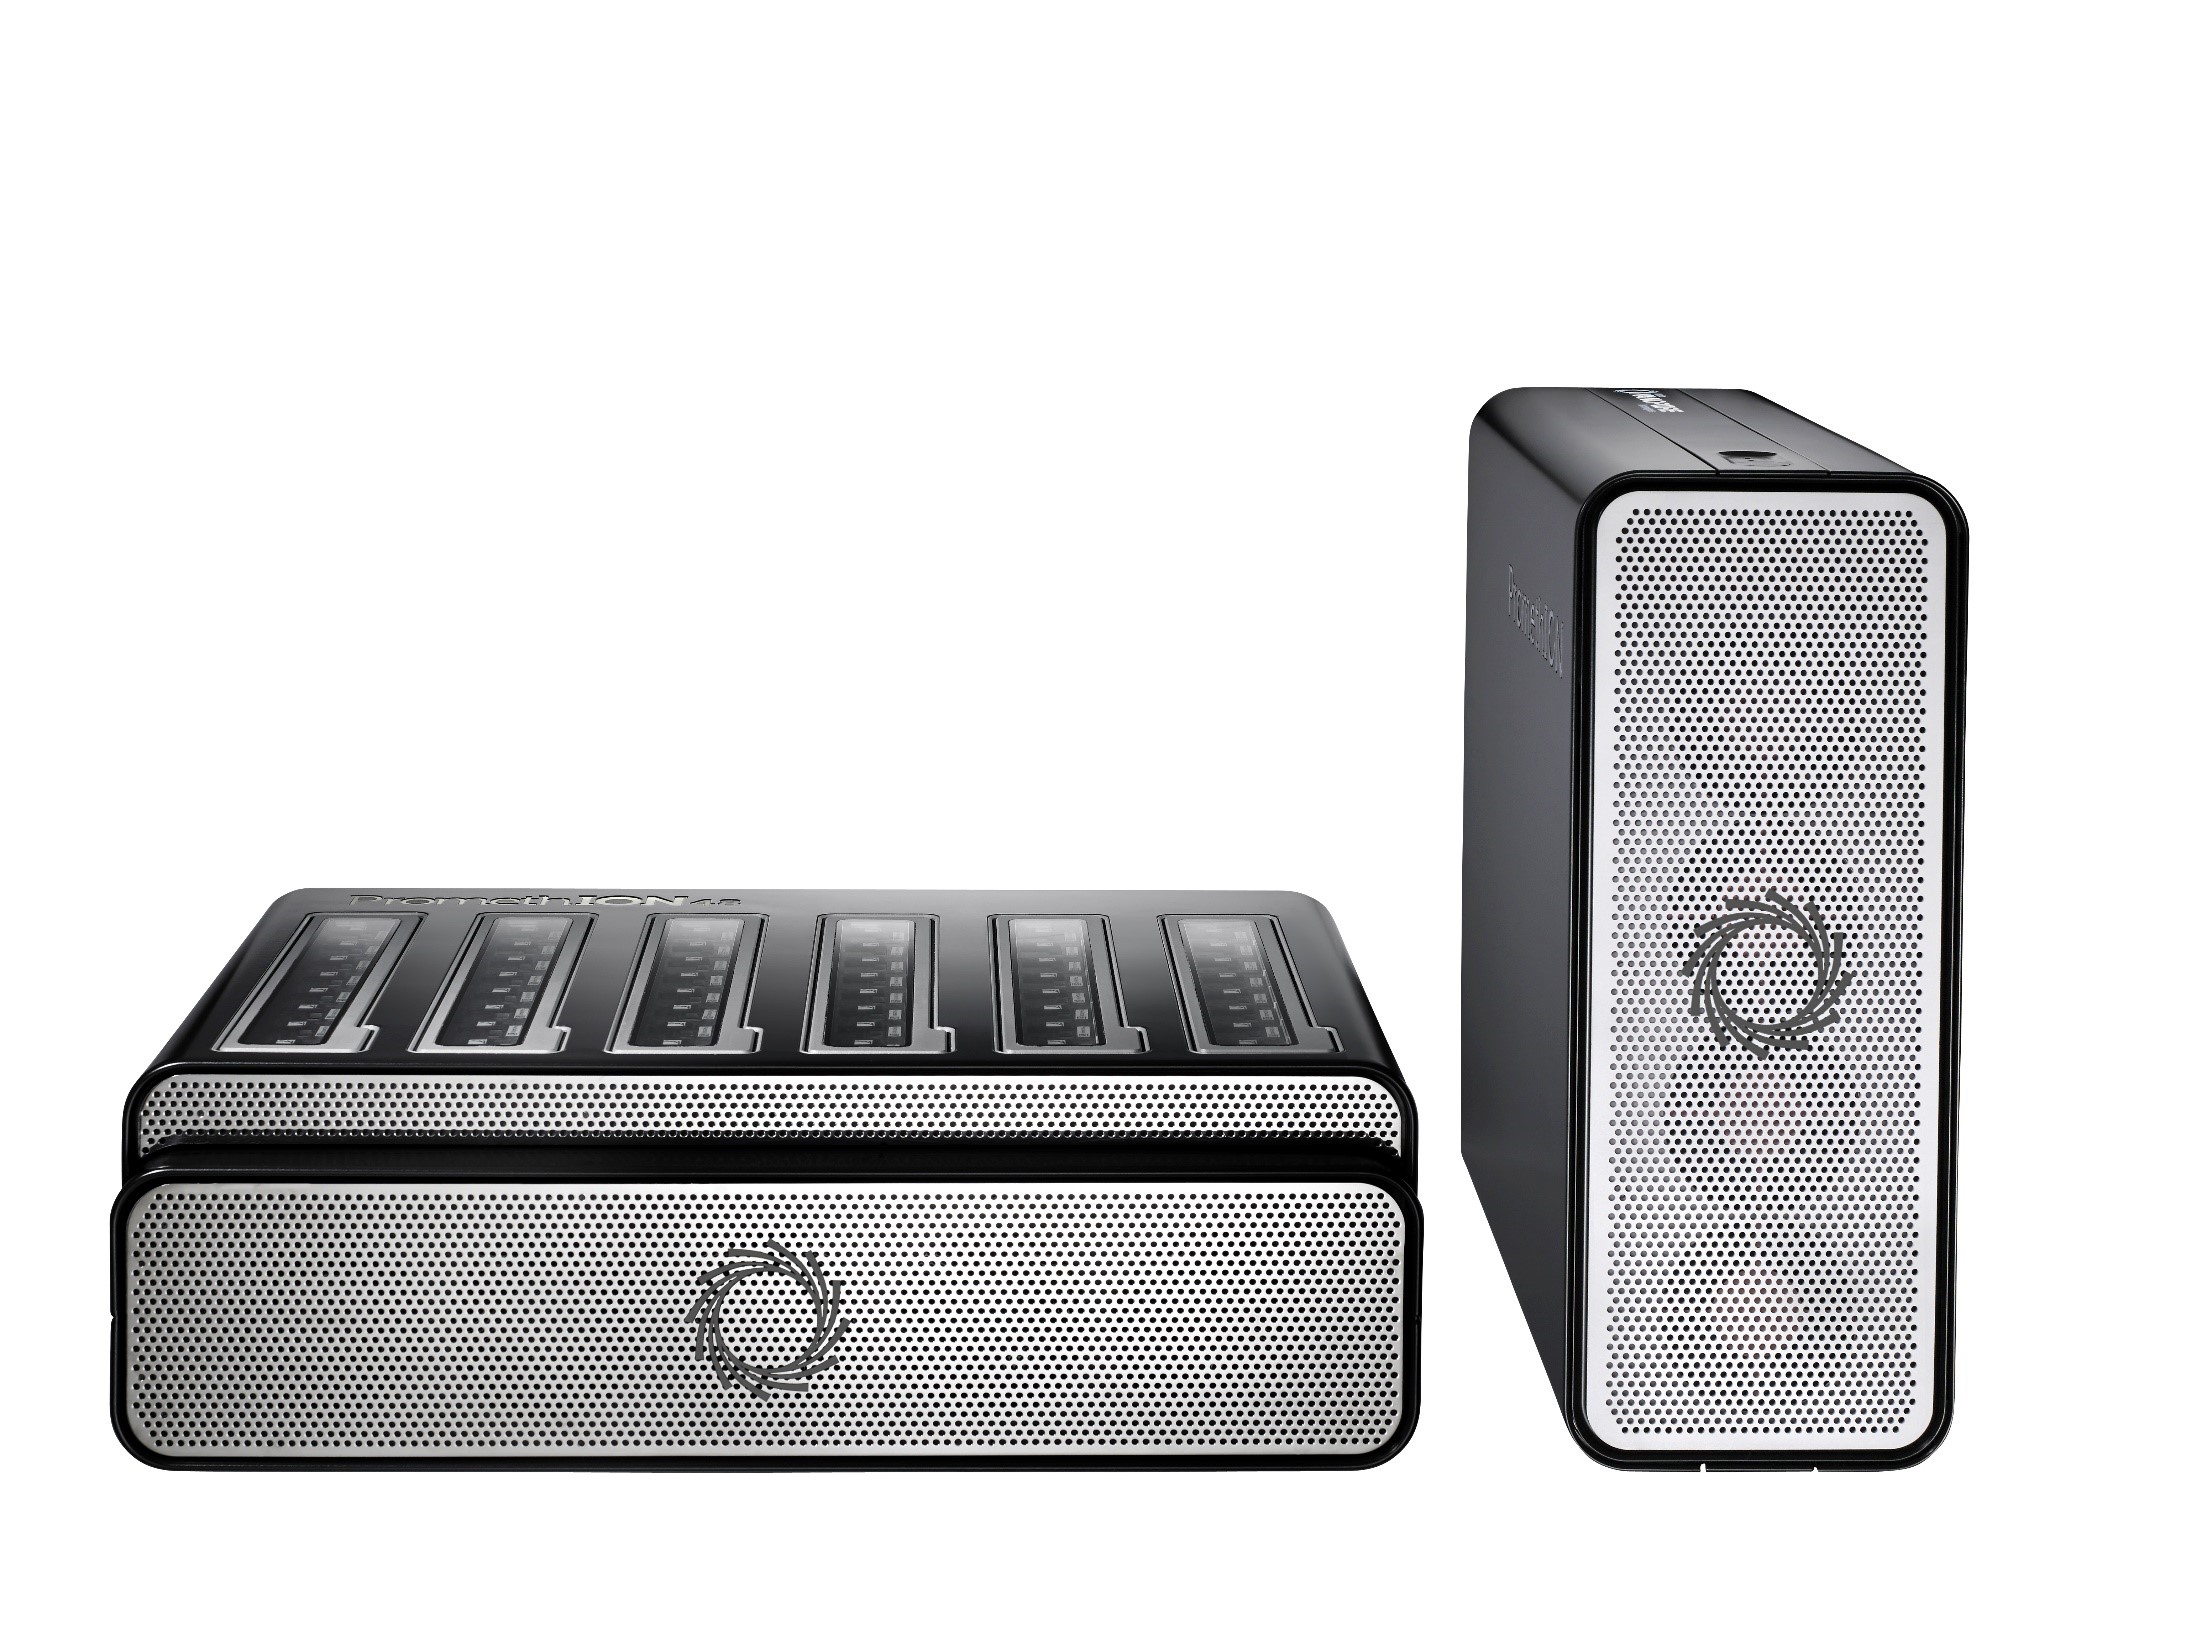
PromethION 24 Sequencing and Data Acquisition Units
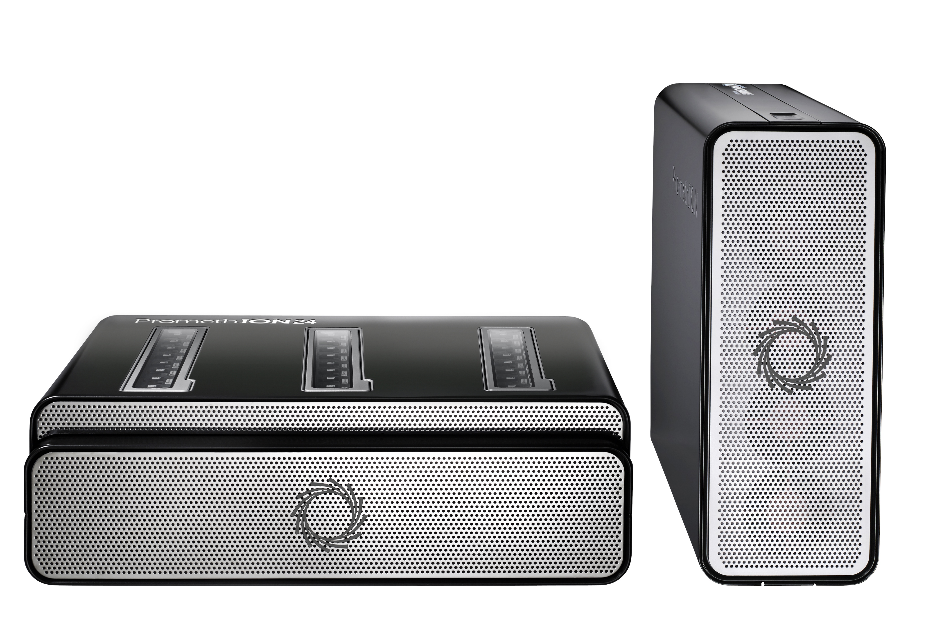
PromethION 48 Sequencing and Data Acquisition Units
-
Optional actionOptional: insert the SFP+ modules into the ports shown below.
If the fibre optic cables are to be used, then you must insert your chosen SFP+ modules into the ports on the rear of the Data Acquisition Unit.

-
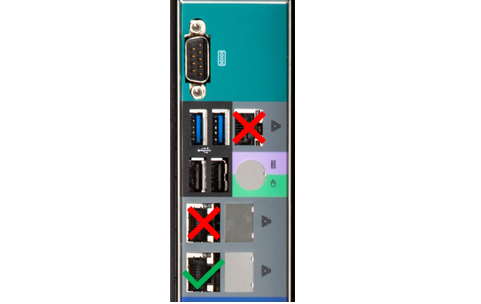
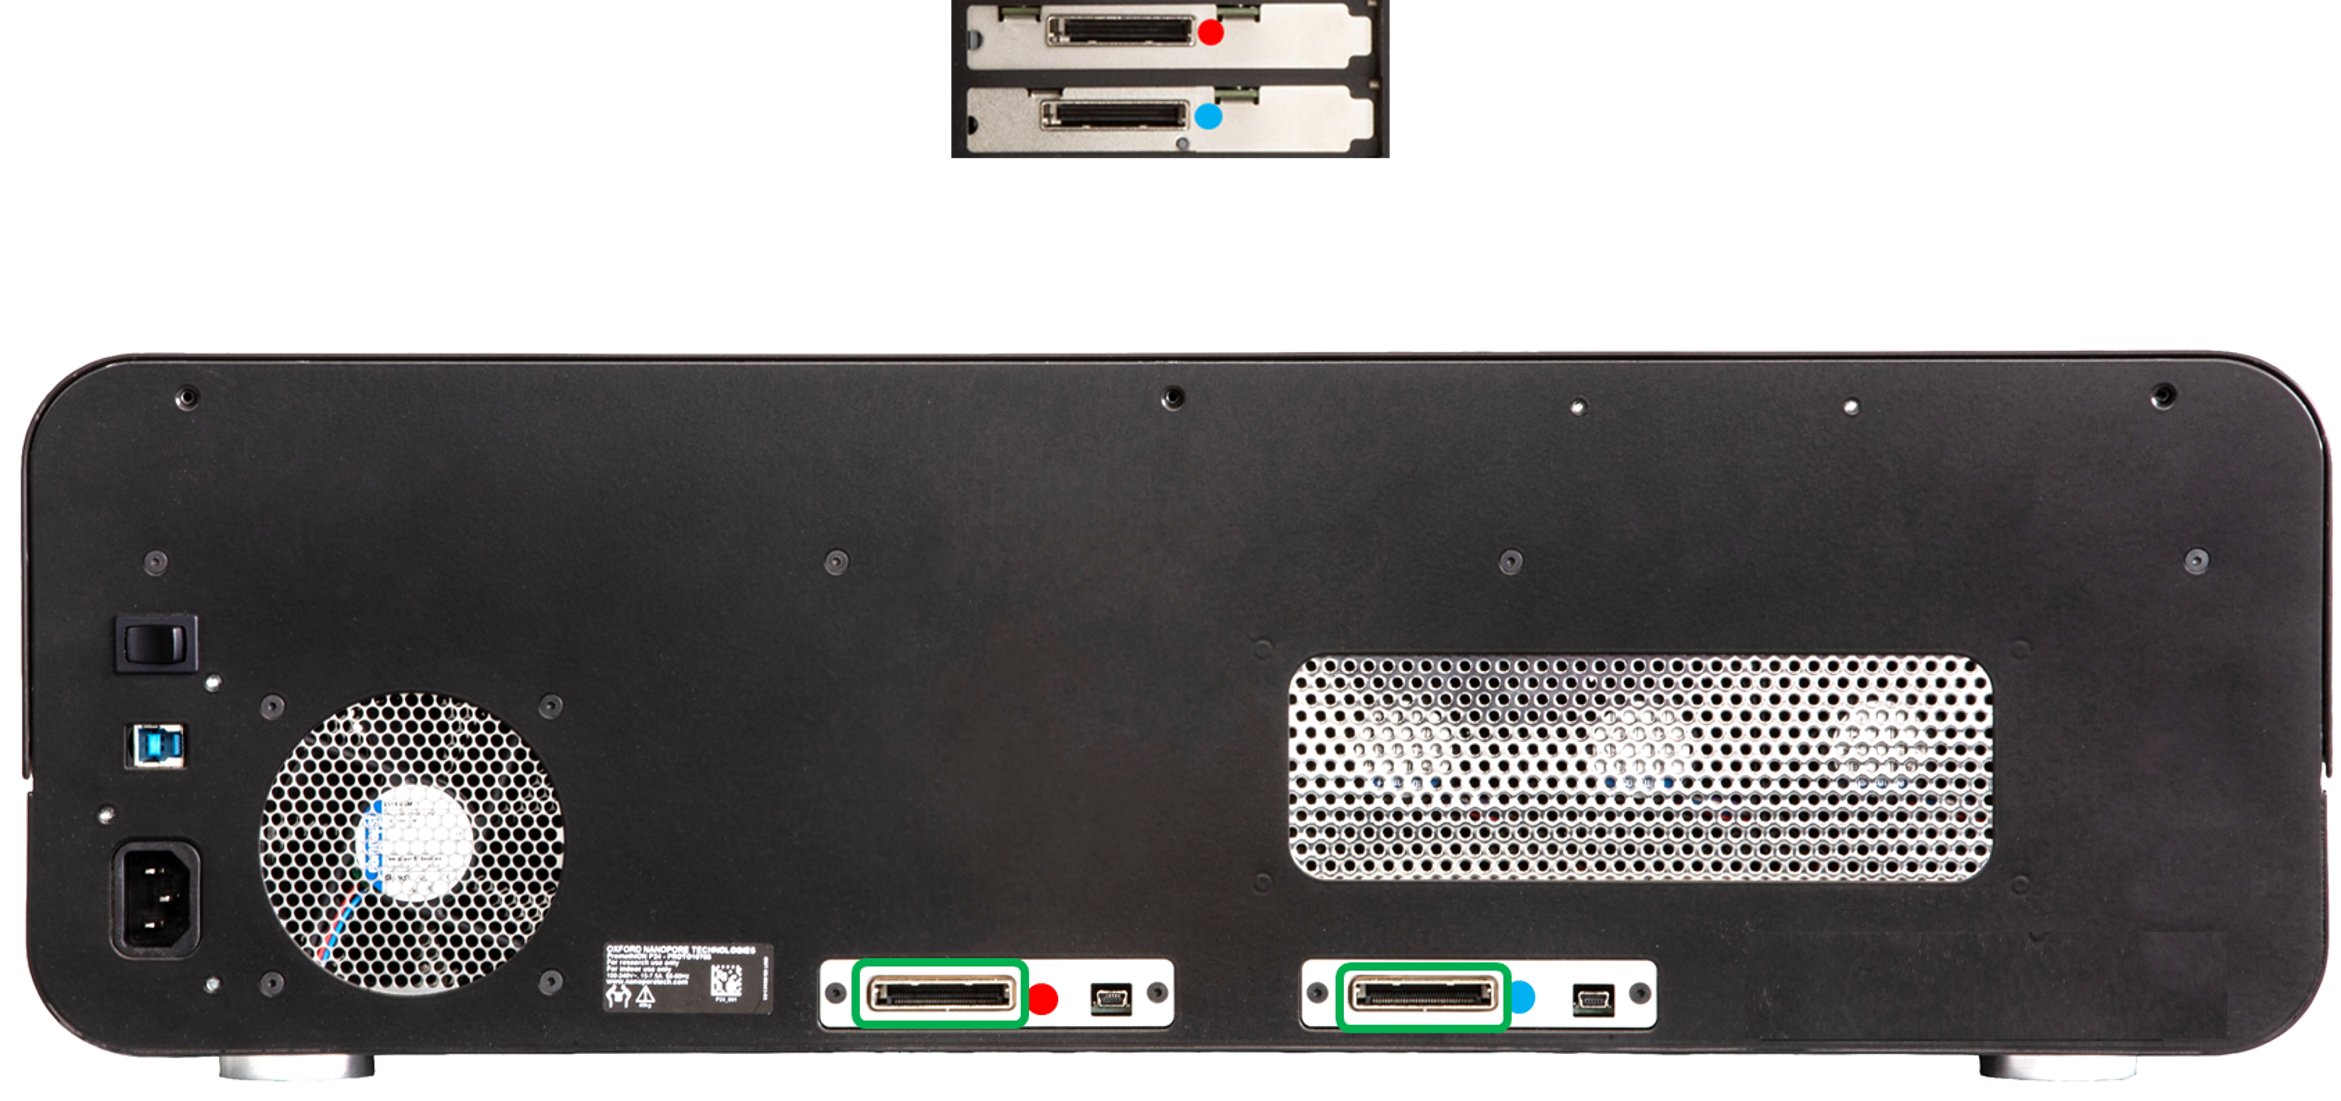
Connect the data cabling into the appropriate port shown below.
For the hardware check, a single copper cable should be used and connected to a port with a DHCP service running.
Download the latest software, then complete full network configuration after the hardware check.
See the Network configuration section in this document to set up single vs dual connectivity and copper vs fibre connections.
-
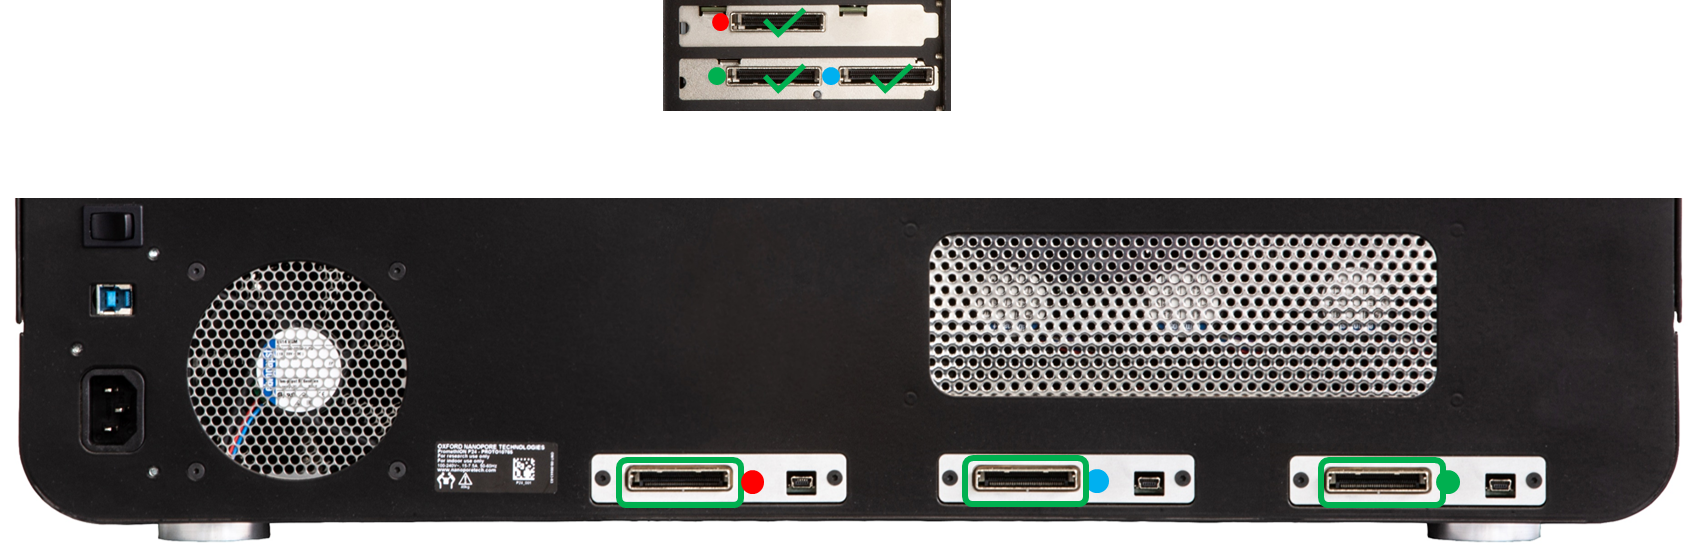
This is the first step of the inter-unit connections. Connect the PCIe cables between your Sequencing Unit and Data Acquisition Unit.
PromethION 24
Connect the PCIe cables to the rear of the Sequencing Unit and the rear of the Data Acquisition Unit.Note There is a port-to-cable colour requirement on both units.
PromethION 48
Connect the PCIe cables to the rear of the Sequencing Unit and the rear of the Data Acquisition Unit.Note There is a port-to-cable colour requirement on both units.
-
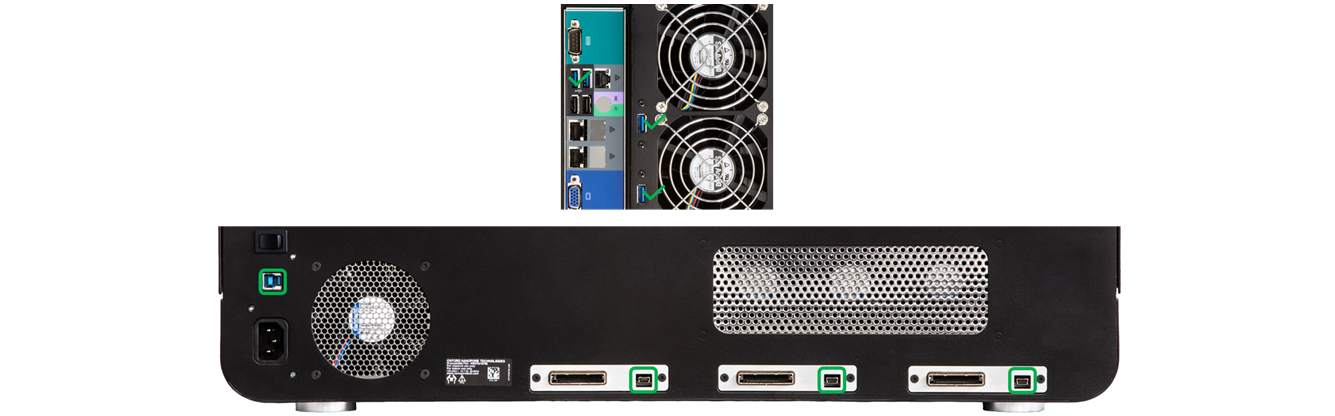
This is the second step of the inter-unit connections. Connect the USB cables between the Data Acquisition Unit and Sequencing Unit.
PromethION 24
Connect:
1. 2x USB A – Mini USB
2. 1x USB A to USB B
from the Data Acquisition Unit to the Sequencing Unit (see the diagram below):
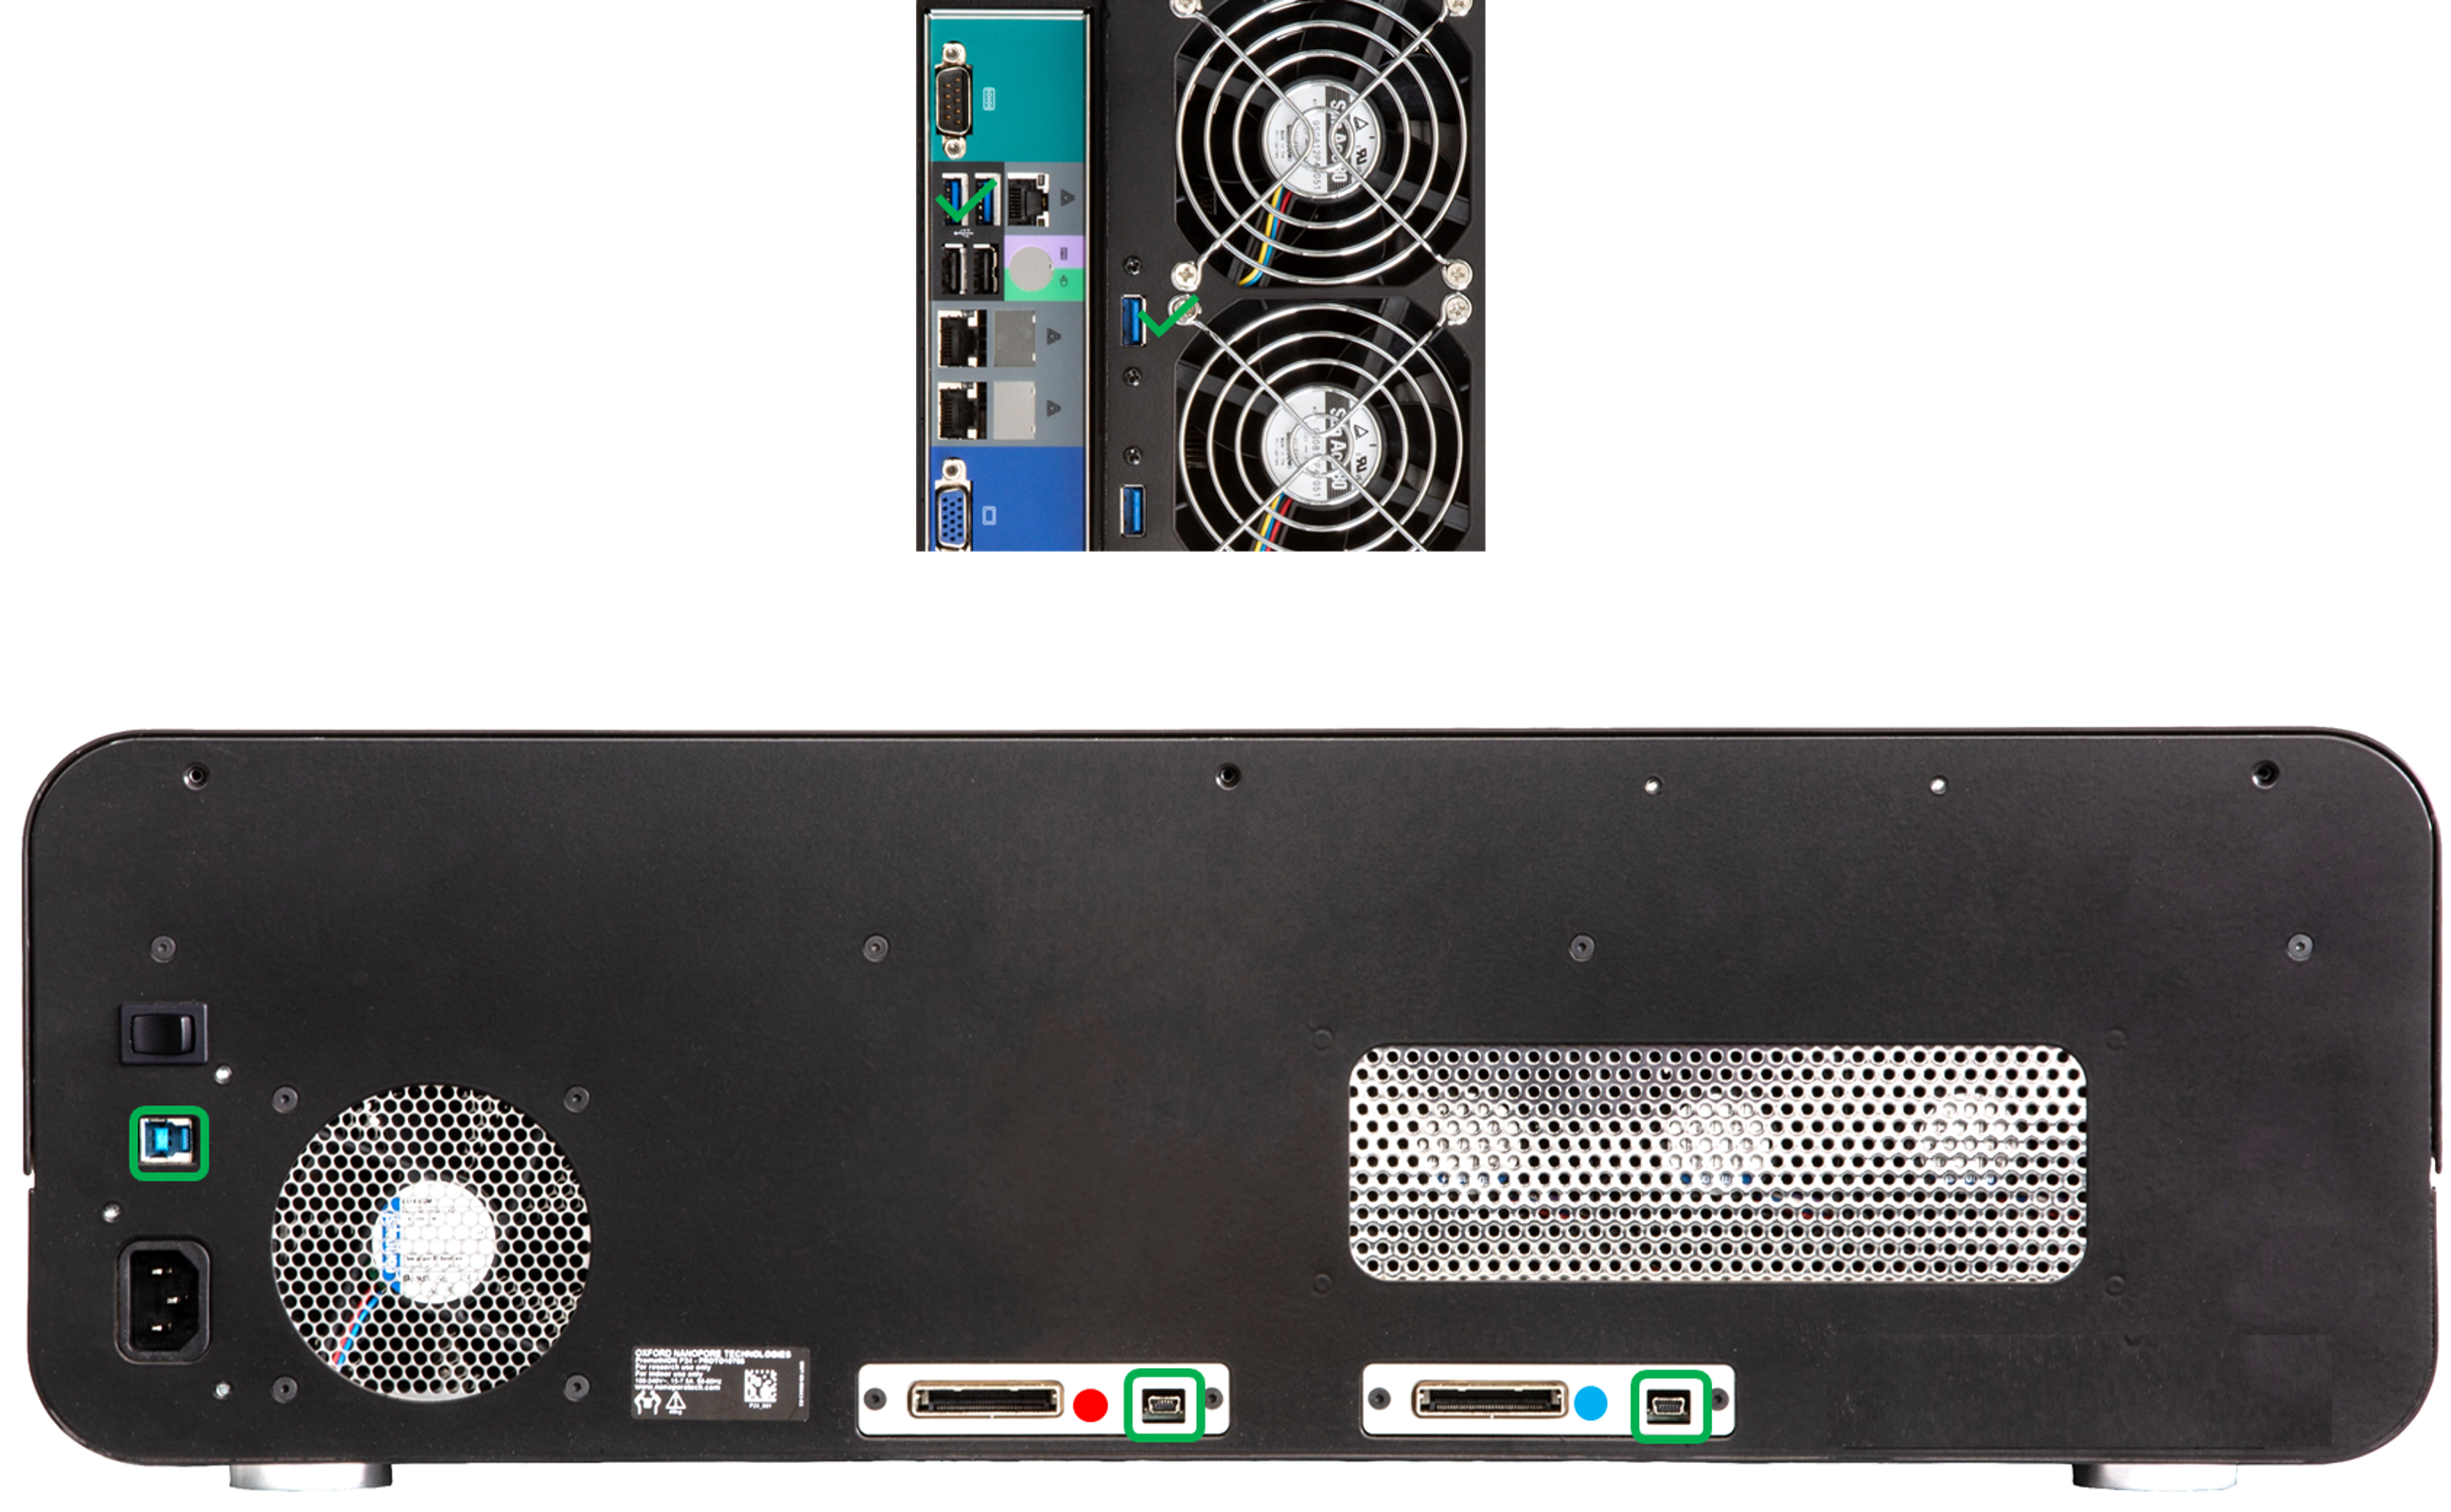
PromethION 48
Connect:
1. 3x USB A – Mini USB
2. 1x USB A to USB B
from the Data Acquisition Unit to the Sequencing Unit (see the diagram below):
-
Connect peripheral devices to the appropriate ports.
Plug in the following:
1a. Monitor VGA cable (if using original PromethION 24/48 Data Acquisition Unit)
1b. Monitor VGA/miniDP cable* (if using the PromethION A-Series Data Acquisition Unit)
2. USB keyboard
3. USB mouse into the remaining USB A port.* Use either the miniDP output or the VGA output. It is not possible to use both outputs simultaneously.

-
Two C13 power cables will plug into the Data Acquisition Unit and one C13 power cable will plug into the Sequencing Unit.
Insert two of the supplied C13 cables into the top of the Data Acquisition Unit, and the third into the Sequencing Unit. Connect all to a mains power supply.
Note: You will be provided with at least three C13 cables with plugs for your country of use.
-
Turn on the power at the mains supply. Then turn on the PromethION units in the order below:
- Turn on the Sequencing Unit

- Wait for 3 minutes
- Turn on the Data Acquisition Unit

- Turn on the Sequencing Unit
-
Double-click the MinKNOW icon located on the desktop to open the MinKNOW UI.

-
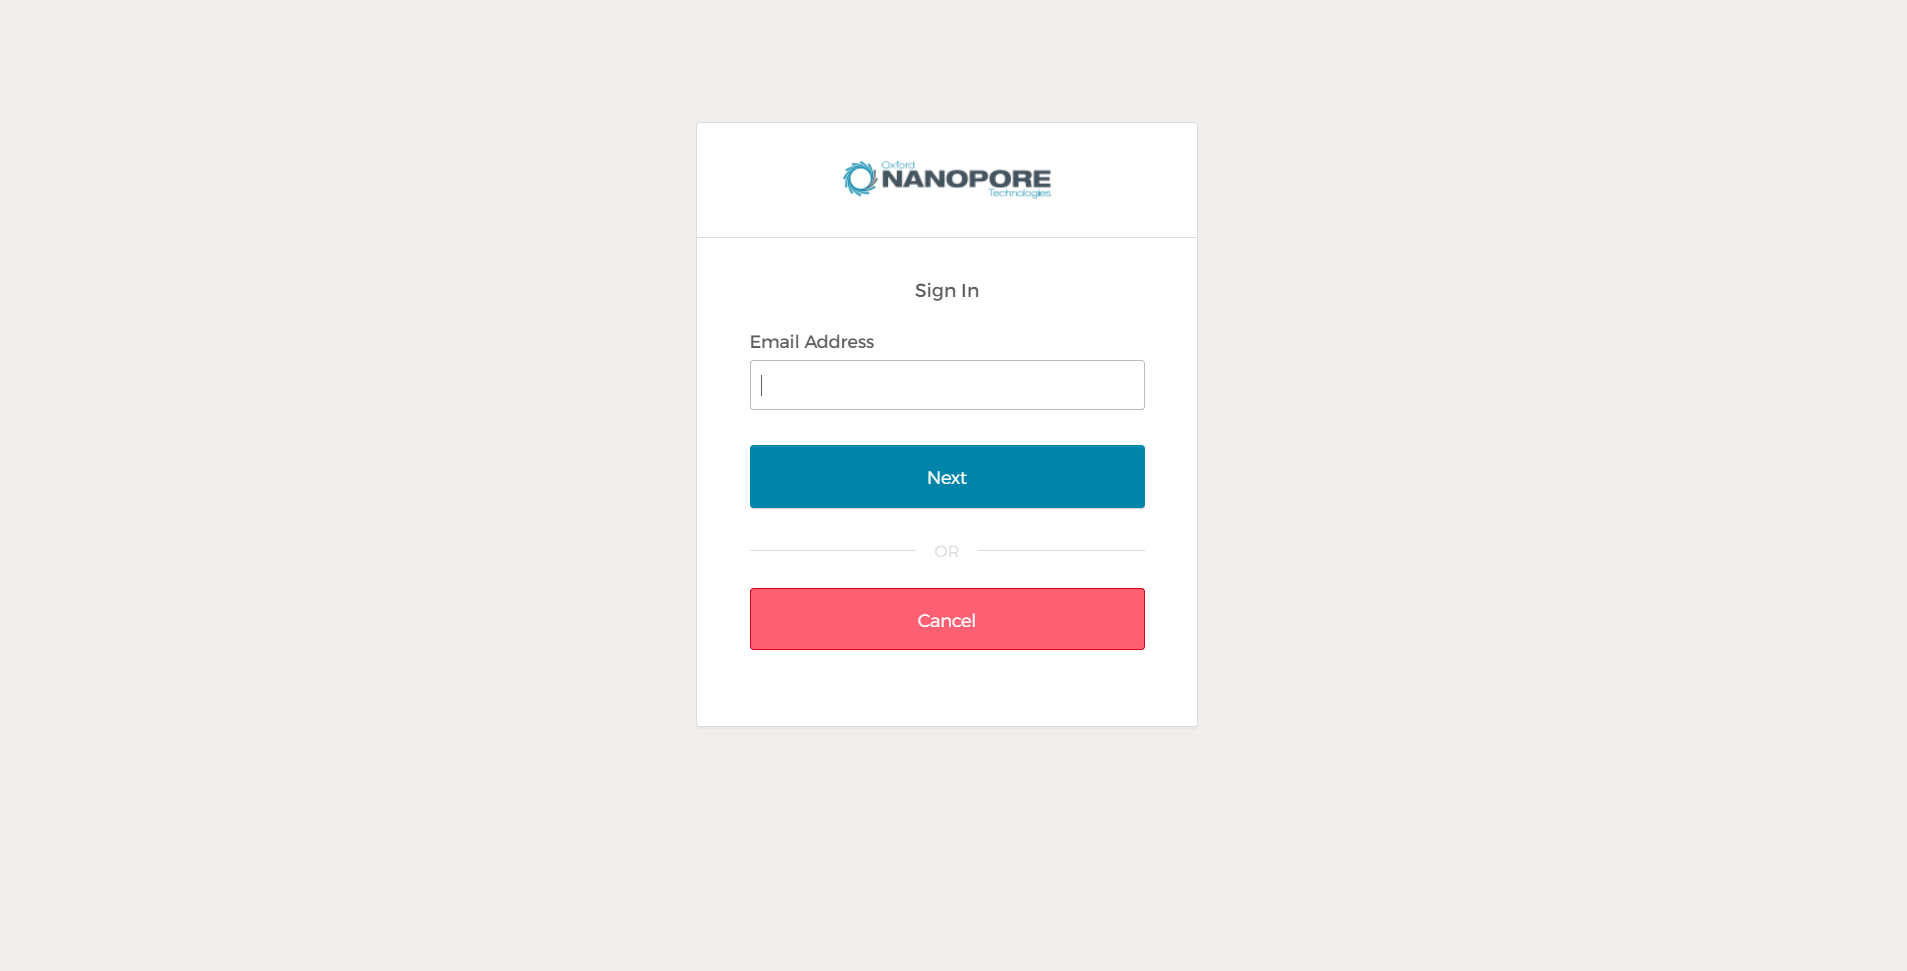
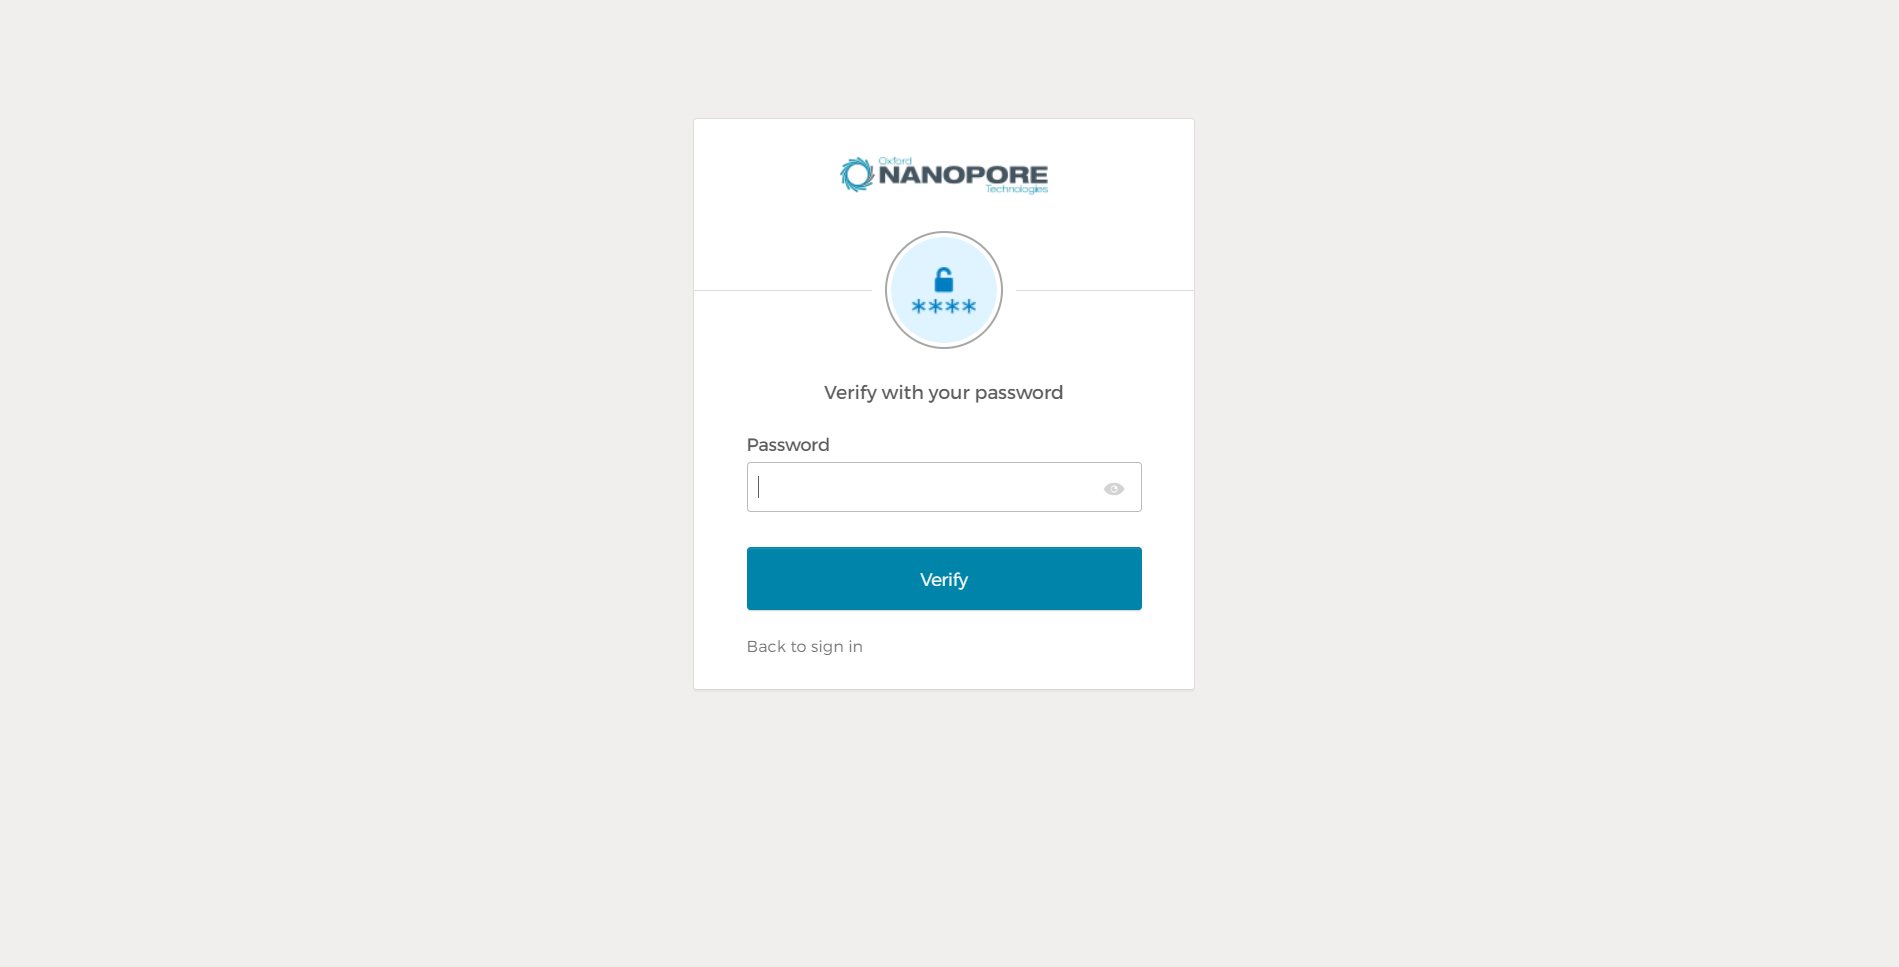
We recommend users to log into the MinKNOW software using their Community credentials.
To log in, you must be connected to the internet.
From here, you can also change the language in the user interface in the bottom right corner.
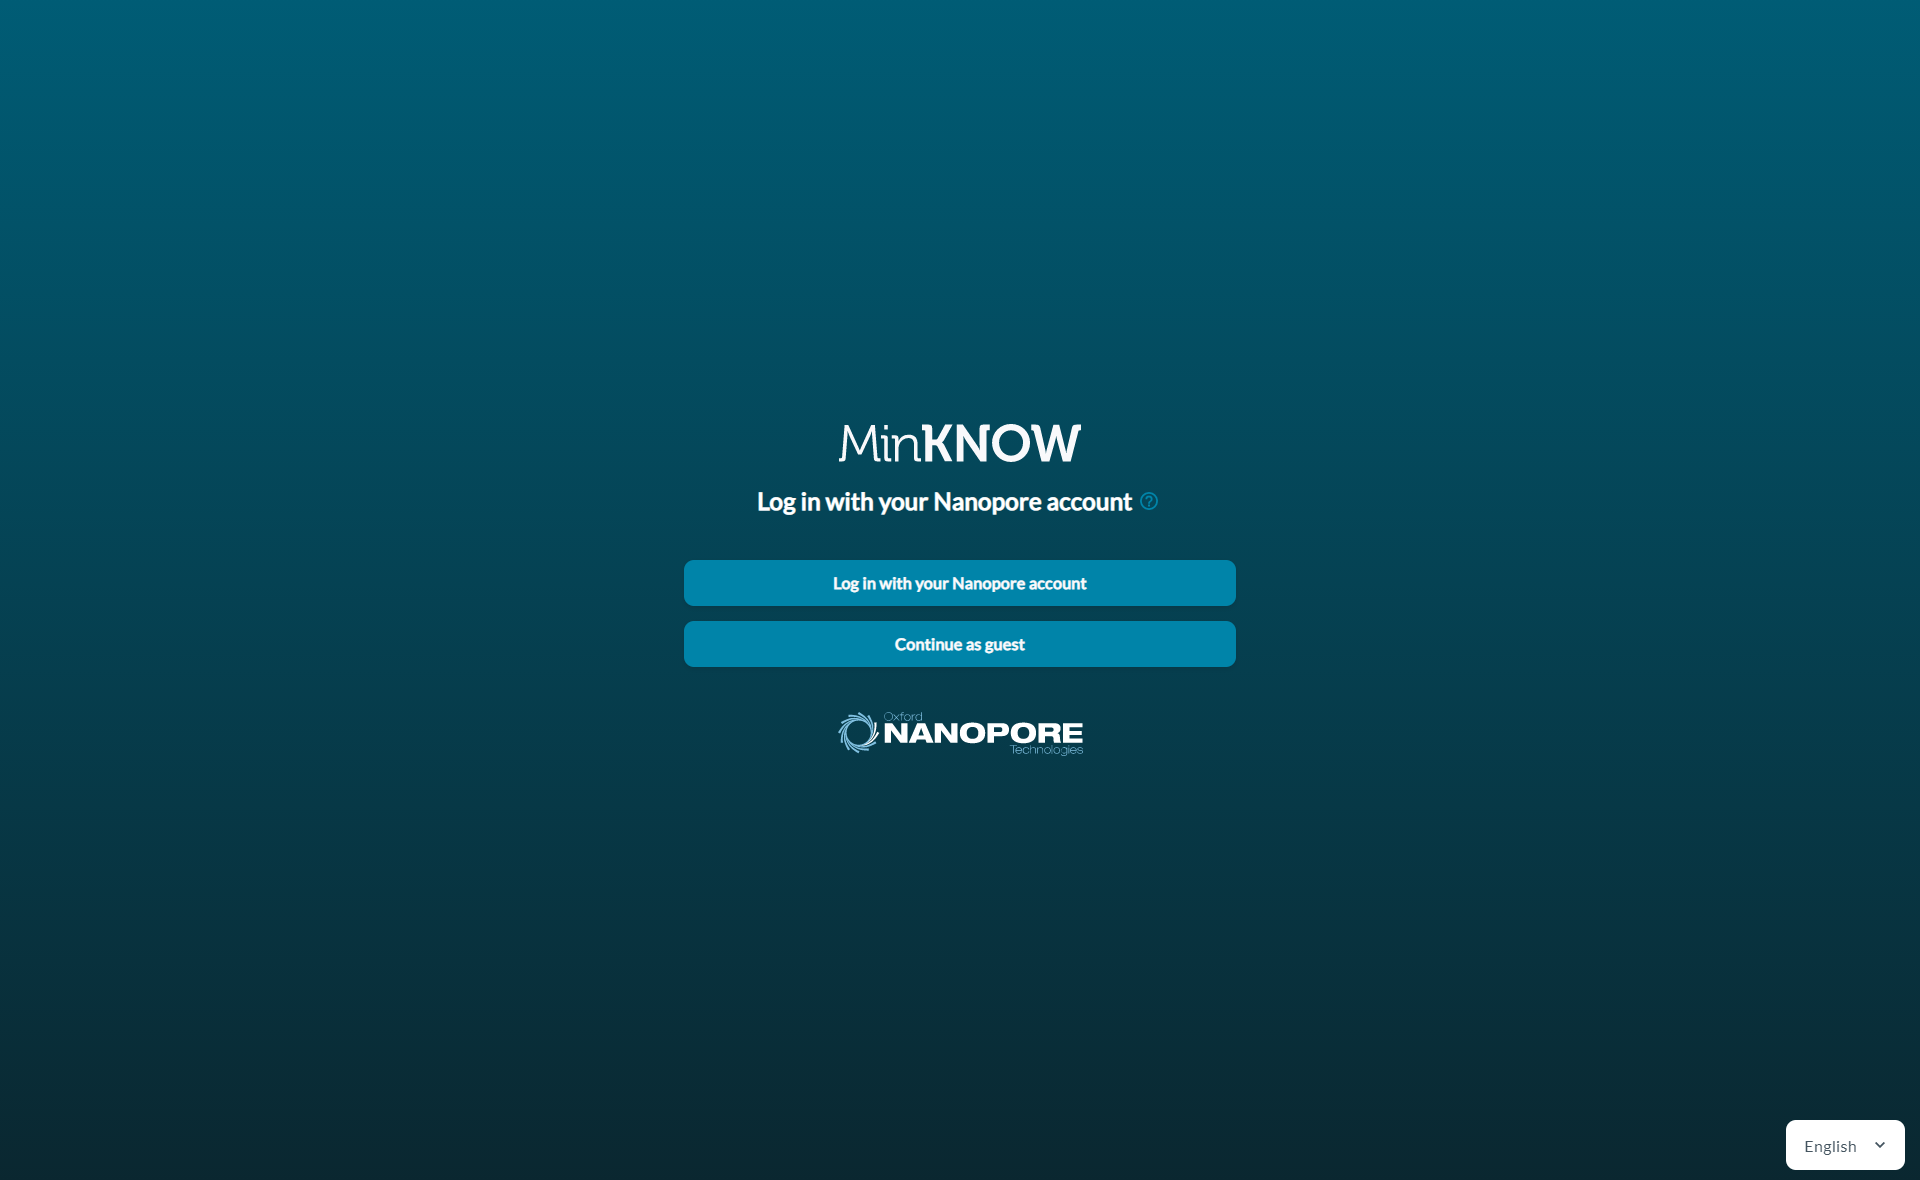
You will be prompted to enter your email address and Nanopore password:
If you experience login issues, please visit the Community Support channel (https://community.nanoporetech.com/support) and use Continue as guest for temporary use.
-
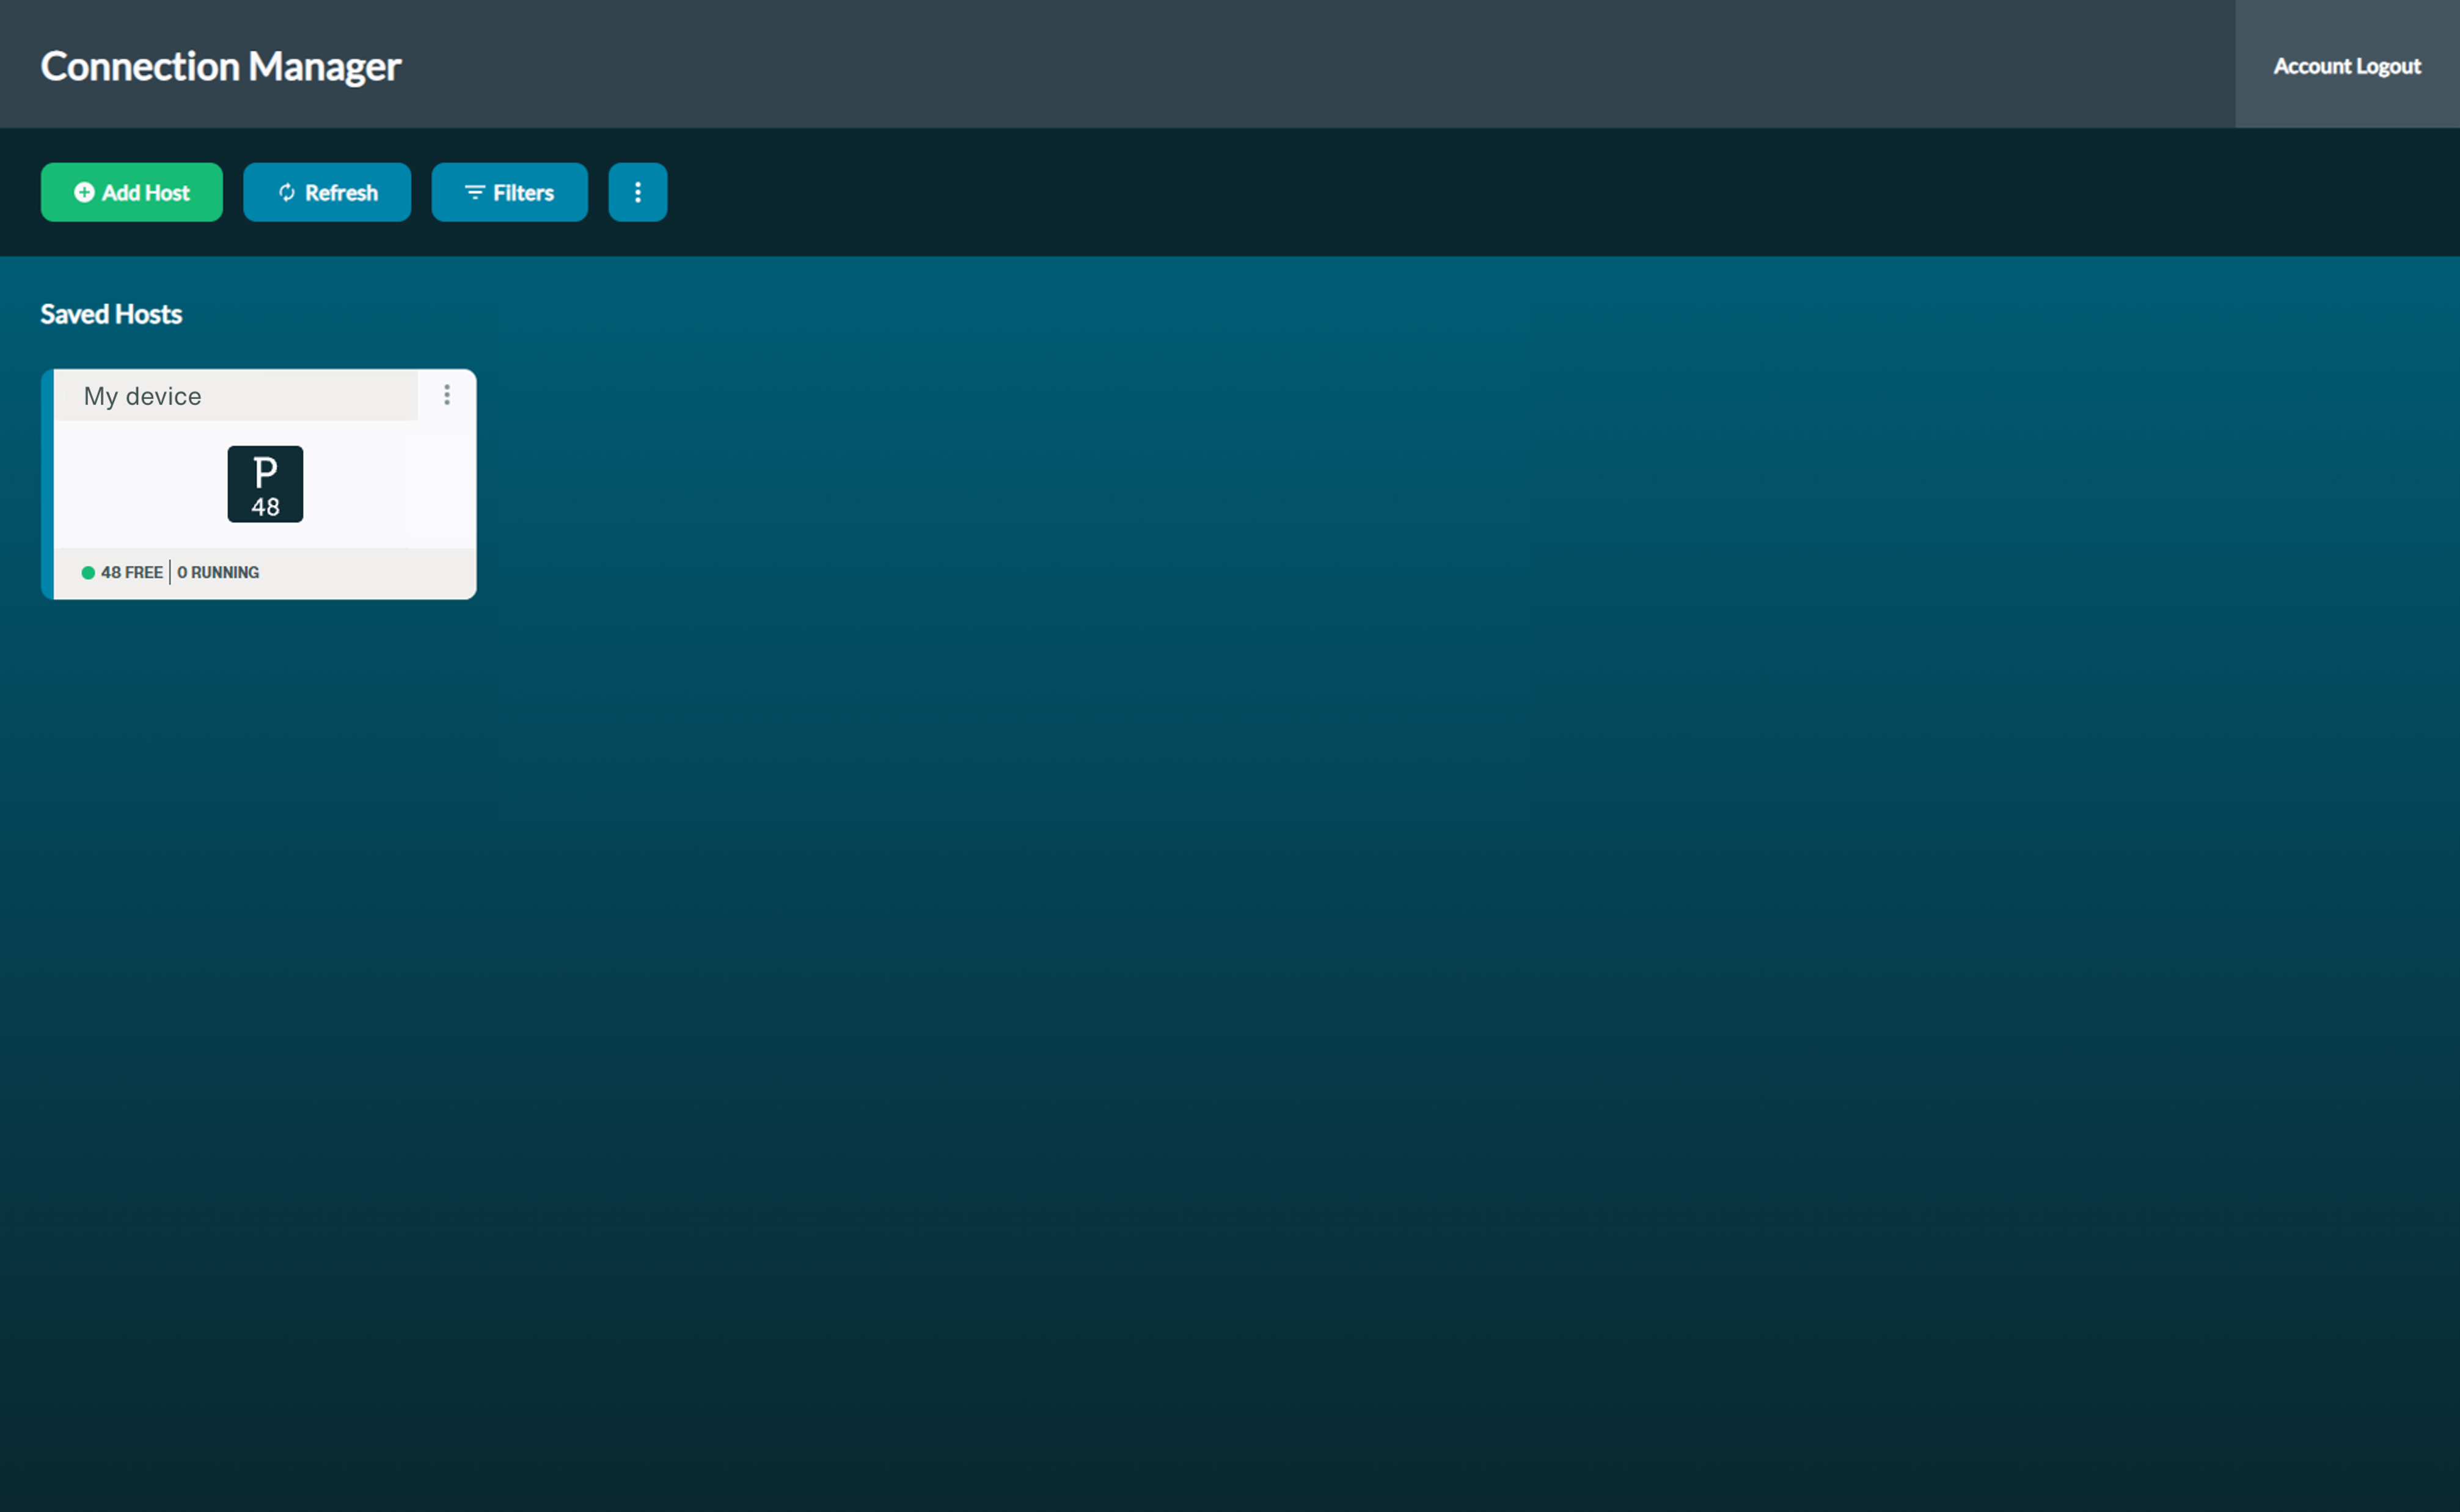
Select the sequencing device in the Connection Manager to connect to the computer.
-
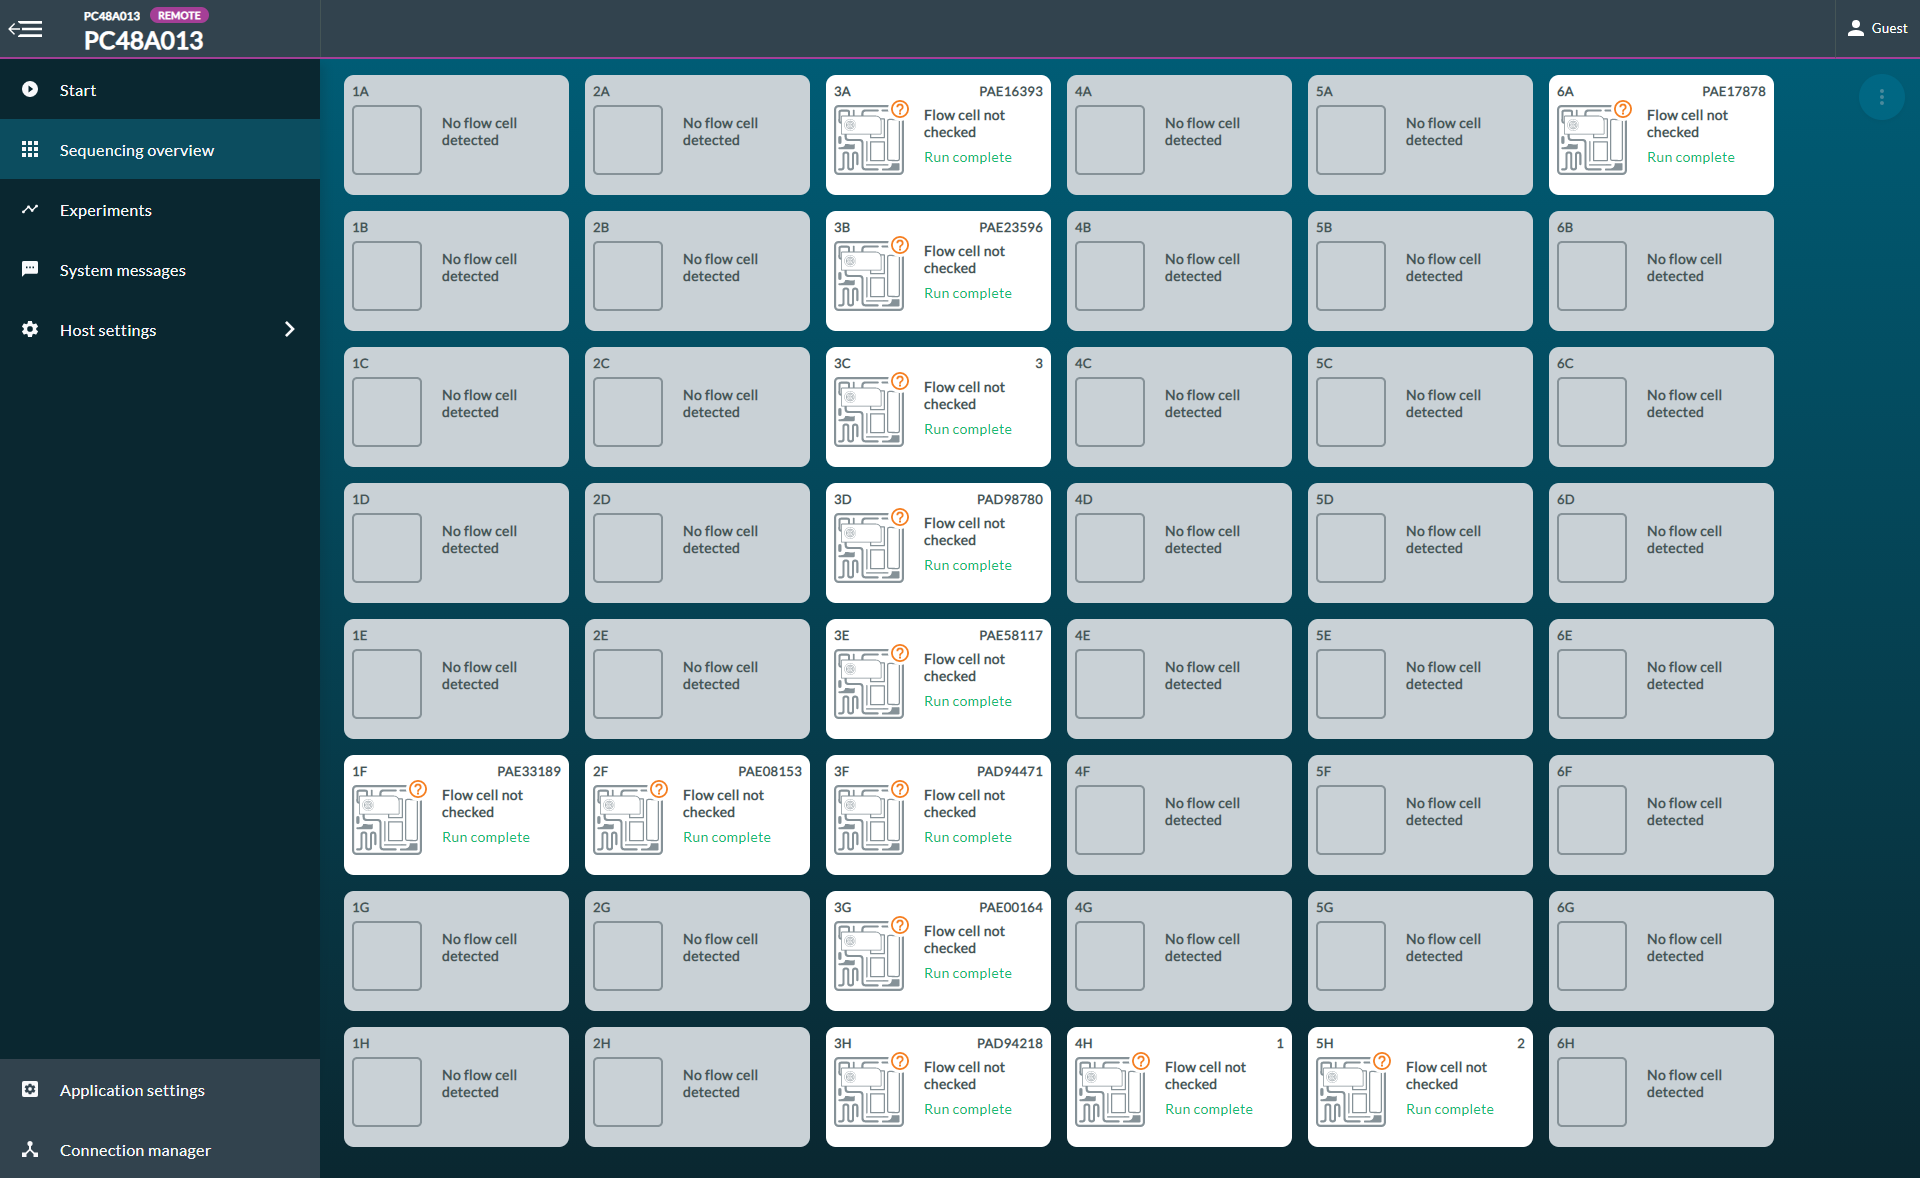
You will be taken to the Sequencing Overview, displaying the connected flow cells.