- Materials
-
- Input RNA in 10 mM Tris-HCl, pH 8.0
- VolTRAX RT-PCR Sequencing Kit 1-12 (VSK-VPS001)
- PCR primers in 10 mM Tris-HCl, pH 8.0
- VolTRAX Cartridge Pack (VCT-V2002B)
- Consumables
-
- 0.2 ml thin-walled PCR tubes
- Qubit dsDNA HS Assay Kit (ThermoFisher, cat # Q32851)
- Equipment
-
- VolTRAX V2b
- P20 pipette and tips
- P10 pipette and tips
- Optional equipment
-
- Qubit fluorometer (or equivalent for QC check)
-
Board test
The Board test should be carried out on your VolTRAX device before proceeding with PCR experiments. The most recent models of the VolTRAX V2b feature improved temperature calibration for PCR, and the Board test checks whether you have a version of the device that is PCR-compatible.
-
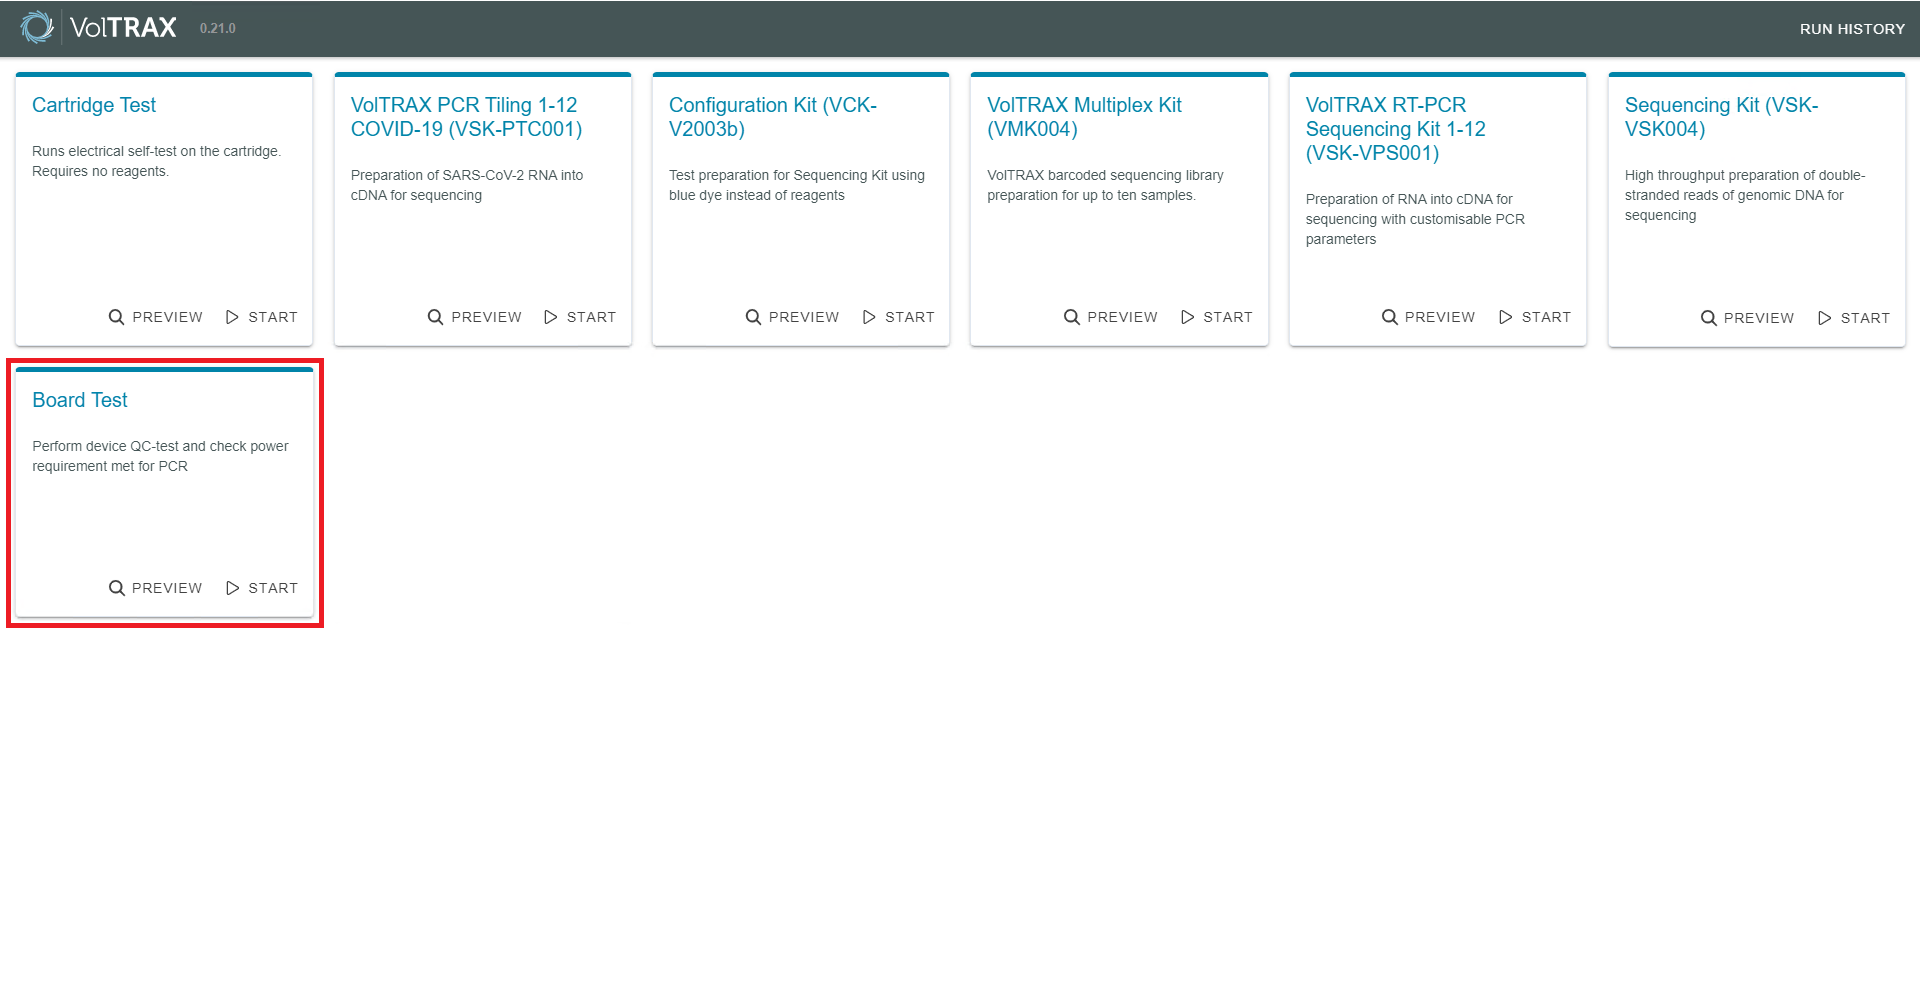
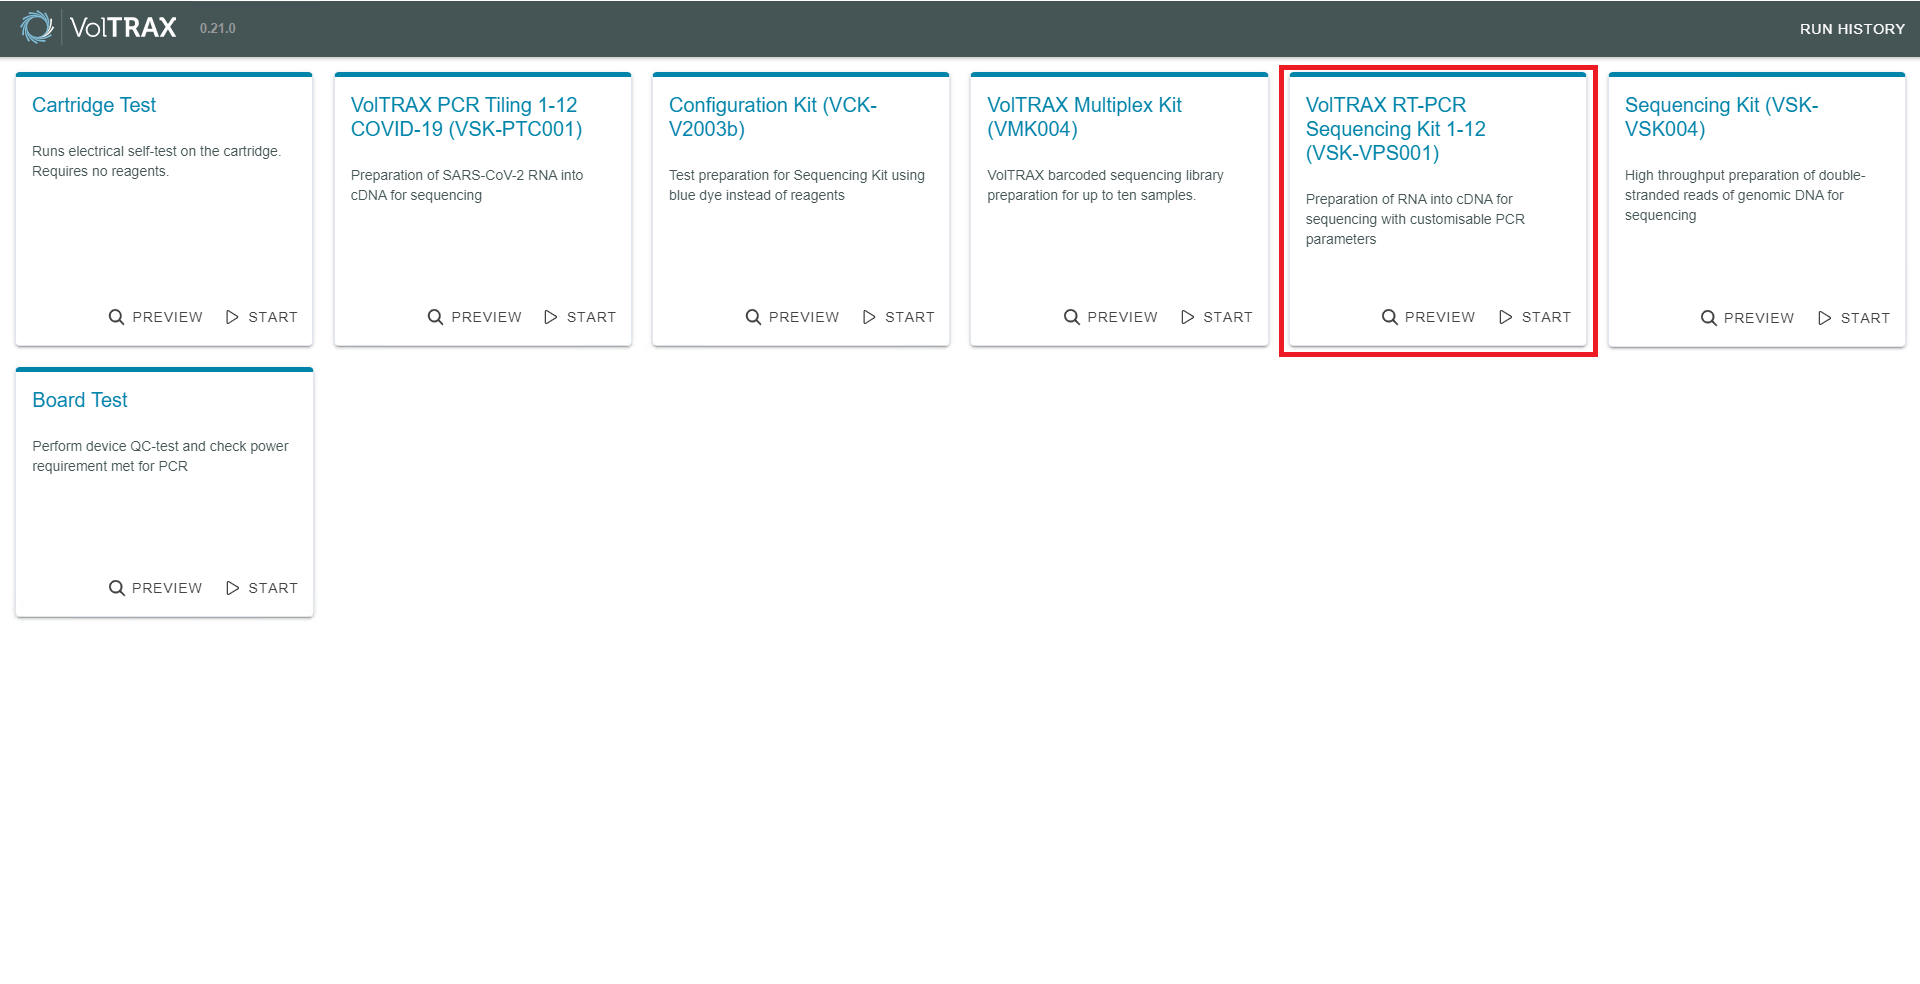
Start the VolTRAX software. You will be presented with the following options for protocols to run. Select "Board Test" to start the protocol and follow the instructions in the software.
-
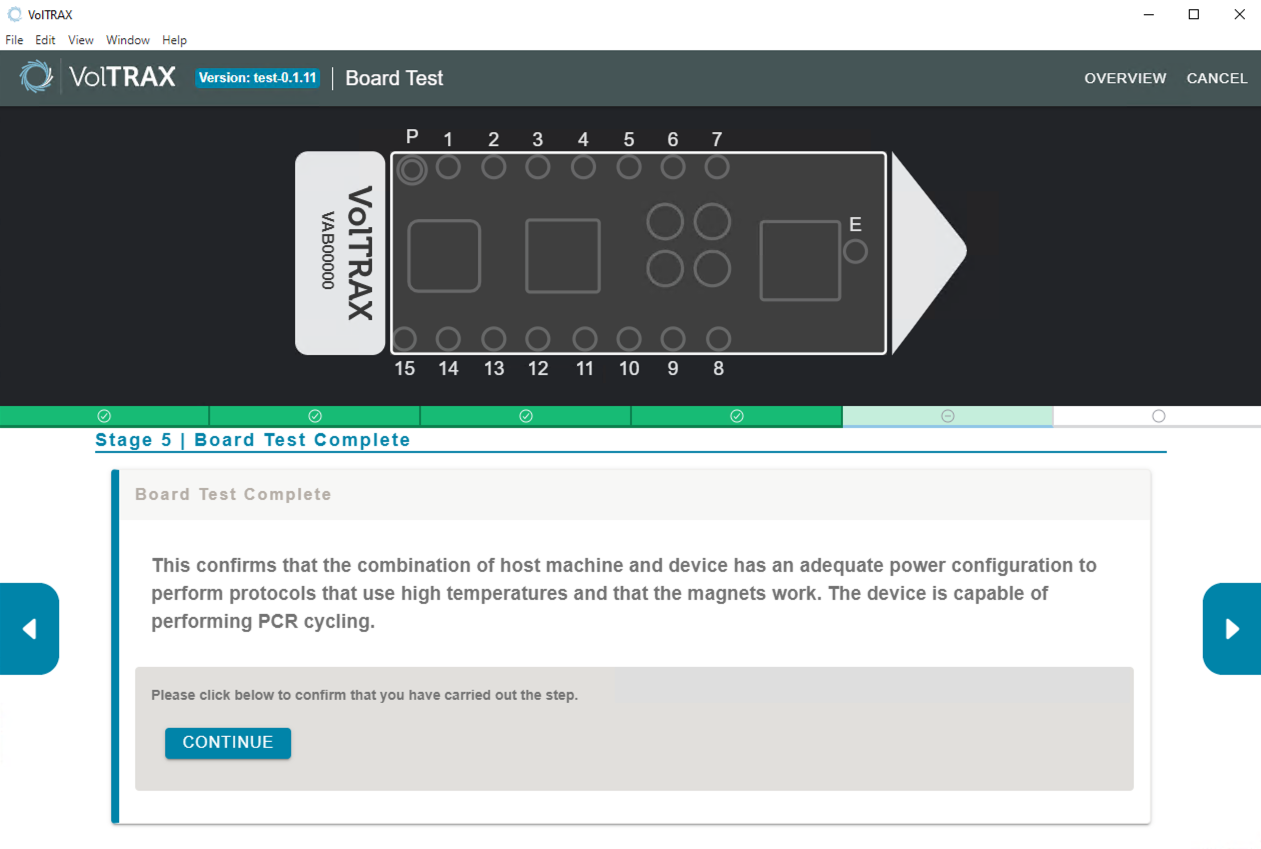
Board test results
If the board test has been successful, you can proceed with PCR experiments.
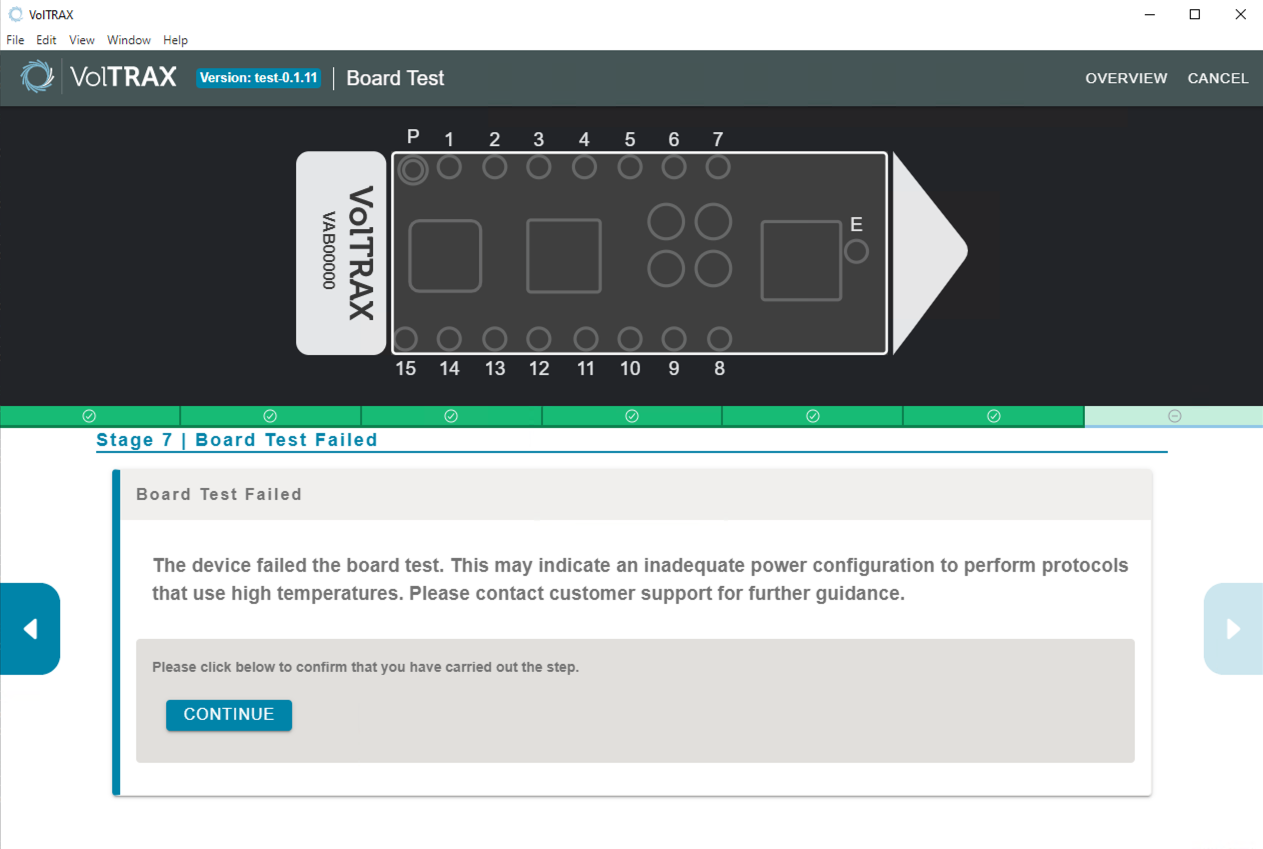
If the board test has failed, please contact Support.
-
Click "Continue", which will take you back to the protocol selection screen. Select "VolTRAX RT-PCR Sequencing Kit" to start the protocol and follow the instructions in the software.
-
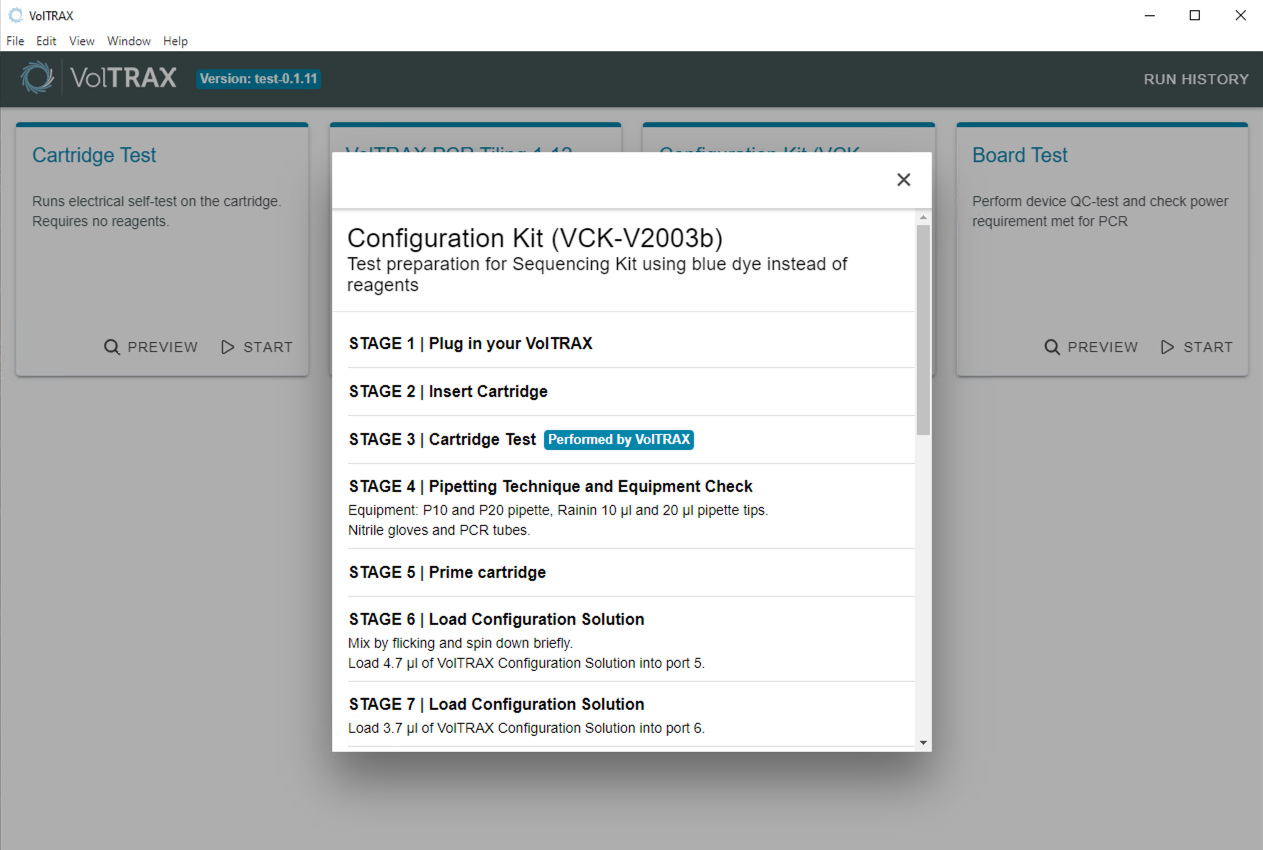
Protocol preview
Once an option is selected from the menu, the UI will show a preview of the steps involved in library preparation. The example below is for the Configuration Kit.
-
When prompted by the UI, connect your VolTRAX device to the computer. When it is connected, you will then be prompted to insert a cartridge into the device.
-
Prime the cartridge as instructed in the UI by twisting the Priming Fluid container anti-clockwise and removing the foil tab to allow the fluid to enter the cartridge.
Select Continue when each step is completed.
-
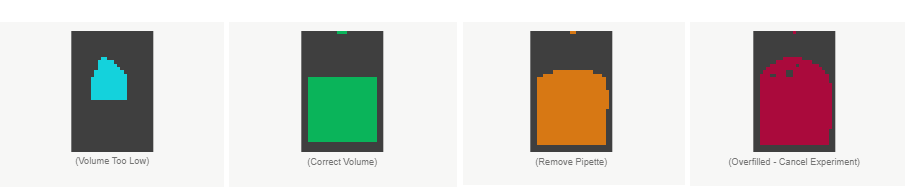
The VolTRAX V2b device can measure solution volumes loaded into the cartridge. The GUI displays a coloured-pixel grid to show:
- Blue: Volume of solution too low. You will need to load more solution to proceed with the protocol.
- Green: Correct volume of solution.
- Orange: slightly overfilled. You will still be able to proceed with the protocol.
- Red: solution overfilled. You will need to cancel the experiment and start again.
-
When loading PCR primers onto the VolTRAX, we recommend loading at 3X the desired reaction concentration.
-
Adjust the PCR parameters
The PCR parameters form is always populated with the default parameters, however you can adjust the times and temperatures if you are using custom primers. This form enables 3-step PCR by default, however the parameters may be modified to allow 2-step PCR as described below.
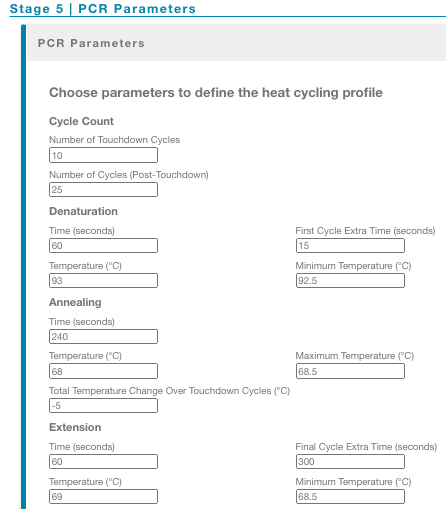
Cycle Count
This section allows you to adjust the number of PCR cycles for your application and incorporate touchdown PCR cycles. Touchdown PCR is an approach that can increase the specificity of a PCR by reducing the amount of off-target priming. The annealing step begins at a temperature several degrees higher than the Tm of the primers. Over the following cycles, the annealing temperature is gradually reduced until it is several degrees below the Tm of the primers.
- Number of Touchdown Cycles: allows control over the number of cycles where touchdown is applied. These cycles are separate from the "Number of Cycles" field below.
- Number of Cycles (Post-Touchdown): total number of PCR cycles to complete after the touchdown PCR cycles.
Total Number of Cycles = Number of Touchdown Cycles + Number of Cycles
Denaturation
- Time (seconds): allows control over the duration of the denaturation step of the PCR.
- First Cycle Extra Time (seconds): this parameter gives you additional control over the initial denaturation step. If required, extend the time for the first denaturation step. If an extended first denaturation step is not required, leave the value at 0.
- Temperature (°C): allows you to set the temperature (°C) for the denaturation step of the PCR.
- Minimum Temperature (°C): this is the temperature at which the countdown for the denaturation step of the cycle will start. It is recommended that this is set to be 0.5°C less than the denaturation temperature.
Annealing
- Time (seconds): allows you to control the duration of the annealing step of the PCR.
- Temperature (°C): allows you to set the temperature (°C) for the annealing step of the PCR. This temperature is the annealing temperature at the start of the touchdown process.
- Maximum Temperature (°C): this is the temperature at which the countdown for the extension step of the cycle will start. It is recommended that this is set to be 0.5°C more than the annealing temperature.
- Total Temperature Change Over Touchdown Cycles (°C): allows to modify the extension temperature over the touchdown PCR cycles (e.g. a value of -5 with 5 touchdown cycles would reduce the annealing temperature of the reaction by 1°C on each touchdown PCR cycle. The subsequent cycles would use the Temperature -5).
Extension:
- Time (seconds): allows you to control the duration of the extension step of the PCR.
- Final Cycle Extra Time (seconds): this parameter gives additional control over the final extension step of the PCR. If required, extend the time for the final extension step. If an extended final extension step is not required, leave the value at 0.
- Temperature (°C): allows you to set the temperature (°C) for the extension steps of the PCR. This temperature is the annealing and extension temperature at the start of the touchdown process.
- Minimum Temperature (°C): this is the temperature at which the countdown for the extension step of the cycle will start. It is recommended that this is set to be 0.5°C less than the extension temperature.To set up 2-step PCR:
Set all Extension step fields to 0. Please note that this will result in no extra time being applied to the final cycle's last step. If extra time is required in the final cycle's last step, make the following adjustments:- Fill in the desired values for the Cycle Count, Denaturation, and Annealing fields (the annealing step in this case is both annealing and extension).
- Set the Extension Time field to 0 (the extension will complete immediately once the minimum temperature is reached).
- Set the Final Cycle Extra Time field to the desired additional time on the final Annealing step.
- Set the Temperature field to the temperature of the final annealing step, taking the touchdown gain into account.
- Set the Minimum Temperature field to 0°C (this will immediately trigger the step timer).
-
Wait for the library prep to finish.
A timer can be found on the right hand side of the UI, indicating the remaining time.
-
At the end of the experiment, extract the prepared library from the E port of the VolTRAX cartridge. Dispense the library into a 0.2 ml PCR tube for preparation of the sequencing mix, as discussed in the following section.
-
Optional actionQuantify 1 µl of eluted sample using a Qubit fluorometer.
-
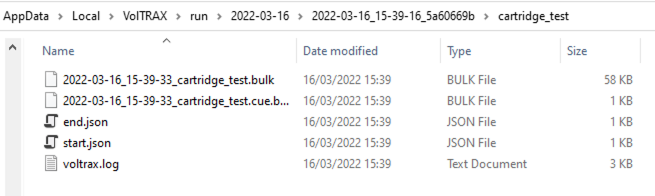
The UI provides a run history option to view previously-run protocols, which can be accessed from the link in the top right corner.
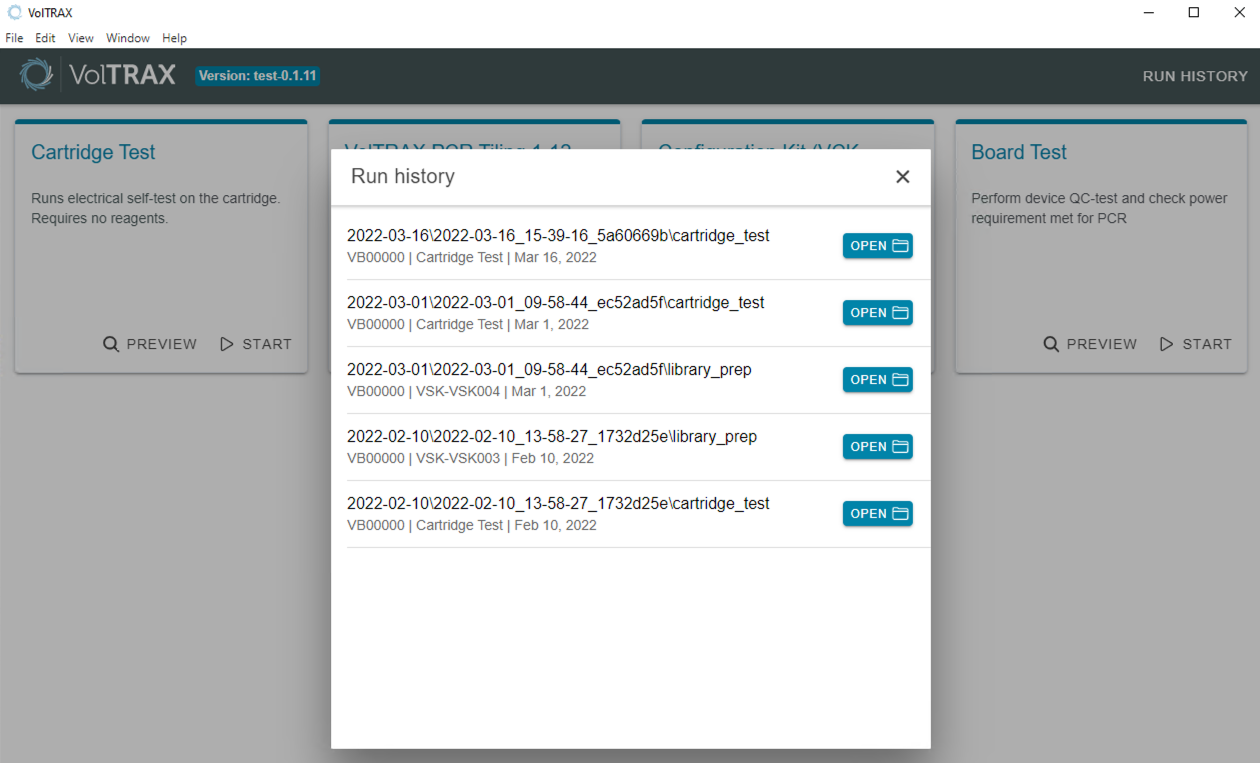
Clicking Open on any of the protocols will navigate the user to the relevant data folder in Windows File Explorer: